

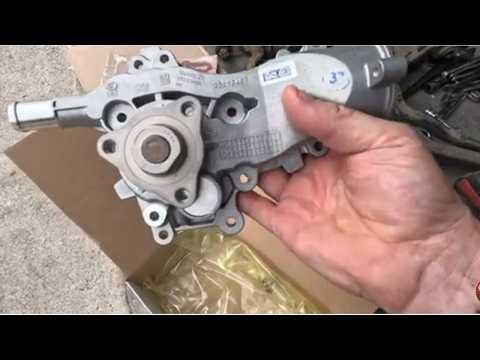







How to Replace the Water Pump on a 2015-2021 Chevrolet Trax 1.4L Turbo (Trim: LT | Engine: Inline 4 1.4L)
Step-by-step DIY guide with required tools, parts, torque specs, and safety tips for 2015, 2016, 2017, 2018, 2019, 2020, 2021
How to Replace the Water Pump on a 2015-2021 Chevrolet Trax 1.4L Turbo (Trim: LT | Engine: Inline 4 1.4L)
Step-by-step DIY guide with required tools, parts, torque specs, and safety tips for 2015, 2016, 2017, 2018, 2019, 2020, 2021


🔧 Trax - Water Pump Replacement
The water pump circulates coolant through your Trax’s turbocharged engine. Replacement requires draining the cooling system, removing the accessory drive belt and pump pulley, supporting the engine, and removing the right-side engine mount for access.
Difficulty Level: Advanced | Estimated Time: 4-6 hours
Assumption: This procedure applies to the stock U.S.-market 1.4L turbo gasoline engine.
⚠️ Safety & Precautions
- ⚠️ Let the engine cool completely before opening the coolant reservoir. Hot coolant can cause severe burns.
- ⚠️ Support the engine before removing the right engine mount. Never rely on a floor jack alone.
- ⚠️ Do not place a jack directly against the aluminum oil pan without a wide wooden block.
- ⚠️ Keep coolant away from children and animals. Collect it in a sealed drain pan.
- ⚠️ Never work beneath the Trax when it is supported only by a floor jack.
- ⚠️ Disconnect the negative battery cable before moving the engine mount.
- ⚠️ Do not allow coolant onto the accessory belt or pulleys.
🔧 Required Tools
You'll need the following tools for this repair:
- Safety glasses
- Nitrile mechanic gloves
- Wheel chocks
- Floor jack rated 2-ton minimum
- Jack stands rated 2-ton minimum
- Wood block approximately 12 x 6 x 1 inches
- Coolant drain pan rated 10-quart minimum
- Fender cover
- 10mm socket
- 13mm socket
- 15mm socket
- 18mm socket
- E10 external Torx socket
- E12 external Torx socket
- 3/8-inch drive ratchet
- 1/2-inch drive breaker bar
- 3-inch socket extension
- 6-inch socket extension
- 3/8-inch drive torque wrench rated 5-80 Nm
- 1/2-inch drive torque wrench rated 20-150 Nm
- Torque-angle gauge
- Serpentine-belt tool with 15mm adapter
- Water-pump pulley holding tool (specialty)
- Hose-clamp pliers
- Plastic gasket scraper
- Plastic trim-clip removal tool
- Small flat-blade screwdriver
- Funnel with spill-free cooling-system adapter
- Plastic bristle cleaning brush
- Shop towels
🔩 Required Parts
HowToo sells all the parts you need for this repair:
- Engine water pump - Qty: 1
- Water-pump sealing gasket - Qty: 1
- Right engine-mount single-use fastener set - Qty: 1
- DEX-COOL-compatible 50/50 premixed coolant - Qty: 2 gallons
- Accessory drive belt - Qty: 1 if worn, cracked, glazed, or coolant-soaked
📋 Before You Begin
- 📋 Park your Trax on level pavement. Select Park, apply the parking brake, and chock both rear wheels.
- 📋 Allow the engine to become completely cold.
- 📋 Record radio presets if desired. No battery registration or programming is required afterward.
- 📋 Open the hood and place a fender cover over the right-front bodywork.
- 📋 Disconnect the negative battery cable with a 10mm socket and position it where it cannot touch the terminal.
- 📋 Raise the right-front corner with a floor jack and support it securely with a jack stand.
🔨 Step-by-Step Instructions
Follow these steps in order:
Step 1: Drain the Cooling System
- Wear safety glasses and gloves. Slowly loosen the coolant-reservoir cap only after the engine is completely cold.
- Position the 10-quart drain pan beneath the lower radiator area.
- Use hose-clamp pliers to release the lower radiator-hose clamp, then carefully work the hose loose. A hose clamp stores spring pressure, so keep your fingers clear of its tabs.
- Allow the coolant to drain fully, then reinstall the hose and return its clamp to the original position with the hose-clamp pliers.
- Twist the hose gently before pulling.
Step 2: Remove the Air-Intake Duct
- Use a small flat-blade screwdriver to release the intake-duct retaining clips.
- Use a 10mm socket where applicable to loosen the duct fastener or clamp.
- Disconnect the breather connection by pressing its locking tabs. Remove the air-intake duct and place it aside.
- Cover the open turbo inlet with a clean shop towel. Do not allow dirt or hardware to enter it.
Step 3: Remove the Right Splash Shield
- Remove the right-front wheel if additional lower access is needed. Use an appropriate wheel-removal socket and breaker bar before lifting, then finish removal while supported by the jack stand.
- Use the plastic trim-clip removal tool and 10mm socket to remove the right-front inner splash-shield retainers.
- Move the shield aside without tearing it.
- When reinstalling the wheel, tighten the wheel nuts evenly in a star pattern to Torque to 140 Nm (103 ft-lbs).
Step 4: Loosen the Water-Pump Pulley Bolts
- Use the water-pump pulley holding tool to keep the pulley from turning.
- Use the correct E10 external Torx socket to loosen the three pulley bolts approximately one turn. Do not remove them yet.
- An external Torx socket fits the star-shaped outside of an E-head bolt.
Step 5: Remove the Accessory Drive Belt
- Photograph or sketch the belt routing before removal.
- Fit the serpentine-belt tool with its 15mm adapter onto the belt tensioner.
- Rotate the tensioner slowly against spring pressure and slide the belt off the water-pump pulley.
- Release the tensioner slowly. Remove the belt and inspect it for cracking, glazing, missing ribs, or coolant contamination.
- Never let the tensioner snap back.
Step 6: Support the Engine
- Place the wide wooden block on the floor-jack saddle.
- Position the block beneath the reinforced portion of the engine oil pan. Raise the jack only until it supports the engine’s weight.
- Do not lift the vehicle by the oil pan. The jack is supporting the engine, not raising your Trax.
Step 7: Remove the Right Engine Mount
- Use an 18mm socket, breaker bar, and extensions to remove the right engine-mount fasteners.
- Use a 15mm or E12 external Torx socket, as fitted, to remove the mount bracket fasteners obstructing the pump.
- Adjust the floor jack only a few millimeters when needed to remove bolt tension. Do not stretch hoses, wiring, or exhaust components.
- Remove the mount and bracket. Keep their positions and orientations organized.
- Discard fasteners identified in the replacement set as single-use. These torque-to-yield bolts stretch during tightening and must not be reused.
Step 8: Remove the Water-Pump Pulley
- Hold the pulley with the water-pump pulley holding tool.
- Use the E10 external Torx socket to remove the three previously loosened bolts.
- Remove the pulley and inspect it for bending, cracks, or belt-groove damage.
Step 9: Remove the Water Pump
- Place the coolant drain pan directly beneath the pump because additional coolant will escape.
- Use the E10 external Torx socket, ratchet, and extensions to remove the water-pump mounting bolts.
- Record the location of every bolt because lengths may differ.
- Pull the pump straight away from the engine. Do not pry against the aluminum sealing surface with a metal screwdriver.
Step 10: Clean the Sealing Surface
- Use the plastic gasket scraper to remove old gasket material from the engine.
- Use a plastic bristle cleaning brush and shop towels to clean the surface.
- Keep debris out of the coolant passages. The sealing surface must be clean, dry, flat, and free of deep scratches.
- Do not use abrasive power tools or add sealant unless the replacement-pump instructions specifically require it.
Step 11: Install the New Water Pump
- Fit the new gasket to the new water pump in its correct locating position.
- Place the pump against the engine without shifting or pinching the gasket.
- Start every mounting bolt by hand. Use the E10 external Torx socket only after all bolts turn freely.
- Tighten the bolts gradually in a crossing pattern.
- Torque the water-pump mounting bolts to 8 Nm (71 in-lbs).
- Do not overtighten these small bolts; the engine’s aluminum threads can be damaged.
Step 12: Install the Water-Pump Pulley
- Position the pulley on the new pump and start all three bolts by hand.
- Use the water-pump pulley holding tool and E10 external Torx socket.
- Tighten the bolts evenly rather than fully tightening one bolt at a time.
- Torque the water-pump pulley bolts to 8 Nm (71 in-lbs).
Step 13: Reinstall the Engine Mount
- Use the floor jack and wooden block to align the engine naturally with the mount. Never pull the engine into position by tightening the bolts.
- Install the mount and bracket with the new single-use fasteners. Start every fastener by hand using the appropriate 15mm, 18mm, or E12 socket.
- Tighten fasteners only after the mount is sitting flat and free of tension.
- Use the torque wrenches and torque-angle gauge to tighten the new fasteners to the instructions supplied for their exact mounting positions. GM uses multiple fastener types here, and their torque-angle values must not be interchanged.
- Remove the floor jack and wooden block only after every mount fastener is fully tightened.
Step 14: Install the Accessory Drive Belt
- Route the belt around each pulley according to the photograph or routing label. Leave it off one easy-to-reach smooth pulley until last.
- Use the serpentine-belt tool with 15mm adapter to rotate the tensioner.
- Slide the belt over the final pulley and release the tensioner slowly.
- Use a flashlight to confirm every belt rib is centered in every grooved pulley.
Step 15: Reassemble the Intake and Splash Shield
- Remove the shop towel from the turbo inlet.
- Reinstall the air-intake duct using the small flat-blade screwdriver and 10mm socket. Reconnect the breather fitting until it clicks.
- Reinstall the splash shield using the trim-clip removal tool and 10mm socket.
- If removed, reinstall the wheel and tighten its nuts in a star pattern to Torque to 140 Nm (103 ft-lbs).
- Lower your Trax safely and remove the wheel chocks only after filling and testing are complete.
Step 16: Refill and Bleed the Cooling System
- Reconnect the negative battery cable using the 10mm socket. Torque to 5 Nm (44 in-lbs).
- Install the spill-free funnel on the coolant reservoir.
- Add DEX-COOL-compatible 50/50 premixed coolant slowly until the level stabilizes at the cold-fill mark.
- Set the cabin heater to full warm. Start the engine and let it idle while watching the coolant level and temperature warning display.
- Add coolant as trapped air escapes. Gently squeeze the upper radiator hose with gloved hands only while it remains safe to touch.
- Once the cooling fan has cycled and cabin heat is steady, switch off the engine and allow it to cool completely.
- Remove the funnel, correct the cold coolant level, and install the reservoir cap securely.
✅ After Repair
- ✅ Inspect the pump, radiator hose, reservoir, and surrounding area for coolant leakage while the engine idles.
- ✅ Watch the temperature display. Shut the engine off immediately if it overheats, the heater turns suddenly cold, or coolant begins surging from the reservoir.
- ✅ Confirm the accessory belt runs straight and quietly without wandering.
- ✅ After a short test drive, let the engine cool completely and recheck the coolant at the cold-fill mark.
- ✅ Recheck for dried orange or white coolant residue over the next several drives.
- ✅ Dispose of used coolant through an authorized automotive-fluid recycling facility. Never pour it onto the ground or into a drain.
💰 DIY vs Shop Cost
Shop Cost: ₹28,000-₹55,000 (parts + labor)
DIY Cost: ₹8,000-₹18,000 (parts only)
You Save: ₹20,000-₹37,000 by doing it yourself!
Local labor and imported-part pricing vary. This repair takes a shop approximately 3.5-5 hours.
🎯 Ready to get started?
HowToo makes it easy: same-day/2-day shipping on every part, plus all the tools and specialty tools you need! Check out the parts and tools sections below to add everything to your cart.