

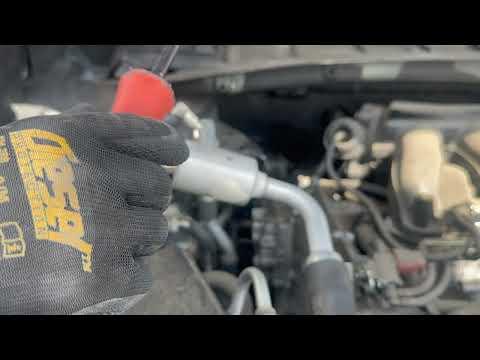






How to Replace the Water Pump on a 2015-2020 Nissan Murano 3.5L V6 (Engine: V6 3.5L)
Advanced step-by-step guide with tools, parts, torque specs, timing-chain precautions, and safety tips for 2015, 2016, 2017, 2018, 2019, 2020
How to Replace the Water Pump on a 2015-2020 Nissan Murano 3.5L V6 (Engine: V6 3.5L)
Advanced step-by-step guide with tools, parts, torque specs, timing-chain precautions, and safety tips for 2015, 2016, 2017, 2018, 2019, 2020


🔧 Murano - Water Pump Replacement
Your Murano’s water pump is mounted behind the front timing cover and driven by the timing chain. The engine does not need to come out, but the timing-chain tensioner must be secured correctly; a mistake can let the chain jump and cause major engine damage.
Difficulty Level: Advanced | Estimated Time: 5-8 hours
Assumption: This procedure applies to the original 3.5L V6 configuration. Because drivetrain information is unavailable, underbody access may differ slightly.
⚠️ Safety & Precautions
- ⚠️ Work only on a completely cold engine. Hot pressurized coolant can cause severe burns.
- ⚠️ Support your Murano with jack stands. Never work beneath a vehicle supported only by a floor jack.
- ⚠️ Disconnect the negative battery terminal before working near the accessory belt and starter wiring.
- ⚠️ Do not rotate the crankshaft with the timing-chain tensioner removed unless the specified chain-control procedure is being followed.
- ⚠️ Do not allow the timing chain to disengage from either camshaft sprocket. Incorrect valve timing can damage the engine.
- ⚠️ Never rotate the crankshaft using a camshaft sprocket or the water-pump sprocket.
- ⚠️ Coolant is poisonous. Keep it away from children and animals, and collect every spill immediately.
- ⚠️ If the chain slips, the tensioner cannot be securely pinned, or timing marks no longer align, stop and have the engine timing checked professionally.
🔧 Required Tools
You'll need the following tools for this repair:
- Hydraulic floor jack rated 2-ton minimum
- Jack stands rated 2-ton minimum
- Wheel chocks
- 10mm socket
- 12mm socket
- 14mm socket
- 19mm socket
- 3/8-inch-drive ratchet
- 1/2-inch-drive breaker bar
- 3/8-inch-drive 3-inch extension
- 3/8-inch-drive 6-inch extension
- 3/8-inch-drive torque wrench rated 5-50 Nm
- 1/2-inch-drive torque wrench rated 40-200 Nm
- Serpentine-belt tensioner tool (specialty)
- Hose-clamp pliers
- Plastic trim-clip removal tool
- Plastic gasket scraper
- 90-degree pick
- 1.5mm hardened steel tensioner pin
- M8 x 1.25 extraction bolts, 50mm long
- Cooling-system vacuum refill tool (specialty)
- Cooling-system pressure tester (specialty)
- Air compressor rated 90 psi minimum
- Coolant drain pan with 12-litre capacity
- Clean filling funnel
- Paint marker
- Inspection mirror
- LED work light
- Shop towels
- Nitrile gloves
- Safety glasses
🔩 Required Parts
HowToo sells all the parts you need for this repair:
- Engine water pump assembly - Qty: 1
- Water-pump O-ring seal set - Qty: 1
- Timing-chain tensioner cover seal - Qty: 1
- Water-pump access cover seal - Qty: 1
- Nissan-compatible RTV liquid gasket - Qty: 1 tube
- Nissan-compatible blue 50/50 premixed coolant - Qty: 10 litres
- Accessory drive belt - Qty: 1 if worn or coolant-contaminated
📋 Before You Begin
- 📋 Park your Murano on firm, level ground. Select Park, apply the parking brake, and let the engine cool completely.
- 📋 Place wheel chocks behind both rear tyres before raising the front.
- 📋 Photograph the accessory-belt routing and every bracket before removal.
- 📋 The timing-chain tensioner uses spring and oil pressure to keep the chain tight. The steel tensioner pin locks its plunger in the compressed position.
- 📋 Have all seals and refill equipment ready before opening the timing-chain access covers.
- 📋 This repair does not require an infotainment menu or scan-tool service command.
🔨 Step-by-Step Instructions
Follow these steps in order:
Step 1: Disconnect the battery
- Use the 10mm socket and ratchet to loosen the negative battery-terminal clamp.
- Lift the clamp from the terminal and position it where it cannot spring back into contact.
Step 2: Raise and support the front
- Use the hydraulic floor jack at the front-center lifting point.
- Place both jack stands beneath the reinforced front side support points, then lower your Murano onto them.
- Push the vehicle gently by hand to confirm it is stable.
Step 3: Drain the cooling system
- Use the plastic trim-clip removal tool and 10mm socket to remove the lower engine cover.
- Place the 12-litre drain pan beneath the radiator drain fitting.
- Remove the coolant reservoir cap by hand, then open the radiator drain fitting by hand.
- Allow the coolant to drain fully, then close the plastic fitting by hand until snug. Do not tighten it with pliers.
Step 4: Remove access components
- Use the hose-clamp pliers to release any intake-duct clamps obstructing access, then move the duct aside.
- Use the 10mm and 12mm sockets with the ratchet and extensions to remove obstructing brackets.
- Use the paint marker to identify bracket positions and fastener locations.
- Keep each group of fasteners separated because their lengths may differ.
Step 5: Remove the accessory drive belt
- Confirm the belt-routing photograph is clear before removal.
- Fit the 14mm socket and serpentine-belt tensioner tool to the automatic tensioner.
- Rotate the tensioner slowly to remove belt tension, then slip the belt from one pulley.
- Release the tensioner slowly and remove the belt by hand.
- Replace the belt if it is cracked, glazed, frayed, swollen, or contaminated by coolant.
Step 6: Position the engine for chain control
- Install the 19mm socket and breaker bar on the crankshaft pulley bolt.
- Rotate the crankshaft clockwise only, viewed from the pulley end, until the timing-chain tensioner plunger is in a position where it can be compressed and pinned.
- Use the LED work light and inspection mirror to watch the tensioner through its access opening once the cover is removed.
- Do not use the starter motor for positioning.
Step 7: Remove the timing-chain tensioner access cover
- Use the 10mm socket, extension, and ratchet to remove the tensioner access-cover bolts.
- Tap the cover gently by hand and remove it without inserting a metal tool between the sealing faces.
- Use the plastic gasket scraper and shop towels to clean the cover and timing-cover sealing surfaces.
- Prevent all old sealant from falling inside the timing cover.
Step 8: Compress and pin the chain tensioner
- Use the 19mm socket and breaker bar to turn the crankshaft slowly clockwise while watching the tensioner plunger.
- When the plunger is fully compressed and its locking holes align, insert the 1.5mm hardened steel tensioner pin completely through the aligned holes.
- Turn the crankshaft only enough to create slight chain slack at the water-pump sprocket.
- Use the paint marker to place matching reference marks on the chain and visible sprocket area.
- Verify that the pin is fully engaged before proceeding.
- Stop if the pin bends or slips.
Step 9: Remove the water-pump access cover
- Use the 10mm socket, extension, and ratchet to remove the water-pump access-cover bolts.
- Remove the cover carefully by hand.
- Use the plastic gasket scraper and shop towels to clean both sealing surfaces without dropping debris inside.
Step 10: Remove the water pump
- Use the 10mm socket and ratchet to remove the water-pump retaining bolts.
- Thread the two M8 x 1.25 extraction bolts evenly into the pump’s threaded extraction holes by hand.
- Use the 12mm socket and ratchet to turn each extraction bolt one turn at a time, alternating between them until the pump releases from its O-rings.
- Do not drive a screwdriver between the pump and timing cover.
- Support the timing chain through the access opening while withdrawing the pump so the chain remains engaged with its guides and sprockets.
- Remove the pump and old O-rings. Expect additional coolant to drain into the pan.
Step 11: Inspect the pump cavity and chain
- Use the LED work light and inspection mirror to check that the timing chain remains seated on its guides.
- Use shop towels and the plastic gasket scraper to clean the water-pump bore and O-ring surfaces.
- Do not scratch the aluminium bore or allow dirt to enter the timing-chain area.
- Compare the old and new pumps by hand. Confirm that the sprocket, bolt locations, and seal grooves match.
Step 12: Install the new water pump
- Install the new water-pump O-rings in their correct grooves by hand.
- Wet the O-rings lightly with fresh Nissan-compatible blue coolant. Do not apply RTV to the O-rings.
- Guide the new pump into the timing chain while keeping the chain properly seated on the pump sprocket.
- Press the pump squarely into its bore by hand. Never pull it into place with the bolts if the O-rings are binding.
- Start all retaining bolts by hand.
- Use the 10mm socket and torque wrench to tighten the water-pump bolts evenly to 9.8 Nm (87 in-lbs).
Step 13: Restore chain tension
- Use the 19mm socket and breaker bar to turn the crankshaft slowly clockwise until pressure is removed from the tensioner pin.
- Pull the 1.5mm tensioner pin out by hand.
- Continue rotating the crankshaft clockwise through two complete crankshaft revolutions.
- Stop immediately if the crankshaft binds or reaches a hard stop. Do not force it.
- Use the inspection mirror and LED work light to confirm the chain remains seated and the tensioner extends normally.
Step 14: Seal and install the access covers
- Use the plastic gasket scraper and shop towels to make both access-cover sealing surfaces clean and dry.
- Apply a continuous 2-3mm bead of Nissan-compatible RTV liquid gasket to each cover’s specified sealing path.
- Install each cover within five minutes of applying the sealant.
- Start the cover bolts by hand, then use the 10mm socket and torque wrench to tighten them evenly to 9.8 Nm (87 in-lbs).
- Follow the RTV manufacturer’s stated curing time before adding coolant.
Step 15: Reinstall the accessory belt and brackets
- Use the 10mm and 12mm sockets with the ratchet to reinstall all removed brackets in their marked positions.
- Route the accessory belt according to the photograph, leaving one smooth pulley until last.
- Use the 14mm socket and serpentine-belt tensioner tool to rotate the tensioner, slip the belt over the final pulley, and release the tensioner slowly.
- Check by hand that every belt rib is fully seated in every grooved pulley.
Step 16: Vacuum-fill the cooling system
- After the RTV curing period, connect the cooling-system vacuum refill tool to the reservoir.
- Connect the air compressor and draw the cooling system into a vacuum.
- Close the tool valve and verify that the vacuum remains steady. A falling reading indicates a leak.
- Place the suction hose in fresh Nissan-compatible blue 50/50 premixed coolant, then open the fill valve.
- Remove the tool and use the clean filling funnel to set the reservoir at the cold maximum line.
Step 17: Pressure-test before starting
- Install the cooling-system pressure tester on the reservoir.
- Pump the tester only to the pressure printed on the reservoir cap; do not exceed that rating.
- Use the LED work light and inspection mirror to check the water-pump area, access covers, hoses, and radiator drain for leakage.
- Release tester pressure according to its instructions, then remove the tester.
Step 18: Reconnect the battery and test
- Use the 10mm socket and ratchet to reconnect the negative battery-terminal clamp securely.
- Confirm all tools are clear of the belt and electric cooling fans.
- Start the engine and listen for chain rattling, scraping, or knocking. Shut it off immediately if any abnormal mechanical noise occurs.
- Set the cabin heater to maximum heat and the blower to low speed.
- Watch the temperature gauge while inspecting for coolant or oil leakage.
Step 19: Reinstall the lower cover
- After confirming there are no leaks, use the 10mm socket, ratchet, and plastic trim-clip removal tool to reinstall the lower engine cover.
- Use the floor jack to raise your Murano slightly, remove the jack stands, and lower the vehicle.
- Remove the wheel chocks.
✅ After Repair
- ✅ Allow the engine to cool completely, then use the clean filling funnel to adjust the reservoir to the cold maximum line.
- ✅ Confirm the heater produces steady heat and the temperature gauge remains at its normal position.
- ✅ Check for coolant around the timing-cover openings and underneath your Murano after a 15-20 minute drive.
- ✅ Recheck the coolant level after two complete warm-up and cool-down cycles.
- ✅ Investigate any chain rattle, overheating, coolant loss, or milky engine oil immediately.
- ✅ Battery registration and scan-tool coding are not required.
- ✅ Take used coolant to an authorised automotive-fluid recycler in the Sonīpat area. Never pour it onto the ground or into a drain.
💰 DIY vs Shop Cost
Shop Cost: ₹35,000-₹75,000 (parts + labour)
DIY Cost: ₹8,000-₹20,000 (parts only)
You Save: ₹27,000-₹55,000 by doing it yourself!
Sonīpat labour rates vary by workshop. This repair takes a shop approximately 5-7 hours.
🎯 Ready to get started?
HowToo makes it easy: same-day/2-day shipping on every part, plus all the tools and specialty tools you need! Check out the parts and tools sections below to add everything to your cart.