

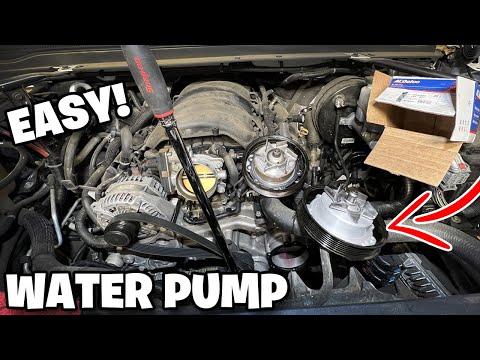






How to Replace the Water Pump on a 2015-2020 Chevrolet Tahoe 5.3L V8 (Trim: LT | Engine: V8 5.3L)
Step-by-step instructions with tools, parts, torque specs, coolant bleeding, and safety tips for 2015, 2016, 2017, 2018, 2019, 2020
How to Replace the Water Pump on a 2015-2020 Chevrolet Tahoe 5.3L V8 (Trim: LT | Engine: V8 5.3L)
Step-by-step instructions with tools, parts, torque specs, coolant bleeding, and safety tips for 2015, 2016, 2017, 2018, 2019, 2020


🔧 Tahoe - Water Pump Replacement
The water pump circulates coolant through your Tahoe’s 5.3L V8. Replacement requires draining the cooling system, removing the drive belt and water-pump pulley, then installing the new pump with fresh gaskets.
Difficulty Level: Intermediate | Estimated Time: 3-5 hours
Assumption: These instructions apply to the stock 5.3L V8 cooling system.
⚠️ Safety & Precautions
- ⚠️ Let the engine become completely cold before opening the coolant reservoir. Hot coolant can cause severe burns.
- ⚠️ Disconnect the negative battery cable because the electric cooling fans can start unexpectedly.
- ⚠️ Coolant is poisonous. Keep it away from children and animals, and clean spills immediately.
- ⚠️ Never work beneath a vehicle supported only by a floor jack.
- ⚠️ Do not allow coolant to contact the drive belt or pulley surfaces.
- ⚠️ Collect used coolant in a sealed container and take it to an approved recycling facility.
🔧 Required Tools
You'll need the following tools for this repair:
- 10mm socket
- 15mm socket
- 3/8-inch drive ratchet
- 1/2-inch drive breaker bar
- 3/8-inch drive extensions
- 3/8-inch drive torque wrench rated 10-80 Nm
- Flat-blade screwdriver
- Hose-clamp pliers (specialty)
- Plastic gasket scraper
- Plastic trim removal tool
- Coolant drain pan rated 16-quart minimum
- Coolant funnel with GM surge-tank adapter (specialty)
- Shop towels
- Nitrile gloves
- Safety glasses
🔩 Required Parts
HowToo sells all the parts you need for this repair:
- Engine water pump - Qty: 1
- Water-pump gaskets - Qty: 2
- Thermostat housing seal - Qty: 1
- DEX-COOL-compatible 50/50 premixed coolant - Qty: 3 gallons
- Serpentine drive belt - Qty: 1 if worn or coolant-contaminated
📋 Before You Begin
- 📋 Park your Tahoe on level ground, select Park, apply the parking brake, and allow the engine to cool completely.
- 📋 Record or photograph the drive-belt routing before removing the belt. A routing diagram may also be located under the hood.
- 📋 Remove the key from the vehicle and keep it away from the cabin.
- 📋 Use a 10mm socket and ratchet to disconnect the negative battery cable. Position it so it cannot touch the terminal.
- 📋 Place the coolant drain pan beneath the front of the engine compartment.
🔨 Step-by-Step Instructions
Follow these steps in order:
Step 1: Relieve Cooling-System Pressure
- Put on safety glasses and nitrile gloves.
- When the engine is completely cold, cover the coolant reservoir cap with a shop towel and turn it slowly counterclockwise.
- Stop if you hear pressure escaping. Wait until it stops before removing the cap fully.
Step 2: Remove the Upper Air Duct
- Use a flat-blade screwdriver to loosen the air-duct clamps.
- Use a plastic trim removal tool to release any retaining clips.
- Disconnect the duct carefully and lift it out for working room.
- Do not pull on electrical wires or sensor connectors.
Step 3: Drain the Coolant
- Position the 16-quart drain pan beneath the radiator drain fitting.
- Open the drain fitting carefully by hand. If access is limited, remove the lower radiator hose using hose-clamp pliers.
- Allow the coolant to drain until the flow stops.
- Close the drain fitting by hand until snug. Do not force the plastic fitting.
Step 4: Loosen the Water-Pump Pulley Bolts
- Before removing the belt, use a 10mm socket and ratchet to loosen the pulley bolts approximately one turn.
- Do not remove the bolts yet. Belt tension helps keep the pulley from rotating.
Step 5: Remove the Serpentine Belt
- The tensioner is the spring-loaded pulley that keeps the belt tight.
- Install a 15mm socket and 1/2-inch breaker bar on the tensioner.
- Rotate the tensioner slowly to release belt tension, then slide the belt off one pulley.
- Slowly return the tensioner to its resting position and remove the belt.
- Replace the belt if it is cracked, glazed, frayed, swollen, or contaminated with coolant.
- Photograph the routing before removing the belt.
Step 6: Remove the Water-Pump Pulley
- Use a 10mm socket and ratchet to remove the previously loosened pulley bolts.
- Support the pulley with one hand as the final bolt is removed.
- Lift the pulley away and place it on a clean surface.
Step 7: Disconnect the Coolant Hoses
- Use hose-clamp pliers to compress each spring clamp and slide it away from the hose connection.
- Twist each hose gently by hand to break the seal, then pull it straight off.
- Do not pry against plastic hose fittings.
- Be ready for additional coolant to drain into the pan.
Step 8: Remove the Water Pump
- Use a 10mm socket, extensions, and ratchet to remove the water-pump mounting bolts.
- Note each bolt’s original position so bolts of different lengths return to the correct holes.
- Support the pump while removing the final bolt.
- Pull the pump straight away from the engine. Do not pry aggressively against the aluminum sealing surfaces.
Step 9: Prepare the Sealing Surfaces
- Use a plastic gasket scraper to remove gasket residue from the engine’s sealing surfaces.
- Use shop towels to wipe the surfaces clean and dry.
- Do not use a powered abrasive wheel. It can damage the aluminum and contaminate the cooling system.
- Keep debris out of the exposed coolant passages.
Step 10: Transfer the Thermostat Housing if Required
- If the replacement pump does not include the thermostat and housing, use a 10mm socket and ratchet to remove the housing from the old pump.
- Install a new thermostat housing seal. Do not reuse the flattened seal.
- Install the housing on the replacement pump with the thermostat in its original orientation.
- Use a torque wrench and 10mm socket to tighten the thermostat housing bolts evenly to Torque to 15 Nm (11 ft-lbs).
Step 11: Install the New Water Pump
- Position the new water-pump gaskets on the pump. Install them dry unless the gasket manufacturer specifically requires sealant.
- Hold the pump against the engine and start every mounting bolt by hand.
- Use a 10mm socket and ratchet to seat the bolts gradually in an alternating pattern.
- Use a torque wrench and 10mm socket to tighten the water-pump mounting bolts evenly to Torque to 25 Nm (18 ft-lbs).
- Do not overtighten the bolts; the engine sealing surfaces are aluminum.
Step 12: Reconnect the Coolant Hoses
- Push each hose fully onto its fitting by hand.
- Use hose-clamp pliers to return each clamp to its original position behind the fitting’s raised bead.
- Inspect each hose to ensure it is not twisted, cracked, or rubbing another component.
Step 13: Install the Water-Pump Pulley
- Position the pulley on the pump hub and start all bolts by hand.
- Use a 10mm socket and ratchet to tighten the bolts lightly in a crossing pattern.
- Final torque will be applied after the drive belt is installed.
Step 14: Install the Serpentine Belt
- Route the belt around each pulley according to the under-hood diagram or your reference photograph.
- Leave one easy-to-reach smooth pulley until last.
- Use a 15mm socket and 1/2-inch breaker bar to rotate the tensioner, slide the belt onto the final pulley, and release the tensioner slowly.
- Verify that every belt rib is centered in every grooved pulley.
Step 15: Tighten the Pulley Bolts
- Use a torque wrench and 10mm socket to tighten the water-pump pulley bolts evenly to Torque to 25 Nm (18 ft-lbs).
- Rotate the pulley by hand and confirm that it turns smoothly without wobbling.
Step 16: Reinstall the Air Duct
- Position the air duct and reconnect all openings fully.
- Use a flat-blade screwdriver to tighten the duct clamps until secure without crushing the plastic.
- Use a plastic trim removal tool by hand to reinstall any retaining clips.
Step 17: Refill the Cooling System
- Confirm that the radiator drain fitting is closed and all hoses are secured.
- Install the coolant funnel with GM surge-tank adapter on the reservoir.
- Slowly add DEX-COOL-compatible 50/50 premixed coolant until the cold-fill mark is reached.
- Pause several times so trapped air can rise through the funnel.
- Do not mix DEX-COOL with conventional green coolant.
Step 18: Reconnect the Battery
- Place the negative battery cable onto its terminal.
- Use a 10mm socket and torque wrench to tighten the negative terminal fastener to Torque to 5 Nm (44 in-lbs).
- Do not overtighten the battery terminal.
Step 19: Bleed Air from the Cooling System
- Leave the coolant funnel installed and start the engine.
- Set the cabin temperature to maximum heat and the blower to low.
- Let the engine idle while watching the coolant level and temperature gauge.
- Add premixed coolant as the level drops. Do not reach near the moving belt or electric fans.
- When the upper radiator hose becomes warm and cabin heat remains steady, allow remaining bubbles to escape.
- Shut the engine off if the temperature gauge rises abnormally or coolant begins surging from the funnel.
- When bubbling stops, switch off the engine, remove the funnel carefully, and install the reservoir cap.
✅ After Repair
- ✅ Inspect the pump, thermostat housing, drain fitting, and every disconnected hose for leaks while the engine idles.
- ✅ Confirm the belt remains centered and the water-pump pulley does not wobble.
- ✅ Verify that the cabin heater produces steady heat and the temperature gauge remains normal.
- ✅ Allow the engine to cool completely, then recheck the reservoir and adjust it to the cold-fill mark with 50/50 premixed coolant.
- ✅ Reinspect for leaks after a short drive and again the following day.
- ✅ Never remove the reservoir cap while the cooling system is hot.
💰 DIY vs Shop Cost
Shop Cost: $750-$1,200 (parts + labor)
DIY Cost: $180-$400 (parts only)
You Save: $350-$900 by doing it yourself!
Shop labor rates vary by region. This repair takes a shop approximately 2.5-4 hours.
🎯 Ready to get started?
HowToo makes it easy: same-day/2-day shipping on every part, plus all the tools and specialty tools you need! Check out the parts and tools sections below to add everything to your cart.