

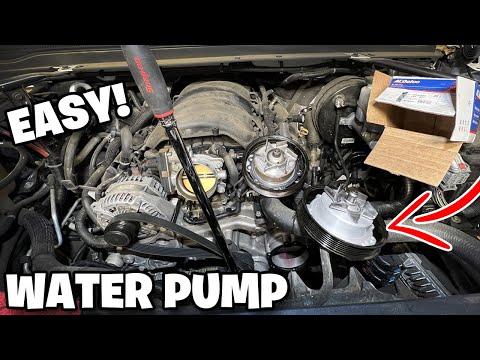





How to Replace the Water Pump on a 2015-2020 Chevrolet Suburban 5.3L V8 (Trim: Premier | Engine: V8 5.3L)
Step-by-step instructions with required tools, parts, torque specs, and safety tips for 2015, 2016, 2017, 2018, 2019, 2020
How to Replace the Water Pump on a 2015-2020 Chevrolet Suburban 5.3L V8 (Trim: Premier | Engine: V8 5.3L)
Step-by-step instructions with required tools, parts, torque specs, and safety tips for 2015, 2016, 2017, 2018, 2019, 2020


🔧 Suburban - Water Pump Replacement
The water pump circulates coolant through your Suburban’s 5.3L V8. Replacement requires draining the cooling system, removing the engine-driven cooling fan and belt, then installing the new pump with fresh gaskets.
Difficulty Level: Intermediate | Estimated Time: 3-5 hours
Assumption: This procedure is for the original 5.3L V8 cooling system.
⚠️ Safety & Precautions
- ⚠️ Work only when the engine is completely cold. Hot coolant can cause severe burns.
- 🧤 Wear gloves and safety glasses because coolant is toxic and slippery.
- 🚫 Keep coolant away from children and animals. Its sweet smell can attract them.
- 🌀 Never start the engine while the fan, shroud, or drive belt is removed.
- 🔋 Battery disconnection is not normally required for this repair.
- ♻️ Collect the old coolant in a sealed container and take it to an approved recycling facility.
🔧 Required Tools
You'll need the following tools for this repair:
- 3/8-inch drive ratchet
- 1/2-inch drive breaker bar
- 10mm socket
- 13mm socket
- 15mm socket
- 36mm fan-clutch wrench
- Water-pump pulley holding tool (specialty)
- Hose-clamp pliers
- 90-degree hose-pick tool
- Flat-blade screwdriver
- Plastic gasket scraper
- 3/8-inch drive torque wrench (5-80 ft-lbs)
- Drain pan (4-gallon minimum)
- Coolant funnel with GM surge-tank adapter
- Shop towels
- Nitrile gloves
- Safety glasses
🔩 Required Parts
HowToo sells all the parts you need for this repair:
- Engine water pump - Qty: 1
- Water pump mounting gaskets - Qty: 2
- GM-approved DEX-COOL 50/50 premixed coolant - Qty: 3 gallons
- Serpentine drive belt - Qty: 1 if worn, cracked, or coolant-soaked
📋 Before You Begin
- 🅿️ Park your Suburban on level ground, shift into Park, engage the parking brake, and allow the engine to become completely cold.
- 📷 Photograph the drive-belt routing before removing the belt. A routing diagram should also be located in the engine compartment.
- 🧹 Clean loose dirt from around the water pump and coolant hoses so contamination does not enter the cooling system.
- 🌡️ Verify that the upper radiator hose feels cold and soft before opening the coolant reservoir.
🔨 Step-by-Step Instructions
Follow these steps in order:
Step 1: Relieve Cooling-System Pressure
- Put on the safety glasses and nitrile gloves.
- When the engine is completely cold, slowly turn the coolant surge-tank cap counterclockwise by hand.
- Stop if you hear pressure escaping. Wait until it stops before removing the cap completely.
Step 2: Drain the Coolant
- Place the 4-gallon drain pan beneath the radiator drain fitting.
- Open the radiator drain fitting carefully by hand. If access is restricted, use the flat-blade screwdriver without forcing the plastic fitting.
- Allow the coolant to drain until the flow stops, then close the fitting gently by hand.
- Do not overtighten the plastic drain fitting.
Step 3: Remove the Air-Intake Duct
- Use the flat-blade screwdriver to loosen the intake-duct clamps.
- Release the duct’s retaining clips by hand and disconnect any attached breather hose.
- Lift the duct out of the engine compartment and cover the open throttle-body inlet with a clean shop towel.
Step 4: Remove the Upper Fan Shroud
- Use the 10mm socket and 3/8-inch drive ratchet to remove the upper fan-shroud fasteners.
- Release the shroud tabs carefully by hand.
- Lift the upper shroud section upward and remove it from your Suburban.
Step 5: Loosen the Cooling-Fan Clutch
- Fit the water-pump pulley holding tool around the pulley fasteners. This tool prevents the pulley from rotating.
- Place the 36mm fan-clutch wrench on the large fan-clutch nut.
- While holding the pulley stationary, turn the fan-clutch nut counterclockwise when viewed from the front of your Suburban.
- Spin the loosened nut off by hand, then lift the fan and clutch assembly straight upward.
- Store the fan upright to protect the clutch.
Step 6: Remove the Serpentine Belt
- Place the 15mm socket and 1/2-inch drive breaker bar on the belt tensioner.
- Rotate the tensioner against its spring pressure until the belt becomes loose.
- Slide the belt off the water-pump pulley, then slowly release the tensioner.
- Remove the belt and inspect it for cracks, glazing, missing ribs, or coolant contamination.
- Never let the tensioner snap back.
Step 7: Remove the Water-Pump Pulley
- Use the water-pump pulley holding tool to keep the pulley from rotating.
- Use the 13mm socket and 3/8-inch drive ratchet to remove the pulley bolts.
- Remove the pulley and set it aside.
Step 8: Disconnect the Coolant Hoses
- Move the drain pan directly beneath the water pump.
- Use the hose-clamp pliers to compress each spring clamp, then slide the clamp away from the water-pump connection.
- Use the 90-degree hose-pick tool to gently break the hose seal. Do not puncture or pry hard against the hose.
- Twist and pull each hose off by hand, allowing the remaining coolant to drain into the pan.
- Mark the hose locations with a shop towel arrangement if needed.
Step 9: Remove the Old Water Pump
- Use the 10mm socket and 3/8-inch drive ratchet to loosen the water-pump mounting bolts gradually.
- Support the pump by hand while removing the final bolts.
- Pull the pump straight forward and remove both old mounting gaskets.
- Expect additional coolant to drain when the pump separates from the engine.
Step 10: Clean and Inspect the Mounting Surfaces
- Use the plastic gasket scraper to remove gasket residue from the engine sealing surfaces.
- Use shop towels to wipe the surfaces clean and dry.
- Do not use a metal scraper, abrasive disc, or power tool on the aluminum surfaces.
- Inspect all hose ends and clamps. Replace any hose that is swollen, cracked, or oil-softened.
- Clean surfaces prevent repeat coolant leaks.
Step 11: Install the New Water Pump
- Position the two new water-pump gaskets on the new pump. Install them dry unless the pump manufacturer specifically supplies sealant.
- Hold the pump squarely against the engine and start every mounting bolt by hand.
- Use the 10mm socket and 3/8-inch drive ratchet to snug the bolts evenly in a crossing pattern.
- Use the 3/8-inch drive torque wrench and 10mm socket for the first pass: Torque to 15 Nm (11 ft-lbs).
- Repeat the crossing pattern for the final pass: Torque to 30 Nm (22 ft-lbs).
Step 12: Reconnect the Coolant Hoses
- Push each hose fully onto its correct water-pump fitting by hand.
- Use the hose-clamp pliers to return each clamp to its original position behind the raised bead on the fitting.
- Confirm that no clamp is crooked and no hose is twisted.
Step 13: Install the Water-Pump Pulley
- Position the pulley on the water-pump hub and start all bolts by hand.
- Use the water-pump pulley holding tool to prevent rotation.
- Use the 3/8-inch drive torque wrench and 13mm socket to tighten the bolts evenly: Torque to 25 Nm (18 ft-lbs).
Step 14: Install the Serpentine Belt
- Route the belt around the pulleys according to the underhood diagram and your reference photograph.
- Leave the belt off one smooth pulley until last.
- Use the 15mm socket and 1/2-inch drive breaker bar to rotate the tensioner, then slide the belt onto the final pulley.
- Release the tensioner slowly and verify that every belt rib is seated correctly in every grooved pulley.
Step 15: Install the Fan and Fan Clutch
- Lower the fan assembly carefully between the radiator and engine.
- Start the fan-clutch nut clockwise by hand to prevent cross-threading.
- Hold the pulley with the water-pump pulley holding tool.
- Use the 36mm fan-clutch wrench and 3/8-inch drive torque wrench-compatible setup to tighten the clutch nut: Torque to 56 Nm (41 ft-lbs).
- Verify that the fan rotates without contacting the radiator or surrounding hoses.
Step 16: Reinstall the Fan Shroud and Intake Duct
- Lower the upper fan shroud into position and engage its locating tabs by hand.
- Use the 10mm socket and 3/8-inch drive ratchet to reinstall the shroud fasteners until snug.
- Remove the shop towel from the throttle-body inlet.
- Reinstall the air-intake duct and reconnect the breather hose by hand.
- Use the flat-blade screwdriver to tighten the duct clamps until secure without crushing the plastic duct.
Step 17: Refill the Cooling System
- Install the coolant funnel with GM surge-tank adapter on the surge tank.
- Slowly add GM-approved DEX-COOL 50/50 premixed coolant until the level reaches the cold-fill mark.
- Wait several minutes for trapped air to rise, then add coolant as necessary.
- Do not mix DEX-COOL with unidentified or incompatible coolant.
✅ After Repair
- 🔍 Leave the surge-tank cap off initially and inspect the pump, gaskets, hoses, and radiator drain fitting for leaks.
- 🚙 Start the engine and set the climate control to maximum heat with the blower on low.
- 🌡️ Allow the engine to idle while monitoring the coolant temperature gauge. Add DEX-COOL 50/50 premix as the level drops.
- 🫧 Gently squeeze the upper radiator hose by hand only while it remains cool enough to touch, helping trapped air move toward the surge tank.
- 🛑 Shut the engine off immediately if it overheats, coolant pours out, or the heater remains cold while temperature rises.
- ✅ Once air bubbles stop and cabin heat is steady, install the surge-tank cap by hand.
- 🧪 Bring the engine to normal operating temperature, confirm the fan and belt run smoothly, then shut it off and inspect for leaks.
- ❄️ After the engine cools completely, recheck the coolant level and adjust it to the cold-fill mark.
- 📅 Recheck the coolant level and all connections after the first drive and again the following day.
💰 DIY vs Shop Cost
Shop Cost: ₹55,000-₹95,000 (parts + labor)
DIY Cost: ₹20,000-₹45,000 (parts only)
You Save: ₹25,000-₹50,000 by doing it yourself!
Imported-part pricing and labor rates vary in Sonīpat. This repair takes a shop approximately 2.5-4 hours.
🎯 Ready to get started?
HowToo makes it easy: same-day/2-day shipping on every part, plus all the tools and specialty tools you need! Check out the parts and tools sections below to add everything to your cart.