

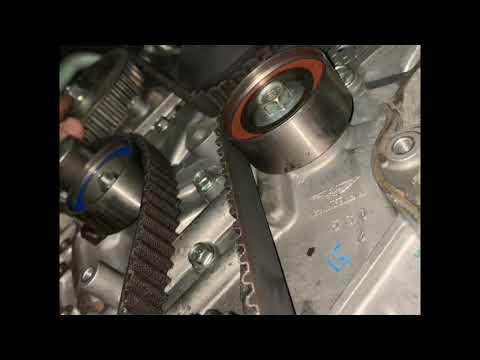







How to Replace the Timing Belt on a 2017-2019 Honda Ridgeline 3.5L V6 (Engine: V6 3.5L)
Step-by-step DIY guide with tools, parts, torque specs, water pump service, and safety tips for 2017, 2018, 2019
How to Replace the Timing Belt on a 2017-2019 Honda Ridgeline 3.5L V6 (Engine: V6 3.5L)
Step-by-step DIY guide with tools, parts, torque specs, water pump service, and safety tips for 2017, 2018, 2019


🔧 Ridgeline - Timing Belt Replacement
Replacing the timing belt requires removing the right engine mount, crankshaft pulley, timing covers, tensioner, and water pump. Your Ridgeline uses an interference engine, so incorrect camshaft timing can cause severe internal engine damage.
Replace the timing belt, water pump, tensioner, and pulleys as one complete service.
Difficulty Level: Advanced | Estimated Time: 6-9 hours
⚠️ Safety & Precautions
- ⚠️ Allow the engine to cool completely before opening the cooling system.
- ⚠️ Disconnect the negative battery cable before removing engine-mount components.
- ⚠️ Support the engine from above before removing the right engine mount.
- ⚠️ Support your Ridgeline with jack stands; never rely on a floor jack alone.
- ⚠️ Do not rotate the crankshaft or camshafts independently with the timing belt removed.
- ⚠️ Rotate the assembled engine clockwise only, viewed from the crankshaft-pulley side.
- ⚠️ Stop immediately if the crankshaft encounters a solid obstruction during hand rotation.
- ⚠️ Keep coolant, oil, and cleaning chemicals off the new belt.
- ⚠️ Incorrect timing can allow the pistons to strike the valves. If the timing marks are unclear, stop and obtain professional assistance.
🔧 Required Tools
You'll need the following tools for this repair:
- Safety glasses
- Nitrile mechanic gloves
- Wheel chocks
- Floor jack rated 2-ton minimum
- Jack stands rated 2-ton minimum
- Engine support bar rated 1,000-pound minimum
- Drain pan rated 12-quart minimum
- 3/8-inch drive ratchet
- 1/2-inch drive breaker bar
- 3/8-inch drive torque wrench rated 10-80 ft-lbs
- 1/2-inch drive torque wrench rated 50-250 ft-lbs
- 10mm socket
- 12mm socket
- 14mm socket
- 17mm socket
- 19mm socket
- 22mm socket
- 10mm combination wrench
- 3-inch socket extension
- 6-inch socket extension
- 14mm serpentine-belt tensioner tool
- Honda-compatible 50mm crankshaft pulley holder (specialty)
- Crankshaft pulley holder handle (specialty)
- 1.5mm automatic-tensioner retaining pin (specialty)
- Bench vise with soft jaws
- Plastic trim-clip removal tool
- Plastic gasket scraper
- Cooling-system vacuum filler (specialty)
- Spill-free coolant funnel
- White paint marker
- Inspection mirror
- LED work light
- Plastic fender cover
🔩 Required Parts
HowToo sells all the parts you need for this repair:
- Timing belt - Qty: 1
- Timing-belt automatic tensioner - Qty: 1
- Timing-belt tensioner pulley - Qty: 1
- Timing-belt idler pulley - Qty: 1
- Water pump with sealing O-ring - Qty: 1
- Accessory drive belt - Qty: 1
- Honda Type 2-compatible blue premixed coolant - Qty: 2 gallons
- Crankshaft pulley bolt - Qty: 1
📋 Before You Begin
- 📋 Park on level pavement, select Park, apply the parking brake, and chock both rear wheels.
- 📋 Let the engine become completely cold.
- 📋 Use a 10mm wrench to disconnect and isolate the negative battery cable.
- 📋 Remove the radiator cap only after confirming the cooling system is cold and unpressurized.
- 📋 Organize timing-cover and engine-mount bolts by their exact installed positions because their lengths differ.
- 📋 An engine support bar spans the body structure and holds the engine from above while its mount is removed.
- 📋 No infotainment setting, scan-tool command, battery registration, or coding procedure is required.
🔨 Step-by-Step Instructions
Follow these steps in order:
Step 1: Raise the Right Front
- Use the floor jack at the specified front lifting point.
- Place jack stands beneath the reinforced front support points and lower your Ridgeline onto them.
- Use a 22mm socket to remove the right-front wheel.
- Use the plastic trim-clip removal tool and 10mm socket to remove the right splash shield and lower access panel.
Step 2: Drain the Cooling System
- Place the 12-quart drain pan beneath the radiator drain.
- Open the radiator drain by hand and allow the coolant to drain.
- Close the plastic drain securely after flow stops. Do not overtighten it.
- Keep coolant away from children and animals because it is poisonous.
Step 3: Clear the Upper Work Area
- Use a 10mm socket and plastic trim-clip removal tool to remove the engine cover, intake duct, and brackets obstructing the right side of the engine.
- Use the 10mm socket to release wiring brackets from the timing-cover area.
- Do not open or bend the air-conditioning refrigerant lines.
Step 4: Remove the Accessory Belt
- Draw the belt routing with the white paint marker or take a clear reference photo.
- Use the 14mm serpentine-belt tensioner tool to rotate the tensioner and release belt tension.
- Slip the belt from one pulley, then release the tensioner slowly.
- Remove the accessory belt.
Step 5: Support the Engine
- Position the 1,000-pound engine support bar across approved structural support areas.
- Connect it to the engine lifting eye and remove the slack gradually.
- Support the engine’s weight without lifting your Ridgeline from the jack stands.
Step 6: Remove the Right Engine Mount
- Use 14mm and 17mm sockets with the breaker bar to remove the right engine-mount fasteners and bracket obstructing the timing covers.
- Adjust the engine support bar slightly if a fastener binds.
- Do not pry against the aluminum cylinder head or plastic timing covers.
- Keep every mount fastener identified by its installed location; fastener sizes and tightening specifications are position-dependent.
Step 7: Loosen the Crankshaft Pulley Bolt
- Fit the Honda-compatible 50mm crankshaft pulley holder into the pulley’s hexagonal opening.
- Secure the pulley holder handle without loading nearby hoses, wiring, or body panels.
- Use a 19mm socket and 1/2-inch breaker bar to loosen the crankshaft pulley bolt counterclockwise.
- Remove the bolt and slide the pulley straight from the crankshaft.
- Never use the starter to loosen this bolt.
Step 8: Remove the Timing Covers
- Use a 10mm socket with the 3-inch and 6-inch extensions to remove the lower and upper timing-cover bolts.
- Remove the covers carefully without damaging their seals.
- Lay the bolts out in the same pattern as the covers because they are not all the same length.
Step 9: Set No. 1 Cylinder to Top Dead Center
- Temporarily thread the crankshaft pulley bolt into the crankshaft by hand.
- Use a 19mm socket and ratchet to turn the crankshaft clockwise.
- Top dead center, or TDC, means No. 1 piston is at the top of its compression stroke.
- Align the crankshaft sprocket mark with the oil-pump housing pointer.
- Use the inspection mirror and LED work light to confirm both camshaft pulley marks align with their cylinder-head reference marks.
- If the camshaft marks face away from their references, rotate the crankshaft one additional complete turn clockwise.
- Use the white paint marker to highlight the existing factory marks without replacing or covering them.
Step 10: Remove the Automatic Tensioner
- Use a 12mm socket to remove the automatic-tensioner mounting bolts.
- Keep your fingers away from the belt and tensioner-pulley area.
- Remove the automatic tensioner without turning either camshaft or the crankshaft.
Step 11: Remove the Belt and Pulleys
- Slide the timing belt from the pulleys without rotating the sprockets.
- Use a 14mm socket to remove the tensioner pulley and idler pulley.
- Inspect the camshaft and crankshaft seals for wet oil leakage.
- Repair active seal leakage before installing the new belt; oil will shorten belt life.
Step 12: Replace the Water Pump
- Move the drain pan beneath the water pump.
- Use a 10mm socket to remove the water-pump bolts.
- Remove the pump and its old sealing O-ring.
- Use the plastic gasket scraper to clean the aluminum sealing surface without gouging it.
- Lightly wet the new O-ring with clean Honda Type 2-compatible coolant.
- Install the new pump and tighten its bolts evenly to 12 Nm (9 ft-lbs).
- Do not add sealant to the O-ring.
Step 13: Install the New Pulleys
- Place the new idler pulley and tensioner pulley in their original locations.
- Use a 14mm socket and torque wrench to tighten the pulley bolts to 44 Nm (33 ft-lbs).
- Confirm both pulleys sit squarely and rotate smoothly.
Step 14: Install the Timing Belt
- Verify the crankshaft and both camshaft factory timing marks remain aligned.
- Route the belt from the crankshaft sprocket to the front camshaft pulley, around the water pump, around the rear camshaft pulley, and around the tensioner-side pulleys.
- Keep the belt tight along the side opposite the tensioner.
- Confirm every belt tooth is fully seated in its sprocket groove.
- Do not force the belt into place with a screwdriver.
Step 15: Install and Release the New Tensioner
- Make sure the retaining pin remains installed in the new automatic tensioner.
- Use a 12mm socket to install the tensioner.
- Tighten the automatic-tensioner mounting bolts to 22 Nm (16 ft-lbs).
- Recheck all three factory timing references.
- Pull the 1.5mm retaining pin straight out and allow the tensioner to extend.
- Wait several minutes before rotating the engine.
Step 16: Verify Mechanical Timing
- Use the 19mm socket and ratchet to turn the crankshaft clockwise slowly through six complete revolutions.
- Stop immediately if you feel a solid mechanical obstruction.
- Return the crankshaft to No. 1 TDC.
- Use the inspection mirror and LED work light to confirm both camshaft marks and the crankshaft mark align exactly.
- If any mark is one or more teeth out, do not start the engine. Remove and reinstall the belt correctly.
Step 17: Reinstall the Timing Covers
- Use a 10mm socket to install the lower and upper timing covers.
- Make sure their seals are seated and no wires are trapped.
- Tighten the 6mm timing-cover bolts evenly to 12 Nm (9 ft-lbs).
Step 18: Reinstall the Crankshaft Pulley
- Clean the crankshaft and pulley mating surfaces with a clean cloth.
- Slide the pulley fully into place without striking it.
- Install the new crankshaft pulley bolt by hand.
- Hold the pulley with the Honda-compatible 50mm pulley holder and handle.
- Use the 19mm socket and 1/2-inch torque wrench to tighten the pulley bolt to 245 Nm (181 ft-lbs).
Step 19: Reinstall the Engine Mount
- Use the engine support bar to align the mount and bracket naturally.
- Use 14mm and 17mm sockets to start every fastener by hand in its original location.
- Do not use the bolts to pull a misaligned mount into position.
- Tighten each mount fastener to its location-specific Honda service specification; the bracket, body-side, and through-bolt specifications are not interchangeable.
- Remove the engine support bar after all mount fasteners are tightened.
Step 20: Install the New Accessory Belt
- Route the belt according to the under-hood belt diagram.
- Use the 14mm serpentine-belt tensioner tool to rotate the tensioner.
- Slide the belt over the final pulley and release the tensioner slowly.
- Use the LED work light to confirm every belt rib is correctly seated.
Step 21: Reassemble the Wheel-Well and Engine Bay
- Use the 10mm socket and plastic trim-clip removal tool to reinstall the brackets, intake duct, access panels, and splash shield.
- Install the right-front wheel using the 22mm socket.
- Lower your Ridgeline with the floor jack.
- Use the 22mm socket and torque wrench to tighten the wheel nuts in a crisscross pattern to 127 Nm (94 ft-lbs).
Step 22: Refill the Cooling System
- Use the cooling-system vacuum filler to refill with Honda Type 2-compatible blue premixed coolant.
- If a vacuum filler is unavailable, use the spill-free coolant funnel and add coolant slowly until the radiator remains full.
- Fill the coolant reservoir to the MAX mark.
- Use a 10mm wrench to reconnect the negative battery cable securely.
✅ After Repair
- ✅ Account for every tool, fastener, and tensioner retaining pin before starting the engine.
- ✅ Start the engine and shut it off immediately if you hear knocking, scraping, or belt slapping.
- ✅ Check the water-pump and radiator-drain areas for coolant leakage.
- ✅ Set the heater to maximum heat and allow the engine to reach operating temperature.
- ✅ Keep hands, clothing, and tools away from the accessory belt and cooling fans.
- ✅ Let the cooling fans cycle, then shut the engine off and allow it to cool completely.
- ✅ Recheck the radiator and reservoir levels only when cold.
- ✅ Take a gentle 10-15 minute road test, then inspect for leaks and warning lights.
- ✅ If camshaft/crankshaft correlation faults or abnormal running occur, stop the engine and recheck mechanical timing.
💰 DIY vs Shop Cost
Shop Cost: ₹85,000-₹160,000 (parts + labor)
DIY Cost: ₹30,000-₹65,000 (parts only)
You Save: ₹55,000-₹95,000 by doing it yourself!
Local costs vary because Ridgeline-specific parts may require importation. This repair takes a properly equipped shop approximately 5-7 hours.
🎯 Ready to get started?
HowToo makes it easy: same-day/2-day shipping on every part, plus all the tools and specialty tools you need! Check out the parts and tools sections below to add everything to your cart.