

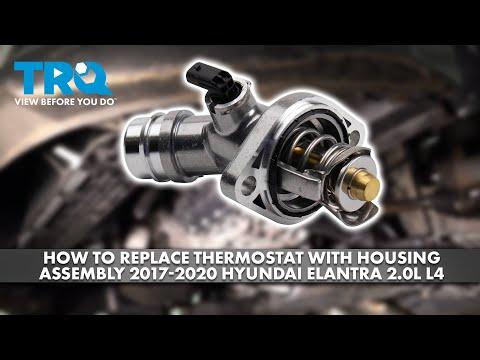





How to Replace the Thermostat on a 2017-2019 Hyundai Elantra (Engine: Inline 4 2.0L)
Step-by-step DIY instructions with tools, parts, torque specs, and coolant bleeding tips for 2017, 2018, 2019
How to Replace the Thermostat on a 2017-2019 Hyundai Elantra (Engine: Inline 4 2.0L)
Step-by-step DIY instructions with tools, parts, torque specs, and coolant bleeding tips for 2017, 2018, 2019


🔧 Elantra - Thermostat Replacement
The thermostat on your Elantra sits inside the engine’s coolant-inlet housing near the alternator. Replacement requires draining the coolant, moving the alternator for access, installing the thermostat in the correct orientation, and bleeding trapped air from the cooling system.
Difficulty Level: Intermediate | Estimated Time: 2-3 hours
⚠️ Safety & Precautions
- ⚠️ Let the engine cool completely before opening the cooling system. Hot coolant can cause severe burns.
- ⚠️ Disconnect the negative battery cable before working near the alternator.
- ⚠️ Keep coolant away from children and animals. Its sweet taste is highly toxic.
- ⚠️ Support the front of your Elantra with jack stands. Never work beneath a vehicle supported only by a jack.
- ⚠️ Do not allow coolant to contact the accessory drive belt.
🔧 Required Tools
You'll need the following tools for this repair:
- 3/8-inch drive ratchet
- 3/8-inch drive torque wrench (5-80 ft-lbs)
- 10mm socket
- 12mm socket
- 14mm socket
- 17mm socket
- 6-inch socket extension
- 10mm combination wrench
- 12mm combination wrench
- Flat-blade screwdriver (6-inch)
- Hose-clamp pliers (specialty)
- Plastic gasket scraper
- Coolant drain pan (2-gallon minimum)
- Spill-free coolant funnel (specialty)
- Floor jack (rated 2-ton minimum)
- Jack stands (rated 2-ton minimum)
- Wheel chocks
- Nitrile gloves
- Safety glasses
- Shop towels
🔩 Required Parts
HowToo sells all the parts you need for this repair:
- Engine thermostat - Qty: 1
- Thermostat seal - Qty: 1
- Hyundai-compatible phosphate-based coolant (50/50 premixed) - Qty: 2 gallons
📋 Before You Begin
- 🚗 Park your Elantra on level ground, apply the parking brake, and chock both rear wheels.
- 🧊 Wait until the upper radiator hose is completely cold and soft.
- 🔋 Use a 10mm wrench to disconnect the negative battery terminal. Move the cable aside so it cannot spring back onto the terminal.
- 🧤 Raise the front with a floor jack and place it securely on jack stands at the factory support points.
- 📋 A spill-free funnel attaches at the radiator filler neck and helps trapped air escape during refilling.
🔨 Step-by-Step Instructions
Follow these steps in order:
Step 1: Drain the Cooling System
- Put on safety glasses and nitrile gloves.
- Remove the radiator cap only after the engine is completely cold.
- Position the 2-gallon drain pan beneath the radiator drain valve at the bottom of the radiator.
- Open the drain valve carefully by hand. If it is tight, use a flat-blade screwdriver gently; the plastic valve can break.
- Allow the coolant to drain, then close the valve by hand until snug. Do not overtighten it.
Step 2: Remove the Lower Engine Cover
- Use a 10mm socket and ratchet to remove the lower engine-cover fasteners needed for access.
- Lower the cover and keep its fasteners together.
Step 3: Release the Accessory Drive Belt
- Note or photograph the belt routing before removal.
- Place a 17mm socket and ratchet on the automatic belt tensioner. A tensioner is the spring-loaded pulley that keeps the belt tight.
- Rotate the tensioner slowly to release belt tension, then slip the belt off the alternator pulley.
- Release the tensioner slowly. Do not let it snap back.
- Keep coolant and grease off the belt.
Step 4: Move the Alternator for Access
- Confirm that the negative battery cable remains disconnected.
- Use a 10mm socket to remove the protective cover and retaining nut from the alternator output cable. Move the cable aside.
- Disconnect the alternator electrical connector by pressing its locking tab by hand.
- Use 12mm and 14mm sockets with the extension and ratchet to remove the alternator mounting bolts.
- Support the alternator by hand while removing the final bolt, then lift it out of the work area.
- During installation, tighten the alternator mounting bolts securely to their original positions. Hyundai uses different bolt sizes here; do not apply one torque value to every alternator fastener.
Step 5: Disconnect the Coolant Hose
- Position the drain pan beneath the thermostat housing.
- Use hose-clamp pliers to compress the lower radiator-hose clamp and slide it backward on the hose.
- Twist the hose gently by hand to break its seal, then pull it from the coolant-inlet housing.
- Use a flat-blade screwdriver only to lift the hose edge slightly. Do not pry against or puncture the hose.
Step 6: Remove the Thermostat Housing
- Use a 12mm socket, extension, and ratchet to remove the coolant-inlet housing bolts evenly.
- Pull the housing straight away from the engine. Expect additional coolant to drain.
- Remove the old thermostat and seal by hand.
- Notice the thermostat’s installed direction before discarding it.
Step 7: Clean and Inspect the Housing
- Use a plastic gasket scraper and shop towels to clean the mating surfaces.
- Do not use a metal scraper, abrasive disc, or excessive sealant.
- Inspect the housing for cracks, corrosion, or a damaged hose neck. Replace it if damaged.
- Keep debris from falling into the coolant passage.
Step 8: Install the New Thermostat
- Fit the new seal onto the thermostat in the same position as the original seal.
- Place the thermostat into its recess with the spring and wax-pellet side facing the engine.
- Position the thermostat’s air-bleed valve at the top, near the 12-o’clock position.
- Incorrect orientation can cause immediate overheating.
Step 9: Reinstall the Thermostat Housing
- Hold the thermostat fully seated while positioning the housing.
- Start every housing bolt by hand to prevent crossed threads.
- Use a 12mm socket and torque wrench to tighten the bolts evenly in stages: Torque to 20 Nm (15 ft-lbs).
- Do not apply RTV sealant when the replacement thermostat uses its molded rubber seal.
Step 10: Reconnect the Coolant Hose
- Push the coolant hose fully onto the housing by hand.
- Use hose-clamp pliers to return the clamp to its original position behind the raised bead on the housing neck.
- Confirm that the hose is not twisted and the clamp sits evenly.
Step 11: Reinstall the Alternator and Belt
- Place the alternator into its bracket and start all mounting bolts by hand.
- Use the 12mm and 14mm sockets to tighten the alternator mounting bolts securely in their original locations.
- Reconnect the alternator electrical plug until its lock clicks.
- Use a 10mm socket and torque wrench to secure the alternator output cable nut: Torque to 10 Nm (89 in-lbs).
- Reinstall the protective terminal cover.
- Route the belt according to your reference photograph.
- Use the 17mm socket and ratchet to rotate the tensioner, place the belt over the final pulley, and release the tensioner slowly.
- Check that every belt rib is seated correctly in every grooved pulley.
Step 12: Refill and Bleed the Cooling System
- Install the spill-free coolant funnel at the radiator filler neck.
- Pour Hyundai-compatible 50/50 premixed coolant into the radiator slowly until full.
- Fill the expansion reservoir to the “F” or “MAX” mark.
- Use a 10mm wrench to reconnect the negative battery cable.
- Set the cabin temperature control to maximum heat and the blower to low.
- Start the engine and let it idle with the funnel installed.
- Watch the temperature gauge and add coolant as the level drops. Small bubbles are normal while trapped air escapes.
- Gently squeeze the upper radiator hose by hand only while it remains safe to touch.
- When the upper radiator hose becomes hot and the radiator fan has cycled, verify that cabin heat is steady and bubbles have stopped.
- Shut the engine off, let it cool completely, remove the funnel, and install the radiator cap securely.
Step 13: Reinstall the Lower Cover
- Use the 10mm socket and ratchet to reinstall the lower engine cover.
- Remove the jack stands and lower your Elantra carefully with the floor jack.
✅ After Repair
- ✅ Start the engine and inspect the thermostat housing, hose connection, radiator drain valve, and alternator area for leaks.
- 🌡️ Confirm that the temperature gauge reaches its normal position and remains stable.
- 🔥 Verify that the heater produces steady hot air. Intermittent heat can indicate trapped air or low coolant.
- 🧊 After the engine cools completely, check the radiator and reservoir levels again. Top up with the same 50/50 coolant if necessary.
- 🔍 Recheck for leaks after a short drive and again the following morning.
- ⚠️ Stop the engine immediately if the temperature gauge rises above normal, coolant boils, or the heater suddenly blows cold.
- ♻️ Transfer the old coolant into sealed containers and take it to an automotive-fluid recycling facility.
💰 DIY vs Shop Cost
Shop Cost: $300-$500 (parts + labor)
DIY Cost: $45-$100 (parts only)
You Save: $200-$400 by doing it yourself!
Shop labor rates vary but typically run $100-$150/hour. This repair takes a shop approximately 1.5-2.5 hours.
🎯 Ready to get started?
HowToo makes it easy: same-day/2-day shipping on every part, plus all the tools and specialty tools you need! Check out the parts and tools sections below to add everything to your cart.