

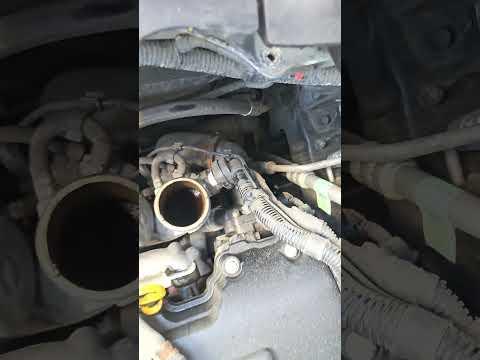




How to Replace the Thermostat on a 2017-2018 Chevrolet Trax 1.4L Turbo
Step-by-step instructions with tools, parts, torque specs, coolant bleeding, and safety tips for 2017, 2018
How to Replace the Thermostat on a 2017-2018 Chevrolet Trax 1.4L Turbo
Step-by-step instructions with tools, parts, torque specs, coolant bleeding, and safety tips for 2017, 2018


🔧 Trax - Thermostat Replacement
Your Trax uses an electronically controlled thermostat housed in a plastic coolant assembly. Replacement requires draining some coolant, removing the intake duct and coolant hoses, installing the new assembly, then carefully bleeding trapped air from the cooling system.
Difficulty Level: Intermediate | Estimated Time: 2-3 hours
Assumption: This procedure is for the original 1.4L turbocharged gasoline engine.
⚠️ Safety & Precautions
- ⚠️ Work only when the engine is completely cold. Opening a hot cooling system can release scalding coolant and steam.
- 🧤 Wear gloves and safety glasses. DEX-COOL coolant is poisonous and must be kept away from children and animals.
- 🔋 Disconnect the negative battery cable before unplugging the electronic thermostat connector.
- 🚫 Do not lift the Trax with only a floor jack. Support it securely on jack stands.
- ♻️ Capture all drained coolant in a clean drain pan and dispose of contaminated coolant responsibly.
- ⚠️ Never mix orange DEX-COOL with conventional green coolant.
🔧 Required Tools
You'll need the following tools for this repair:
- 7mm socket
- 8mm socket
- 10mm socket
- 13mm socket
- 1/4-inch drive ratchet
- 3/8-inch drive ratchet
- 3-inch socket extension
- 6-inch socket extension
- Inch-pound torque wrench rated 20-200 in-lbs
- Hose-clamp pliers (specialty)
- 90-degree hose-pick tool
- Plastic gasket scraper
- Cooling-system vacuum filling tool (specialty)
- Air compressor rated 90 psi minimum
- Coolant drain pan rated 10-quart minimum
- Floor jack rated 2-ton minimum
- Jack stands rated 2-ton minimum
- Wheel chocks
- Fender cover
- Shop towels
- Nitrile gloves
- Safety glasses
🔩 Required Parts
HowToo sells all the parts you need for this repair:
- Electronic engine coolant thermostat assembly with seal - Qty: 1
- GM-approved orange DEX-COOL 50/50 premixed coolant - Qty: 2 gallons
📋 Before You Begin
- 🅿️ Park the Trax on level ground, select Park, apply the parking brake and chock the rear wheels.
- ❄️ Let the engine cool for several hours. The upper radiator hose must feel cool before opening the reservoir cap.
- 🔧 Place a fender cover over the painted bodywork.
- 🔋 Save any preferred audio settings, switch the ignition off and keep the key away from the vehicle.
- 🧼 Clean around the coolant reservoir and thermostat before opening the system. Dirt must not enter the cooling passages.
🔨 Step-by-Step Instructions
Follow these steps in order:
Step 1: Disconnect the Battery
- Open the hood and remove the battery negative terminal with a 10mm socket and 1/4-inch drive ratchet.
- Move the cable aside so it cannot spring back onto the terminal.
Step 2: Raise and Support the Front
- Place the wheel chocks firmly behind the rear wheels.
- Lift the front at the designated center lifting point with the 2-ton floor jack.
- Lower the vehicle onto 2-ton jack stands positioned at the reinforced front pinch-weld locations.
- Gently push the vehicle to verify that it is stable before going underneath.
Step 3: Remove the Lower Splash Shield
- Wear safety glasses before working underneath the vehicle.
- Use a 7mm socket, 1/4-inch drive ratchet and 3-inch extension to remove the lower splash-shield fasteners.
- Support the shield by hand while removing the final fastener, then lower it out of the way.
Step 4: Drain the Coolant
- Slowly loosen the coolant reservoir cap by hand to release any residual pressure.
- Place the 10-quart coolant drain pan beneath the lower radiator hose connection.
- Compress the lower radiator hose spring clamp with hose-clamp pliers and slide the clamp back.
- Carefully loosen the hose with the 90-degree hose-pick tool. Do not push the pick deeply enough to scratch the plastic fitting.
- Pull the hose free and let the coolant drain. Refit the hose after the flow stops and return its clamp to the original position.
- Twist hoses gently; plastic fittings become brittle.
Step 5: Remove the Intake Duct
- Disconnect the intake-air electrical connector by pressing its locking tab by hand. Pull on the connector, not its wires.
- Use a 7mm socket and 1/4-inch drive ratchet to loosen the clamps at both ends of the air-intake duct.
- Release the breather-hose fitting by hand, then lift the intake duct out of the engine compartment.
- Cover the exposed intake opening with a clean shop towel.
Step 6: Expose the Thermostat Assembly
- Locate the thermostat assembly where the coolant hoses meet the engine beneath the removed intake duct.
- Release the electronic thermostat connector locking tab by hand and unplug the connector.
- Move any wiring retainers off the thermostat assembly by hand without pulling on the wires.
Step 7: Disconnect the Thermostat Hoses
- Position the 10-quart coolant drain pan under the thermostat area because more coolant will escape.
- Use hose-clamp pliers to compress each spring clamp and slide it several centimetres back on its hose.
- Use the 90-degree hose-pick tool to break each hose seal carefully, then twist and remove the hoses by hand.
- Mark hose positions if necessary so every hose returns to its original fitting.
Step 8: Remove the Thermostat
- Use an 8mm socket, 1/4-inch drive ratchet and 6-inch extension to remove the thermostat mounting bolts.
- Support the assembly while removing the final bolt, then pull it straight away from the engine.
- Remove the old seal and confirm it did not remain stuck in the engine recess.
Step 9: Clean the Sealing Surface
- Place clean shop towels below the opening to catch residue.
- Use a plastic gasket scraper to remove seal deposits without gouging the aluminium surface.
- Wipe the surface clean with a fresh shop towel. Do not use abrasive discs or metal scrapers.
Step 10: Install the New Thermostat Assembly
- Confirm the new seal is fully seated in the new thermostat assembly.
- Lightly wet the seal with fresh DEX-COOL 50/50 premixed coolant. Do not use RTV silicone unless supplied and specifically required by the part manufacturer.
- Position the assembly squarely against the engine and install all bolts by hand to avoid crossed threads.
- Use the inch-pound torque wrench, 8mm socket and 6-inch extension to tighten the mounting bolts evenly to 10 Nm (89 in-lbs).
- Plastic housings crack easily; never overtighten them.
Step 11: Reconnect the Hoses and Wiring
- Push each coolant hose completely over its fitting by hand.
- Use hose-clamp pliers to return each clamp to its original position behind the raised bead on the fitting.
- Reconnect the thermostat electrical connector by hand until its lock clicks.
- Reinstall all wiring retainers by hand and verify no wiring rests against hot or moving parts.
Step 12: Reinstall the Intake Duct
- Remove the protective shop towel from the intake opening.
- Seat the duct fully at both ends and reconnect its breather hose by hand.
- Use the 7mm socket and 1/4-inch drive ratchet to tighten both duct clamps until snug. Do not crush the plastic duct.
- Reconnect the intake-air electrical connector by hand until it clicks.
Step 13: Refill and Bleed the Cooling System
- Attach the cooling-system vacuum filling tool to the coolant reservoir and connect the 90 psi air compressor.
- A vacuum filling tool removes trapped air before drawing coolant into the system.
- Follow the tool instructions to create a vacuum, close the valve and verify the vacuum holds. A falling gauge reading indicates a leak that must be corrected.
- Place the tool’s pickup hose into fresh DEX-COOL 50/50 premixed coolant, then open the fill valve and allow the system to draw in coolant.
- Remove the filling tool and adjust the cold coolant level to the reservoir’s marked cold-fill line.
Step 14: Reconnect the Battery
- Install the negative battery terminal with the 10mm socket and inch-pound torque wrench.
- Torque to 5 Nm (44 in-lbs).
Step 15: Check Operation and Coolant Level
- Leave the reservoir cap installed and start the engine.
- Set the cabin heater to maximum heat and let the engine idle while watching the temperature display and checking every connection for leaks.
- Switch the engine off immediately if the temperature warning appears, the heater suddenly blows cold air or coolant begins overflowing.
- Allow the engine to cool completely, then adjust the reservoir level to the cold-fill mark using fresh DEX-COOL 50/50 premixed coolant.
Step 16: Reinstall the Splash Shield
- Raise the splash shield into position and start every fastener by hand.
- Use the 7mm socket, 1/4-inch drive ratchet and 3-inch extension to tighten the fasteners until snug.
- Raise the vehicle with the 2-ton floor jack, remove the 2-ton jack stands and lower the Trax carefully.
- Remove the wheel chocks.
✅ After Repair
- 🌡️ Take a short drive while monitoring engine temperature. The temperature should remain stable and the cabin heater should produce consistent heat.
- 🔍 After the engine cools completely, inspect the thermostat, hose connections and lower radiator hose for dried coolant or wetness.
- 🧴 Recheck the reservoir level cold on each of the next two mornings and add only premixed DEX-COOL if needed.
- ⚠️ A recurring low level, overheating warning or diagnostic code means the system needs leak testing and electronic diagnosis.
- ♻️ Transfer old coolant to a sealed container and take it to an authorised automotive-fluid recycling facility in Sonīpat.
💰 DIY vs Shop Cost
Shop Cost: ₹12,000-₹22,000 (parts + labor)
DIY Cost: ₹4,500-₹9,000 (parts and coolant only)
You Save: ₹7,500-₹13,000 by doing it yourself!
Local labor rates and imported-part availability vary. This repair takes a shop approximately 1.5-2.5 hours.
🎯 Ready to get started?
HowToo makes it easy: same-day/2-day shipping on every part, plus all the tools and specialty tools you need! Check out the parts and tools sections below to add everything to your cart.