

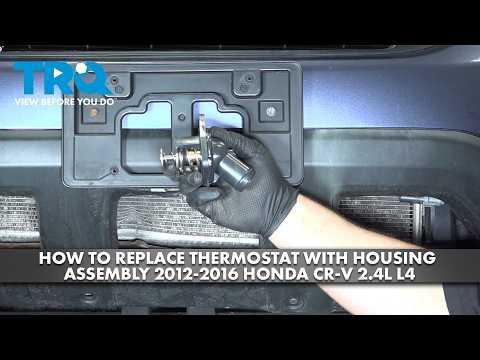






How to Replace the Thermostat on a 2015-2019 Honda CR-V 2.4L (Engine: Inline 4 2.4L)
Step-by-step instructions with tools, parts, torque specs, coolant bleeding, and safety tips for 2015, 2016, 2017, 2018, 2019
How to Replace the Thermostat on a 2015-2019 Honda CR-V 2.4L (Engine: Inline 4 2.4L)
Step-by-step instructions with tools, parts, torque specs, coolant bleeding, and safety tips for 2015, 2016, 2017, 2018, 2019


🔧 CR-V - Thermostat Replacement
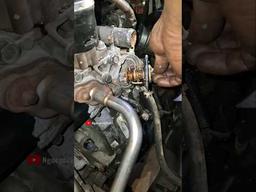
The thermostat is installed where the lower radiator hose connects to the engine. Replacing it requires draining some coolant, removing the thermostat cover, installing a new thermostat and seal, then carefully bleeding air from the cooling system.
Difficulty Level: Intermediate | Estimated Time: 1.5-2.5 hours
Assumption: This procedure is for the stock 2.4L naturally aspirated engine.
⚠️ Safety & Precautions
- ⚠️ Allow the engine to become completely cold before opening the cooling system. Hot coolant can cause severe burns.
- 🧤 Wear chemical-resistant gloves and safety glasses. Coolant is poisonous.
- 🚫 Keep spilled coolant away from children and animals because its sweet smell attracts them.
- 🛞 Support your CR-V with jack stands. Never work underneath a vehicle supported only by a floor jack.
- 🔋 Battery disconnection is not required for this repair.
- ♻️ Collect the old coolant in a clean drain pan and dispose of it through an approved recycling facility.
🔧 Required Tools
You'll need the following tools for this repair:
- 3/8-inch drive ratchet
- 3/8-inch drive torque wrench rated 5-80 ft-lbs
- 10mm socket
- 12mm socket
- 6-inch extension
- Hose-clamp pliers (specialty)
- Plastic trim-clip removal tool
- Plastic gasket scraper
- Cooling-system spill-free funnel (specialty)
- Coolant drain pan rated 10-quart minimum
- Floor jack rated 2-ton minimum
- Jack stands rated 2-ton minimum
- Wheel chocks
- Safety glasses
- Chemical-resistant gloves
- Shop towels
🔩 Required Parts
HowToo sells all the parts you need for this repair:
- Engine coolant thermostat - Qty: 1
- Thermostat rubber seal - Qty: 1
- Honda Type 2 blue premixed coolant - Qty: 2 gallons
📋 Before You Begin
- 🅿️ Park your CR-V on level ground, select Park and apply the parking brake.
- 🧊 Let the engine cool for at least several hours, preferably overnight.
- 🛞 Place wheel chocks behind the rear wheels before lifting the front.
- 📦 Have the new thermostat ready before opening the cooling system.
- 🚿 Do not mix Honda Type 2 coolant with tap water. It is already diluted and ready to use.
🔨 Step-by-Step Instructions
Follow these steps in order:
Step 1: Lift and Support the Front
- Place the wheel chocks firmly behind both rear wheels.
- Use the 2-ton floor jack at the front-center lifting point to raise your CR-V.
- Position the 2-ton jack stands under the reinforced front side support points, then lower the vehicle onto them.
- Gently push the vehicle to verify that it is stable before going underneath.
Step 2: Remove the Lower Engine Cover
- Put on the safety glasses and chemical-resistant gloves.
- Use the plastic trim-clip removal tool to release the lower cover clips.
- Use the 10mm socket, extension and ratchet to remove any lower-cover bolts.
- Lower the cover and place its fasteners where they will not be lost.
- Photograph clip positions before removal.
Step 3: Release Cooling-System Pressure
- Confirm that the upper radiator hose is cold and soft.
- Cover the radiator cap with a shop towel and turn it slowly by hand to the first stop.
- Pause to ensure no pressure escapes, then remove the cap completely.
- Do not continue if the system hisses or releases hot coolant.
Step 4: Drain the Coolant
- Position the 10-quart drain pan beneath the radiator drain valve at the bottom of the radiator.
- Open the plastic drain valve carefully by hand. Do not use pliers because the valve can break.
- Allow the coolant to drain until the flow slows to an occasional drip.
- Close the drain valve gently by hand. Do not overtighten the plastic valve.
Step 5: Locate the Thermostat Cover
- Follow the lower radiator hose from the radiator toward the engine. It ends at the thermostat cover.
- Use the hose-clamp pliers to compress the spring clamp and slide it several inches away from the cover.
- Twist the hose gently by hand to release it, then pull it from the thermostat cover.
- Direct the remaining coolant into the drain pan.
- Twist first; pulling alone can damage hoses.
Step 6: Remove the Thermostat Cover
- Use the 10mm socket, extension and ratchet to loosen the thermostat-cover bolts evenly.
- Support the cover by hand as the final bolt is removed.
- Pull the cover straight away from the engine. Do not pry against its sealing surface.
- Note the thermostat’s installed direction and air-bleed pin position before removing it.
- Remove the thermostat and its rubber seal by hand.
Step 7: Clean and Inspect the Sealing Surfaces
- Use the plastic gasket scraper to remove seal residue from the cover and engine mating surfaces.
- Use shop towels to wipe both surfaces clean and dry.
- Inspect the thermostat cover for cracks, corrosion or distortion.
- Do not use a metal scraper or abrasive power tool on the aluminum surfaces.
Step 8: Install the New Thermostat
- Fit the new rubber seal evenly around the new thermostat.
- Install the thermostat with its spring and sensing element facing into the engine.
- Position the air-bleed pin at the top and align it with the index mark in the thermostat opening.
- Do not apply RTV silicone or gasket sealant. The molded rubber seal provides the seal.
Step 9: Reinstall the Thermostat Cover
- Hold the cover squarely against the engine without moving the thermostat or pinching its seal.
- Start every cover bolt by hand to prevent cross-threading.
- Use the 10mm socket and ratchet to tighten the bolts evenly and lightly.
- Use the torque wrench and 10mm socket to tighten the thermostat-cover bolts to 12 Nm (9 ft-lbs).
- Do not exceed the specification because the aluminum threads and cover can be damaged.
Step 10: Reconnect the Lower Radiator Hose
- Push the lower radiator hose fully onto the thermostat-cover fitting by hand.
- Use the hose-clamp pliers to return the spring clamp to its original position behind the fitting’s raised bead.
- Inspect the hose to ensure it is not twisted, cracked or partially seated.
Step 11: Refill the Cooling System
- Install the spill-free funnel in the radiator filler neck.
- Pour Honda Type 2 blue premixed coolant slowly into the funnel until the radiator remains full.
- Fill the coolant reservoir by hand to the MAX line.
- Squeeze the upper radiator hose carefully several times by hand to release trapped air.
- Add coolant whenever the level drops.
Step 12: Bleed Air from the Cooling System
- Verify that the transmission is in Park and the parking brake is applied.
- Start the engine with the spill-free funnel installed.
- Set the climate temperature to maximum heat and select a low blower speed using the dashboard controls.
- Allow the engine to idle while watching the coolant level and temperature gauge.
- Add Honda Type 2 coolant as air bubbles leave the funnel.
- Briefly hold the engine near 1,500 rpm several times after it begins warming up.
- Continue until the radiator fan cycles at least twice, the cabin heat remains hot and bubbles stop appearing.
- Shut the engine off and let it cool completely before removing the funnel.
Step 13: Close the System and Reinstall the Cover
- Top off the radiator with Honda Type 2 coolant after the engine is completely cold.
- Install the radiator cap firmly by hand.
- Adjust the reservoir level to the MAX line.
- Use the 10mm socket and ratchet to reinstall the lower-cover bolts snugly.
- Use the plastic trim-clip removal tool by hand to reinstall the lower-cover clips.
- Use the 2-ton floor jack to raise your CR-V, remove the jack stands and lower it carefully.
✅ After Repair
- 🔍 Start the engine and inspect the thermostat cover, lower hose and radiator drain valve for leaks.
- 🌡️ Confirm that the temperature gauge remains in its normal range and does not climb toward hot.
- 🔥 Verify that the cabin heater produces steady hot air. Heat that repeatedly turns cold can indicate trapped air.
- 🧊 Let the engine cool completely, then recheck the radiator and reservoir levels. Never open the cap while hot.
- 🚗 Take a short test drive while monitoring the temperature gauge, then inspect again for leaks.
- 📅 Check the reservoir level each morning for the next three days and add only Honda Type 2 coolant if needed.
- 🛑 Stop the engine immediately if it overheats, coolant leaks heavily or the heater suddenly blows cold.
💰 DIY vs Shop Cost
Shop Cost: ₹9,000-₹16,000 (parts + labor)
DIY Cost: ₹3,500-₹7,000 (parts only)
You Save: ₹5,500-₹9,000 by doing it yourself!
Local labor rates vary. This repair takes a shop approximately 1.5-2.0 hours.
🎯 Ready to get started?
HowToo makes it easy: same-day/2-day shipping on every part, plus all the tools and specialty tools you need! Check out the parts and tools sections below to add everything to your cart.