

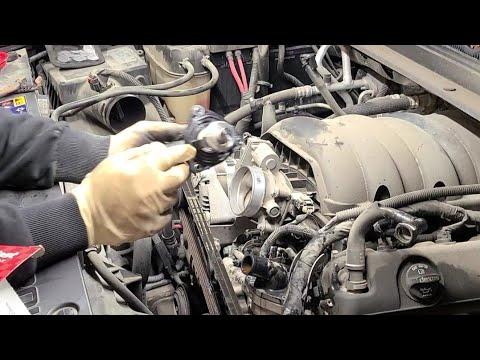





How to Replace the Thermostat on a 2014-2020 Chevrolet Tahoe (Engine: V8 5.3L)
Step-by-step DIY guide with tools, parts, torque specs, coolant bleeding, and safety tips for 2014, 2015, 2016, 2017, 2018, 2019, 2020
How to Replace the Thermostat on a 2014-2020 Chevrolet Tahoe (Engine: V8 5.3L)
Step-by-step DIY guide with tools, parts, torque specs, coolant bleeding, and safety tips for 2014, 2015, 2016, 2017, 2018, 2019, 2020


🔧 Tahoe - Thermostat Replacement
The thermostat on your Tahoe is mounted in the coolant inlet housing at the front-lower portion of the engine, where the lower radiator hose connects to the water pump. Replacement requires draining some coolant, removing the inlet housing, installing the new thermostat assembly, and carefully bleeding air from the cooling system.
Difficulty Level: Intermediate | Estimated Time: 1.5-2.5 hours
⚠️ Safety & Precautions
- ⚠️ Work only when the engine is completely cold. Hot coolant can cause severe burns.
- ⚠️ Never remove the coolant surge-tank cap while the cooling system is hot or pressurized.
- ⚠️ Coolant is poisonous. Keep it away from children and animals, and clean spills immediately.
- ⚠️ Support the Tahoe with jack stands before working underneath it. Never rely only on a floor jack.
- ⚠️ Keep coolant off belts, electrical connectors, and painted surfaces.
- ⚠️ The thermostat housing seals directly to the water pump. Do not pry against or scratch its sealing surface.
- The battery does not need to be disconnected for this repair.
🔧 Required Tools
You'll need the following tools for this repair:
- 8mm socket
- 10mm socket
- 15mm socket
- 3/8-inch drive ratchet
- 3/8-inch drive 6-inch extension
- 3/8-inch drive torque wrench rated 5-80 ft-lbs
- Flat-tip screwdriver
- Hose-clamp pliers (specialty)
- Plastic trim-clip removal tool
- Coolant drain pan rated 20-quart minimum
- Spill-free coolant funnel (specialty)
- Floor jack rated 3-ton minimum
- Jack stands rated 3-ton minimum
- Wheel chocks
- Nitrile gloves
- Safety glasses
- Shop towels
🔩 Required Parts
HowToo sells all the parts you need for this repair:
- Engine coolant thermostat with housing and seal - Qty: 1
- DEX-COOL-compatible 50/50 premixed coolant - Qty: 2 gallons
Use only coolant meeting the GM DEX-COOL specification. The complete cooling system holds more than a partial thermostat drain, so the actual refill amount will depend on how much coolant is recovered.
📋 Before You Begin
- Park the Tahoe on firm, level ground, shift into Park, apply the parking brake, and switch off the engine.
- Allow the engine to cool completely, preferably for several hours.
- Place wheel chocks behind the rear wheels.
- Raise the front with a 3-ton floor jack at an approved frame lifting point, then place 3-ton jack stands beneath the front frame rails.
- Set the climate controls to their normal settings. No infotainment service mode or scan-tool command is required.
- The spring clamp on the radiator hose is a reusable constant-tension clamp. Hose-clamp pliers safely compress and hold this type of clamp open.
🔨 Step-by-Step Instructions
Follow these steps in order:
Step 1: Release Residual Cooling-System Pressure
- Put on safety glasses and nitrile gloves.
- Verify that the upper radiator hose feels cold and is not firm from pressure.
- Cover the surge-tank cap with a shop towel. Turn it slowly counterclockwise by hand, pause if pressure escapes, and then remove it.
Step 2: Remove the Lower Shield
- Place the 20-quart drain pan beneath the front of the engine.
- Use a 15mm socket and 3/8-inch drive ratchet to remove any bolts securing the lower splash shield.
- Use a plastic trim-clip removal tool to release any push clips, then lower the shield.
- Keep the fasteners arranged in their original positions.
Step 3: Drain Enough Coolant
- Position the drain pan below the lower radiator-hose connection.
- Use hose-clamp pliers to compress the lower-hose spring clamp. Slide the clamp several inches back on the hose.
- Twist the hose gently by hand to break its seal, then pull it off slowly and direct the coolant into the pan.
- Once coolant stops flowing, temporarily reinstall the hose so it does not continue dripping.
- Do not use excessive force on plastic fittings.
Step 4: Improve Access from Above
- Use an 8mm socket and 3/8-inch drive ratchet to loosen the air-intake duct clamps if the duct limits access.
- Use a flat-tip screwdriver to release any duct-retaining clip carefully.
- Disconnect only the electrical connector or breather tube attached directly to the duct, then lift the duct away.
- Do not pull on wiring. Press each connector lock before removal.
Step 5: Disconnect the Thermostat Hose
- Locate the thermostat housing at the front-lower side of the water pump, where the lower radiator hose attaches.
- Move the drain pan directly beneath the housing.
- Use hose-clamp pliers to compress the spring clamp and slide it back along the hose.
- Twist and pull the hose off the thermostat housing by hand. Catch the remaining coolant in the drain pan.
- If stuck, use a flat-tip screwdriver only to lift the hose edge slightly. Do not gouge the hose or housing.
Step 6: Remove the Thermostat Assembly
- Use a 10mm socket, 6-inch extension, and 3/8-inch drive ratchet to remove the thermostat housing bolts evenly.
- Support the housing by hand while removing the final bolt.
- Pull the thermostat and housing assembly straight away from the water pump.
- Remove the old rubber seal if it remains in the water-pump opening.
- Note the original thermostat orientation before discarding it.
Step 7: Clean and Inspect the Sealing Area
- Use shop towels to wipe the water-pump sealing surface clean.
- Do not use a metal scraper, abrasive disc, or power tool on the sealing surface.
- Inspect the hose for swelling, cracking, or oil-softened rubber. Replace a damaged hose before reassembly.
- Confirm that the new thermostat assembly has a new undamaged seal installed.
- Do not add RTV silicone unless the replacement-part instructions specifically require it.
Step 8: Install the New Thermostat
- Position the new thermostat assembly in the same orientation as the original.
- Start all housing bolts by hand to prevent cross-threading.
- Use a 10mm socket and 3/8-inch drive torque wrench to tighten the bolts evenly in alternating stages.
- Torque the thermostat housing bolts to 10 Nm (89 in-lbs).
- Do not overtighten the bolts; the housing and water-pump threads can be damaged.
Step 9: Reconnect the Coolant Hoses
- Push the thermostat hose fully onto its fitting by hand until it reaches the molded stop.
- Use hose-clamp pliers to return the spring clamp to its original position behind the fitting bead.
- Verify that the lower radiator hose is fully seated and move its clamp back into its original position with hose-clamp pliers.
- Make sure neither hose is twisted or contacting a belt or pulley.
Step 10: Reinstall the Air-Intake Duct
- Set the air-intake duct into place and reconnect any electrical connector and breather tube by hand.
- Use an 8mm socket and 3/8-inch drive ratchet to tighten the duct clamps until snug.
- Do not overtighten the clamps against the plastic duct.
Step 11: Refill the Cooling System
- Install the spill-free coolant funnel on the surge tank.
- Slowly add DEX-COOL-compatible 50/50 premixed coolant until the cold level reaches the indicated mark.
- Pause frequently so trapped air can rise through the funnel.
- Gently squeeze the upper radiator hose by hand several times while the engine remains cold.
- Do not mix conventional green coolant with DEX-COOL coolant.
Step 12: Bleed Air from the System
- Keep the spill-free coolant funnel attached and ensure all tools are clear of the fan, belts, and pulleys.
- Start the engine and let it idle while watching the coolant level.
- Add 50/50 premixed coolant with the funnel as the level drops. Do not overfill.
- Allow the engine to warm until the upper radiator hose becomes hot, indicating coolant is circulating through the thermostat.
- Watch the temperature gauge continuously. Shut the engine off immediately if the gauge rises abnormally or coolant begins forcefully surging from the funnel.
- When air bubbles stop and the level stabilizes, switch off the engine and allow it to cool completely.
- Remove the funnel, adjust the cold coolant level to the surge-tank mark, and reinstall the cap firmly by hand.
Step 13: Reinstall the Lower Shield
- Use a plastic trim-clip removal tool by hand to reinstall all reusable push clips.
- Use a 15mm socket and 3/8-inch drive ratchet to reinstall the lower-shield bolts in their original locations.
- Tighten the shield fasteners until secure without crushing the plastic shield.
- Remove the jack stands and lower the Tahoe slowly with the 3-ton floor jack.
✅ After Repair
- Inspect the thermostat housing and both disturbed hose connections for leaks while the engine idles.
- Confirm that the cabin heater produces steady warm air and the temperature gauge remains at its normal operating position.
- Take a short test drive while monitoring the temperature gauge. Stop immediately if the engine begins overheating.
- After the engine cools completely, recheck the surge-tank level and add DEX-COOL-compatible 50/50 premixed coolant if needed.
- Recheck for dried orange residue around the housing and hose connections after the next few drives.
- Transfer used coolant into a sealed container and take it to an approved automotive-fluid recycling facility. Never pour it onto the ground or into a drain.
💰 DIY vs Shop Cost
Shop Cost: ₹12,000-₹24,000 (parts + labor)
DIY Cost: ₹4,000-₹9,000 (parts only)
You Save: ₹8,000-₹15,000 by doing it yourself!
Local labor rates and imported-part pricing vary. This repair takes a shop approximately 1.5-2.0 hours.
🎯 Ready to get started?
HowToo makes it easy: same-day/2-day shipping on every part, plus all the tools and specialty tools you need! Check out the parts and tools sections below to add everything to your cart.