

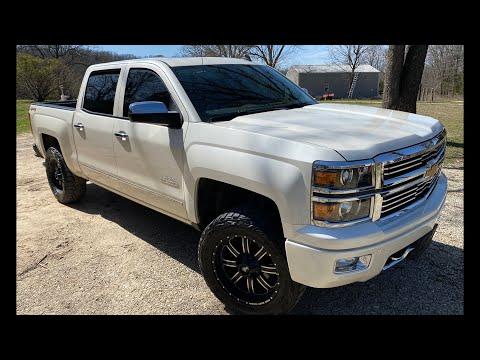






How to Replace the Thermostat on a 2014-2019 GMC Sierra 1500 6.2L V8 (Engine: V8 6.2L)
Step-by-step instructions with required tools, parts, torque specs, coolant bleeding, and safety tips for 2014, 2015, 2016, 2017, 2018, 2019
How to Replace the Thermostat on a 2014-2019 GMC Sierra 1500 6.2L V8 (Engine: V8 6.2L)
Step-by-step instructions with required tools, parts, torque specs, coolant bleeding, and safety tips for 2014, 2015, 2016, 2017, 2018, 2019


🔧 Sierra 1500 - Thermostat Replacement
The thermostat on your Sierra 1500 is contained in a housing at the front of the engine near the water pump. Replacement requires draining some coolant, disconnecting the lower radiator hose, installing the new thermostat housing assembly, and refilling the GM cooling system carefully to remove trapped air.
Difficulty Level: Intermediate | Estimated Time: 1.5-2.5 hours
Assumption: These instructions apply to the stock 6.2L V8 cooling system.
⚠️ Safety & Precautions
- ⚠️ Work only when the engine is completely cold. Hot coolant can cause severe burns.
- ⚠️ Never remove the coolant surge-tank cap from a hot or pressurized system.
- ⚠️ Coolant is poisonous. Keep it away from children and animals, and clean spills immediately.
- ⚠️ Support your Sierra 1500 with jack stands before working underneath it. Never rely on a floor jack alone.
- ⚠️ Disconnecting the battery is not required, but keep the ignition switched off throughout the repair.
- ⚠️ Collect old coolant in a sealed container and take it to an authorized recycling facility.
🔧 Required Tools
You'll need the following tools for this repair:
- 10mm socket
- 13mm socket
- 3/8-inch drive ratchet
- 3/8-inch drive 6-inch extension
- 3/8-inch drive torque wrench rated 5-60 Nm
- Flat-blade screwdriver
- Hose-clamp pliers (specialty)
- Plastic gasket scraper
- Coolant drain pan rated 20-quart minimum
- Spill-free coolant funnel (specialty)
- Floor jack rated 3-ton minimum
- Jack stands rated 3-ton minimum
- Wheel chocks
- Nitrile gloves
- Safety glasses
- Shop towels
🔩 Required Parts
HowToo sells all the parts you need for this repair:
- Thermostat and housing assembly with seal - Qty: 1
- GM-approved DEX-COOL 50/50 premixed coolant - Qty: 2 gallons
- Lower radiator hose retaining clamp - Qty: 1, if damaged or corroded
📋 Before You Begin
- 📍 Park your Sierra 1500 on level, solid ground and let the engine cool completely.
- 🛑 Apply the parking brake, place the transmission in Park, and place wheel chocks behind both rear wheels.
- 🧊 Verify that the upper radiator hose feels cool and soft before opening the cooling system.
- 🧪 Use only orange GM-approved DEX-COOL coolant. Do not mix it with conventional green coolant.
- 📱 No infotainment service mode, scan-tool command, battery registration, or coding is required.
🔨 Step-by-Step Instructions
Follow these steps in order:
Step 1: Relieve Cooling-System Pressure
- Put on safety glasses and nitrile gloves.
- With the engine completely cold, cover the coolant surge-tank cap with a shop towel.
- Turn the cap slowly by hand to the first stop. Pause if you hear pressure escaping, then remove it fully.
Step 2: Raise and Support the Truck
- Use the 3-ton floor jack at the front frame lifting point to raise your Sierra 1500.
- Position the 3-ton jack stands beneath solid frame rails, then lower the truck onto them.
- Gently push the truck to verify that it is stable before going underneath.
Step 3: Remove the Lower Shield
- Use the 13mm socket, 6-inch extension, and 3/8-inch ratchet to remove the front lower splash-shield bolts, if equipped.
- Support the shield with one hand while removing the final fastener, then lower it carefully.
- Keep the bolts arranged in their original positions.
Step 4: Drain the Coolant
- Place the 20-quart drain pan beneath the lower radiator area.
- If the radiator drain fitting is accessible, turn it slowly with the flat-blade screwdriver and drain enough coolant to lower the level below the thermostat.
- If no usable drain fitting is present, position the pan under the lower radiator hose and use the hose-clamp pliers to move its spring clamp back from the connection.
- Twist the hose gently by hand to break it free, then pull it off slowly and direct the coolant into the pan.
- Do not pry against a plastic coolant fitting.
- Open the connection slowly to control splashing.
Step 5: Gain Access to the Thermostat Housing
- Use the flat-blade screwdriver to loosen the air-intake duct clamps.
- Release the duct clips by hand, then remove the duct between the air-filter housing and throttle body.
- Move only the wiring retainers or hoses necessary to expose the thermostat housing at the front of the engine.
- A thermostat housing is the coolant outlet that holds the temperature-control valve.
Step 6: Disconnect the Lower Radiator Hose
- Place the drain pan directly below the thermostat housing.
- Use the hose-clamp pliers to compress the spring clamp and slide it rearward on the hose.
- Twist the hose by hand, then pull it straight off the housing.
- Catch the remaining coolant in the drain pan.
- Inspect the hose for swelling, cracks, oil contamination, or a damaged sealing surface.
Step 7: Remove the Thermostat Assembly
- Use the 10mm socket, 6-inch extension, and 3/8-inch ratchet to loosen the thermostat-housing bolts evenly.
- Remove the bolts and pull the thermostat and housing assembly straight away from the water-pump connection.
- Note the housing orientation before removal so the replacement is installed the same way.
- Expect additional coolant to drain when the housing is removed.
Step 8: Clean and Inspect the Sealing Surface
- Use shop towels to plug the open coolant passage lightly so debris cannot enter.
- Use the plastic gasket scraper to remove seal residue without scratching the aluminum surface.
- Remove the shop towel and wipe the surface clean and dry.
- Do not use powered abrasive discs, sandpaper, or metal scrapers.
Step 9: Install the New Thermostat Assembly
- Confirm that the new seal is fully seated in the replacement thermostat housing.
- Do not apply RTV silicone unless specifically supplied by the thermostat manufacturer. The formed seal installs clean and dry.
- Position the thermostat assembly in the same orientation as the original.
- Start both housing bolts by hand to prevent crossed threads.
- Use the 10mm socket and torque wrench to tighten the bolts evenly to 10 Nm (89 in-lbs).
- Do not overtighten the bolts; the aluminum threads and housing can be damaged.
Step 10: Reconnect the Radiator Hose
- Push the lower radiator hose fully onto the thermostat-housing neck by hand.
- Use the hose-clamp pliers to return the spring clamp to its original position behind the raised bead.
- Verify that the clamp sits squarely around the hose.
- If the radiator drain fitting was opened, close it gently with the flat-blade screwdriver. Do not overtighten a plastic drain fitting.
Step 11: Reinstall the Air-Intake Duct
- Install the air-intake duct fully onto the throttle body and air-filter housing.
- Reconnect every clip and breather connection by hand.
- Use the flat-blade screwdriver to tighten the duct clamps until secure without crushing the duct.
- Check that no tools or shop towels remain in the engine compartment.
Step 12: Refill and Bleed the Cooling System
- Install the spill-free coolant funnel onto the surge tank.
- Slowly add GM-approved DEX-COOL 50/50 premixed coolant until the cold-fill mark is reached.
- Leave the surge-tank cap off and start the engine.
- Set the cabin temperature to full hot and the blower to low.
- Allow the engine to idle while watching the coolant level and temperature gauge.
- Add coolant through the funnel as the level falls. Do not allow the surge tank to run dry.
- Gently squeeze the upper radiator hose by hand only while it remains safe to touch.
- When the upper hose becomes hot and cabin heat is steady, the thermostat has opened.
- Shut the engine off if the temperature gauge rises abnormally or coolant begins surging forcefully from the tank.
- Once air bubbles stop, switch off the engine, remove the funnel, set the cold level correctly, and install the cap securely.
Step 13: Check for Leaks and Reinstall the Shield
- Use a flashlight and shop towels to inspect the thermostat housing, hose connection, radiator drain, and surge tank for leaks.
- Use the 13mm socket, extension, and ratchet to reinstall the lower splash shield, if equipped.
- Tighten the shield fasteners snugly in their original positions; do not overtighten them into plastic retainers.
- Use the floor jack to raise your Sierra 1500 slightly, remove the jack stands, and lower it to the ground.
✅ After Repair
- ✅ Let the engine cool completely, then verify that the coolant remains at the surge tank's cold-fill mark.
- 🔍 Inspect beneath your Sierra 1500 and around the thermostat housing for fresh coolant.
- 🌡️ Take a short drive while monitoring the temperature gauge. It should rise normally and remain steady.
- 🔥 Confirm that the cabin heater produces consistent heat. Intermittent heat can indicate trapped air.
- 🧊 Recheck the coolant level only after the engine is completely cold, and top up with DEX-COOL 50/50 if necessary.
- ♻️ Transfer drained coolant into a sealed container and deliver it to an authorized recycling or hazardous-waste facility.
- 🚫 If overheating continues, stop driving. Possible causes include trapped air, a failing water pump, restricted radiator, cooling-fan fault, or internal engine leakage.
💰 DIY vs Shop Cost
Shop Cost: ₹22,000-₹42,000, approximately $260-$500 (parts + labor)
DIY Cost: ₹8,000-₹18,000, approximately $95-$215 (parts only)
You Save: ₹14,000-₹24,000, approximately $165-$285 by doing it yourself!
Local labor and imported-parts pricing vary. This repair takes a shop approximately 1.5-2.0 hours.
🎯 Ready to get started?
HowToo makes it easy: same-day/2-day shipping on every part, plus all the tools and specialty tools you need! Check out the parts and tools sections below to add everything to your cart.