

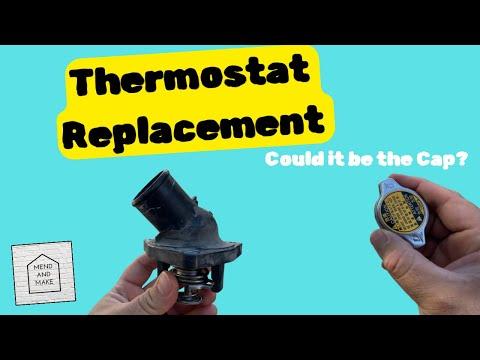






How to Replace the Thermostat on a 2007-2021 Toyota Tundra 5.7L V8 (Trim: Limited)
Step-by-step instructions with tools, parts, torque specs, coolant bleeding, and safety tips for 2007, 2008, 2009, 2010, 2011, 2012, 2013
How to Replace the Thermostat on a 2007-2021 Toyota Tundra 5.7L V8 (Trim: Limited)
Step-by-step instructions with tools, parts, torque specs, coolant bleeding, and safety tips for 2007, 2008, 2009, 2010, 2011, 2012, 2013


🔧 Tundra - Thermostat Replacement
The thermostat on your Tundra is installed in the water inlet at the lower front of the 5.7L V8. Replacing it requires draining part of the cooling system, removing the lower radiator hose and water inlet, then carefully refilling and bleeding the system.
Difficulty Level: Intermediate | Estimated Time: 2-3 hours
Assumption: This procedure applies to the stock U.S.-market 5.7L V8 cooling system; underbody shield hardware may vary.
⚠️ Safety & Precautions
- ⚠️ Work only when the engine and radiator are completely cold. Hot coolant can cause severe burns.
- 🧤 Toyota Super Long Life Coolant is poisonous. Capture it in a clean drain pan and keep it away from children and animals.
- 🚫 Never open the coolant reservoir cap while the cooling system is hot or pressurized.
- 🛞 Support your Tundra with rated jack stands if it must be raised. Never work beneath a vehicle supported only by a jack.
- 🔋 Battery disconnection is not required for this repair.
- ♻️ Do not mix Toyota pink coolant with universal green coolant or incompatible coolant types.
🔧 Required Tools
You'll need the following tools for this repair:
- 3-ton floor jack
- 3-ton jack stands
- Wheel chocks
- 10mm socket
- 12mm socket
- 3/8-inch drive ratchet
- 3/8-inch drive 6-inch extension
- Torque wrench rated 5-30 Nm
- Hose-clamp pliers (specialty)
- Plastic hose-pick tool (specialty)
- Cooling-system funnel kit (specialty)
- Cooling-system pressure tester rated 20 psi (specialty)
- 4-gallon coolant drain pan
- Plastic trim-clip removal tool
- Plastic scraper
- Shop towels
- Nitrile gloves
- Safety glasses
🔩 Required Parts
HowToo sells all the parts you need for this repair:
- Engine coolant thermostat - Qty: 1
- Thermostat rubber gasket - Qty: 1
- Toyota Super Long Life Coolant, pink, 50/50 premixed - Qty: 3 gallons
📋 Before You Begin
- 🅿️ Park your Tundra on level ground, shift into Park, apply the parking brake, and let the engine cool completely.
- 🛞 Place wheel chocks behind both rear wheels before raising the front.
- 🧊 Verify the upper radiator hose feels cold and soft before opening the coolant reservoir.
- 🧹 Clean around the water inlet so dirt cannot enter the cooling system.
- 📱 No infotainment setting, scan-tool command, battery registration, or coding is required.
🔨 Step-by-Step Instructions
Follow these steps in order:
Step 1: Raise and support the front
- Place the 3-ton floor jack beneath the front-center frame crossmember and raise your Tundra only high enough to work safely underneath.
- Position the 3-ton jack stands beneath the left and right frame rails. Lower the truck onto them and verify it is stable.
- Keep the wheel chocks firmly against the rear tires.
Step 2: Remove the front underbody shield
- Use the 12mm socket, 3/8-inch drive ratchet, and 6-inch extension to remove the shield bolts.
- Use the plastic trim-clip removal tool for any plastic retainers.
- Support the shield with one hand while removing its final fastener.
- Arrange fasteners in their installed positions.
Step 3: Relieve pressure and drain the coolant
- Put on the safety glasses and nitrile gloves.
- Cover the coolant reservoir cap with a shop towel. Turn it slowly by hand only after confirming the engine is cold.
- Place the 4-gallon coolant drain pan below the radiator drain cock.
- Open the drain cock by hand and allow the coolant to drain. Do not use pliers because the plastic drain cock can break.
- Close the drain cock by hand until seated. Do not overtighten it.
Step 4: Disconnect the lower radiator hose
- Locate the lower radiator hose connection at the engine’s water inlet.
- Use the hose-clamp pliers to compress the spring clamp and slide it rearward on the hose.
- Use the plastic hose-pick tool to gently separate the hose from the inlet. A hose pick is a rounded tool that loosens a stuck hose without cutting it.
- Direct the remaining coolant into the 4-gallon coolant drain pan.
- Do not pry against or scratch the aluminum sealing neck.
Step 5: Remove the water inlet
- Use the 10mm socket, 3/8-inch drive ratchet, and 6-inch extension to remove the water-inlet fasteners evenly.
- Pull the inlet straight away from the engine. Do not force a metal screwdriver between the sealing surfaces.
- Note the thermostat’s direction and the position of its jiggle valve before removal. The jiggle valve is the small loose pin in the thermostat flange that allows trapped air to escape.
- Remove the old thermostat and rubber gasket by hand.
Step 6: Clean and inspect the sealing surfaces
- Use the plastic scraper and shop towels to remove coolant residue from the water inlet and engine sealing surfaces.
- Inspect the inlet for cracks, corrosion, or a damaged hose neck.
- Do not use abrasive discs or metal scrapers on the aluminum surfaces.
- Keep debris and old gasket material out of the coolant passage.
Step 7: Install the new thermostat
- Fit the new thermostat rubber gasket evenly around the new thermostat’s outer edge. Do not apply RTV silicone or gasket sealer.
- Install the thermostat with its jiggle valve at the top, within approximately 10 degrees of the 12-o’clock position.
- Hold the thermostat fully seated while positioning the water inlet by hand.
- Correct jiggle-valve position improves air bleeding.
Step 8: Reinstall the water inlet
- Start all water-inlet fasteners by hand to prevent cross-threading.
- Use the 10mm socket and torque wrench rated 5-30 Nm to tighten the fasteners evenly in stages.
- Torque to 10 Nm (89 in-lbs).
- Do not overtighten the fasteners; the aluminum housing and threads can be damaged.
Step 9: Reconnect the lower radiator hose
- Push the lower radiator hose fully onto the water-inlet neck by hand.
- Use the hose-clamp pliers to return the spring clamp to its original position behind the raised bead on the inlet.
- Use a shop towel to dry the connection so fresh leakage will be easy to identify.
Step 10: Refill the cooling system
- Install the cooling-system funnel kit at the coolant reservoir filler opening.
- Slowly add Toyota Super Long Life Coolant, pink, 50/50 premixed until the level stabilizes.
- Gently squeeze the upper radiator hose by hand several times to help move trapped air toward the reservoir.
- Continue filling until the reservoir remains at the full mark.
- Do not dilute premixed coolant or combine it with another coolant type.
Step 11: Bleed trapped air
- Leave the cooling-system funnel kit installed and set the cabin heater controls to maximum heat with the blower on low.
- Start the engine and let it idle while monitoring the funnel and coolant level.
- Add premixed coolant through the cooling-system funnel kit whenever the level drops.
- Watch for bubbles as the thermostat opens. The upper radiator hose should gradually become hot.
- Stop the engine immediately if the temperature warning appears, the gauge rises abnormally, or coolant stops circulating.
- Once bubbles stop and the heater produces steady hot air, switch off the engine and let it cool completely.
Step 12: Set the final coolant level
- After the engine is completely cold, use the cooling-system funnel kit to adjust the reservoir to the cold full mark.
- Install the reservoir cap securely by hand.
- Use the shop towels to clean spilled coolant from the engine and surrounding parts.
Step 13: Pressure-test the repair
- Attach the cooling-system pressure tester rated 20 psi using the correct reservoir adapter.
- Pump the tester only to the pressure printed on the coolant cap. Do not exceed the cap rating.
- Inspect the water inlet, lower hose, drain cock, and surrounding connections for leakage.
- Release tester pressure according to the tool instructions before removing the adapter.
Step 14: Reinstall the underbody shield
- Raise the shield into position and start every fastener by hand.
- Use the plastic trim-clip removal tool to reinstall reusable plastic retainers.
- Use the 12mm socket and 3/8-inch drive ratchet to snug the shield bolts securely without crushing the shield.
Step 15: Lower the vehicle
- Use the 3-ton floor jack to lift your Tundra slightly off the stands.
- Remove the 3-ton jack stands, then lower the truck slowly to the ground.
- Remove the wheel chocks only after the repair and leak inspection are complete.
✅ After Repair
- 🌡️ Let the engine reach normal operating temperature while watching the temperature gauge. It should remain steady.
- 🔥 Confirm the cabin heater produces consistent hot air. Intermittent heat can indicate trapped air or low coolant.
- 🔍 Inspect around the thermostat housing, lower radiator hose, and radiator drain for leaks.
- 🧊 Allow the engine to cool completely, then recheck the reservoir. Add only matching Toyota pink 50/50 premixed coolant if needed.
- 🚗 Take a short test drive, allow the engine to cool again, and perform one final coolant-level and leak check.
- ♻️ Take used coolant to an approved recycling or hazardous-waste facility. Never pour it onto the ground or into a drain.
💰 DIY vs Shop Cost
Shop Cost: ₹24,000-₹48,000, approximately $275-$550 (parts + labor)
DIY Cost: ₹7,000-₹16,000, approximately $80-$185 (parts only)
You Save: ₹17,000-₹32,000, approximately $195-$365 by doing it yourself!
Imported-vehicle labor and parts prices in Haryana vary considerably. This repair typically takes a shop approximately 1.5-2.5 hours.
🎯 Ready to get started?
HowToo makes it easy: same-day/2-day shipping on every part, plus all the tools and specialty tools you need! Check out the parts and tools sections below to add everything to your cart.