




How to Replace the Starter Motor on a 2017-2024 Chevrolet Malibu 1.5L Turbo (Engine: Inline 4 1.5L)
Step-by-step DIY instructions with required tools, parts, torque specs, and safety tips for 2017, 2018, 2019, 2020, 2021, 2022, 2023, 2024
How to Replace the Starter Motor on a 2017-2024 Chevrolet Malibu 1.5L Turbo (Engine: Inline 4 1.5L)
Step-by-step DIY instructions with required tools, parts, torque specs, and safety tips for 2017, 2018, 2019, 2020, 2021, 2022, 2023, 2024


🔧 Malibu - Starter Motor Replacement
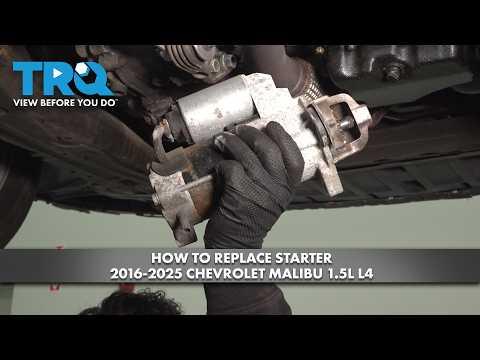
The starter motor is mounted low on the engine at the transmission bellhousing. Replacement requires working underneath your Malibu, disconnecting its electrical connections, and removing the two starter mounting bolts.
Difficulty Level: Intermediate | Estimated Time: 1.5-2.5 hours
⚠️ Safety & Precautions
- Disconnect the negative battery cable before touching the starter. Its main power cable remains live whenever the battery is connected.
- Allow the engine and exhaust system to cool completely.
- Support your Malibu with jack stands on solid, level ground. Never work beneath a vehicle supported only by a floor jack.
- Wear safety glasses because dirt can fall while working underneath.
- Keep metal tools away from the positive battery terminal and starter power terminal.
🔧 Required Tools
You'll need the following tools for this repair:
- 10mm socket
- 13mm socket
- 15mm socket
- 7mm socket
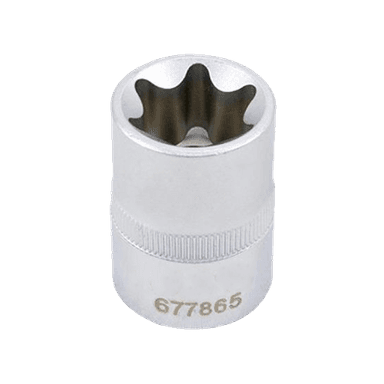
- E-Torx socket set, E10-E14
- 3/8-inch-drive ratchet
- 3/8-inch-drive 6-inch extension
- 3/8-inch-drive universal joint
- 3/8-inch-drive torque wrench, 5-80 Nm range
- Trim-clip removal tool
- Flat-blade screwdriver, 6-inch
- Floor jack rated 2-ton minimum
- Jack stands rated 2-ton minimum
- Wheel chocks
- Mechanic’s work light
- Safety glasses
- Mechanic’s gloves
🔩 Required Parts
HowToo sells all the parts you need for this repair:
- Starter motor for 1.5L turbo engine - Qty: 1
- Starter mounting bolts - Qty: 2, if damaged or supplied with replacement starter
- Underbody shield retainers - Qty: As needed
📋 Before You Begin
- Park your Malibu on firm, level ground. Select Park, apply the parking brake, and switch the ignition off.
- Keep the key fob away from the vehicle so the electrical system cannot wake unexpectedly.
- Open the hood before disconnecting the battery. No infotainment service mode or scan-tool command is required.
- Wait at least two minutes after switching off the ignition before disconnecting the battery.
- Place wheel chocks securely behind both rear wheels.
🔨 Step-by-Step Instructions
Follow these steps in order:
Step 1: Disconnect the Battery
- Use a 10mm socket and 3/8-inch-drive ratchet to loosen the negative battery-terminal clamp.
- Lift the negative cable from the battery post and position it where it cannot spring back into contact.
- Do not disconnect the positive terminal.
Step 2: Raise and Support the Front
- Use the floor jack at the designated front-center lifting point.
- Position both jack stands under the reinforced front side support points, then lower your Malibu onto them.
- Gently push the vehicle to confirm it is stable before going underneath.
- Keep the floor jack nearby as a backup.
Step 3: Remove the Lower Shield
- Use a 7mm socket and 3/8-inch-drive ratchet to remove the screws from the lower engine splash shield.
- Use the trim-clip removal tool to release any plastic push retainers.
- Support the shield with one hand as the final fastener is removed, then lower it out of the way.
Step 4: Locate the Starter
- Use the mechanic’s work light to locate the starter where the engine joins the transmission.
- The starter is a cylindrical electric motor with one thick battery cable and one smaller control wire attached to its solenoid. The solenoid is the smaller cylinder mounted on the starter.
- Note the routing and orientation of both wires before removing them.
Step 5: Disconnect the Starter Wiring
- Use a flat-blade screwdriver to release any protective cap over the large starter terminal without cracking it.
- Use a 13mm socket, 3/8-inch-drive extension, and ratchet to remove the nut securing the large battery cable.
- Use the correctly fitting small socket from the listed set to remove the control-wire retaining nut, or release its locking tab if your replacement configuration uses a plug connector.
- Move both wires aside without pulling on their insulation.
- Pull terminals, never the wires themselves.
Step 6: Remove the Starter Motor
- Support the starter with one hand. It is heavier than it appears.
- Use the matching 15mm or E-Torx socket, 6-inch extension, universal joint, and 3/8-inch-drive ratchet to remove the two starter mounting bolts.
- Keep track of each bolt’s original position if their lengths differ.
- Lower the starter carefully through the available space.
Step 7: Compare the Starter Motors
- Place the old and new starters side by side.
- Confirm that the mounting flange, pinion gear, electrical terminals, and locating surfaces match.
- Do not install the replacement if its terminals or mounting pattern differ.
Step 8: Install the New Starter
- Raise the new starter into position and seat it flat against the transmission bellhousing.
- Start both mounting bolts by hand for several turns. This prevents cross-threading.
- Use the appropriate 15mm or E-Torx socket, extension, and ratchet to seat the bolts evenly.
- Use the torque wrench with the same socket to tighten both starter mounting bolts to 50 Nm (37 ft-lbs).
- Do not place washers or shims between the starter and bellhousing unless they were installed from the factory.
Step 9: Reconnect the Starter Wiring
- Place the large battery-cable eyelet squarely over the large solenoid terminal.
- Use the 13mm socket and torque wrench to tighten the large terminal nut to 15 Nm (11 ft-lbs).
- Reconnect the small control terminal. If retained by a nut, use the correctly fitting small socket and torque wrench to tighten it to 5 Nm (44 in-lbs).
- If the control wire uses a plug, press it into place until its lock clicks.
- Reinstall the protective terminal cap by hand.
- Make sure neither wire touches the exhaust, a sharp edge, or a moving component.
Step 10: Reinstall the Lower Shield
- Raise the lower splash shield into its original position.
- Install the push retainers by hand and seat them with the trim-clip removal tool.
- Use the 7mm socket and ratchet to reinstall the shield screws until snug. Do not overtighten the plastic retainers.
Step 11: Lower the Vehicle
- Use the floor jack to lift your Malibu slightly off the jack stands.
- Remove both jack stands, then lower the vehicle slowly to the ground.
- Remove the floor jack and rear wheel chocks.
Step 12: Reconnect the Battery
- Place the negative battery clamp fully onto the negative post.
- Use the 10mm socket and torque wrench to tighten the clamp nut to 6 Nm (53 in-lbs).
- Do not overtighten the clamp or twist the battery post.
✅ After Repair
- Switch the ignition on for approximately 10 seconds, then start the engine.
- Listen for prompt, smooth cranking. Grinding, clicking, or continued starter operation means the engine should be switched off immediately.
- Start the engine two or three times to verify consistent operation.
- Check that the battery warning light goes out and no warning messages remain displayed.
- The clock and saved settings may need to be restored after battery disconnection.
- Battery registration, starter programming, and scan-tool setup are not normally required for this replacement.
💰 DIY vs Shop Cost
Shop Cost: ₹18,000-₹35,000 (parts + labor)
DIY Cost: ₹9,000-₹22,000 (parts only)
You Save: ₹7,000-₹15,000 by doing it yourself!
Local labor and imported-part prices vary. This repair takes a shop approximately 1.0-1.8 hours.
🎯 Ready to get started?
HowToo makes it easy: same-day/2-day shipping on every part, plus all the tools and specialty tools you need! Check out the parts and tools sections below to add everything to your cart.