

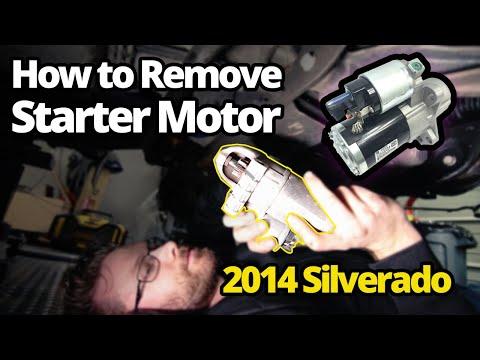







How to Replace the Starter Motor on a 2015-2020 Chevrolet Suburban 5.3L V8 (Engine: V8 5.3L)
Step-by-step DIY instructions with required tools, parts, torque specs, and safety tips for 2015, 2016, 2017, 2018, 2019, 2020
How to Replace the Starter Motor on a 2015-2020 Chevrolet Suburban 5.3L V8 (Engine: V8 5.3L)
Step-by-step DIY instructions with required tools, parts, torque specs, and safety tips for 2015, 2016, 2017, 2018, 2019, 2020


🔧 Suburban - Starter Motor Replacement
The starter motor is mounted low on the passenger side of the engine, next to the transmission bellhousing. Replacement requires working underneath your Suburban, disconnecting the high-current electrical cables, and removing the starter mounting bolts.
Difficulty Level: Intermediate | Estimated Time: 2-3 hours
⚠️ Safety & Precautions
- ⚠️ Disconnect the negative battery cable before touching the starter. Its main terminal has battery voltage at all times.
- 🛑 Never work beneath your Suburban while it is supported only by a floor jack.
- 🔥 Allow the exhaust system to cool completely before starting.
- 🔑 Keep the ignition off and the key away from the vehicle while working.
- 🧤 Wear safety glasses and gloves because dirt and rust can fall while you work.
- ⚡ Prevent tools from touching both a starter terminal and metal engine component simultaneously.
🔧 Required Tools
You'll need the following tools for this repair:
- 3-ton hydraulic floor jack
- 3-ton jack stands
- Heavy-duty wheel chocks
- 10mm socket
- 13mm deep socket
- 15mm socket
- 3/8-inch-drive ratchet
- 3/8-inch-drive 3-inch extension
- 3/8-inch-drive 6-inch extension
- 3/8-inch-drive torque wrench rated 5-80 Nm
- Small flat-blade screwdriver
- Plastic terminal cleaning brush
- Mechanic’s creeper
- LED work light
- Mechanic’s gloves
- Safety glasses
🔩 Required Parts
HowToo sells all the parts you need for this repair:
- Starter motor for 5.3L V8 engine - Qty: 1
- Starter terminal protective boot - Qty: 1 if damaged
📋 Before You Begin
- 🅿️ Park your Suburban on firm, level ground. Shift into Park and apply the parking brake.
- 🧱 Place heavy-duty wheel chocks firmly against both sides of a rear tire.
- 🌡️ Let the engine and exhaust cool completely.
- 🔋 Open the hood before disconnecting the battery. No infotainment service mode or scan-tool command is required.
- 📝 Photograph the starter wiring before removal so each connection returns to the correct terminal.
🔨 Step-by-Step Instructions
Follow these steps in order:
Step 1: Disconnect the Battery
- Use a 10mm socket and 3/8-inch-drive ratchet to loosen the negative battery-cable clamp.
- Lift the negative cable from the battery post and position it where it cannot spring back into contact.
- Wait at least two minutes before working on the starter wiring.
- Cover the terminal with a clean glove.
Step 2: Raise and Support the Vehicle
- Use the 3-ton hydraulic floor jack beneath the front frame crossmember to raise the front of your Suburban.
- Position the 3-ton jack stands beneath the reinforced frame rails on both sides.
- Lower the vehicle slowly onto the stands. Gently push the body to confirm it is stable before going underneath.
- Use the mechanic’s creeper, LED work light, safety glasses, and gloves when moving beneath the vehicle.
Step 3: Locate and Inspect the Starter
- Find the cylindrical starter at the lower passenger side of the engine, where the engine meets the transmission.
- Use the LED work light to identify the large battery cable, small control wire, heat shield, and two mounting bolts.
- Photograph the wire positions before disconnecting anything.
Step 4: Remove the Starter Heat Shield
- Use a 10mm socket, 3/8-inch-drive ratchet, and 3-inch extension to remove the heat-shield fastener if equipped.
- Move the shield aside without bending it. It protects the starter from exhaust heat and must be reinstalled.
Step 5: Disconnect the Starter Wiring
- Slide the rubber protective boot away from the large starter-solenoid terminal. The solenoid is the small cylinder attached to the starter.
- Use a 13mm deep socket and 3/8-inch-drive ratchet to remove the large battery-cable terminal nut.
- Lift the large cable terminal straight off its stud without twisting the cable.
- Use a 10mm socket to remove the small control-wire nut when a stud connection is fitted.
- If the small wire uses a locking connector, use a small flat-blade screwdriver to release its locking tab gently, then pull on the connector body—not the wire.
- Position both wires away from the starter.
Step 6: Remove the Starter Motor
- Support the starter with one hand because it will drop when the final bolt is removed.
- Use a 15mm socket, 3/8-inch-drive ratchet, and 6-inch extension to loosen the two starter mounting bolts.
- Remove the lower bolt first, then remove the upper bolt while supporting the starter.
- Lower the starter carefully and guide it around the nearby transmission and exhaust components.
- Do not pry against the aluminum engine or transmission housing.
Step 7: Compare and Prepare the New Starter
- Place the old and new starters side by side.
- Confirm the mounting flange, drive gear, electrical terminals, and locating surfaces match exactly.
- Use a plastic terminal cleaning brush to remove light corrosion from the cable terminals.
- Do not operate the loose starter with jumper cables.
Step 8: Install the New Starter
- Guide the new starter into position and seat its mounting flange flat against the engine.
- Start both mounting bolts by hand for several turns to prevent cross-threading.
- Use a 15mm socket and 3/8-inch-drive ratchet to snug both bolts evenly.
- Use the 3/8-inch-drive torque wrench and 15mm socket to tighten both starter mounting bolts to 50 Nm (37 ft-lbs).
- No starter shims are normally used on this factory installation. Reinstall only a shim that was already present.
Step 9: Reconnect the Starter Wiring
- Place the large battery-cable terminal onto the large solenoid stud. Make sure it sits flat and cannot touch the starter housing.
- Install its nut with the 13mm deep socket, then use the torque wrench to tighten it to 15 Nm (11 ft-lbs).
- Reconnect the small control wire. If it uses a nut, use the 10mm socket and tighten it to 5 Nm (44 in-lbs).
- If it uses a locking connector, push it in by hand until the lock clicks.
- Pull the protective boot completely over the large terminal.
- Check that neither cable is stretched, pinched, or touching the exhaust.
Step 10: Reinstall the Heat Shield
- Position the starter heat shield exactly as it was removed.
- Install its fastener using the 10mm socket.
- Use the torque wrench to tighten the heat-shield fastener to 9 Nm (80 in-lbs).
- Confirm the shield does not touch either electrical terminal.
Step 11: Lower the Vehicle
- Use the 3-ton hydraulic floor jack to lift the vehicle slightly off the jack stands.
- Remove both 3-ton jack stands, then lower your Suburban slowly to the ground.
- Leave the wheel chocks in position until the repair has been tested.
Step 12: Reconnect the Battery
- Place the negative battery-cable clamp fully onto the negative battery post.
- Use the 10mm socket and 3/8-inch-drive ratchet to tighten the clamp to 5 Nm (44 in-lbs).
- Do not overtighten or deform the battery terminal.
✅ After Repair
- ✅ Switch off the lights, climate control, and other electrical accessories.
- 🔑 Start the engine. The starter should crank smoothly without grinding, clicking, or remaining engaged.
- 👂 Shut the engine off and restart it two more times while listening for abnormal noise.
- 🔍 Inspect beneath your Suburban and confirm no wiring is hanging near the exhaust.
- ⚡ If the starter only clicks, stop testing and recheck battery charge, terminal tightness, and ground connections.
- 🕒 Reset the clock and retained infotainment preferences if the battery disconnect cleared them.
- 📟 Starter replacement normally requires no programming, scan-tool reset, or battery registration.
💰 DIY vs Shop Cost
Shop Cost: ₹25,000-₹48,000 (parts + labor)
DIY Cost: ₹14,000-₹30,000 (parts only)
You Save: ₹11,000-₹18,000 by doing it yourself!
Imported-part pricing varies in Sonīpat. Local labor commonly runs ₹800-₹2,500 per hour, and this repair takes a shop approximately 1-2 hours.
🎯 Ready to get started?
HowToo makes it easy: same-day/2-day shipping on every part, plus all the tools and specialty tools you need! Check out the parts and tools sections below to add everything to your cart.