
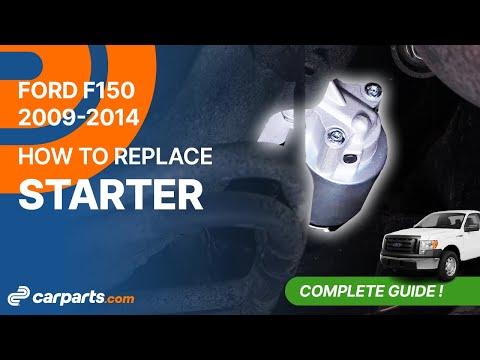





How to Replace the Starter Motor on a 1999-2013 Ford F-150 3.7L V6
Step-by-step DIY instructions with required tools, safety tips, and torque specs for 1999, 2000, 2001, 2002, 2003, 2004, 2005, 2006, 2007, 2008, 2009, 2010, 2011, 2012, 2013
How to Replace the Starter Motor on a 1999-2013 Ford F-150 3.7L V6
Step-by-step DIY instructions with required tools, safety tips, and torque specs for 1999, 2000, 2001, 2002, 2003, 2004, 2005, 2006, 2007, 2008, 2009, 2010, 2011, 2012, 2013


🔧 F-150 - Starter Motor Replacement
The starter motor is mounted low on the passenger side of the engine, where it turns the engine during starting. Replacement requires working underneath your F-150, disconnecting the electrical cables, and removing two mounting bolts.
Difficulty Level: Intermediate | Estimated Time: 1.5-2.5 hours
⚠️ Safety & Precautions
- ⚠️ Disconnect the negative battery cable before touching the starter. Its main cable has constant battery power and can cause severe burns or a fire.
- 🧤 Allow the engine and exhaust system to cool completely before working underneath.
- 🚫 Never work beneath your F-150 while it is supported only by a floor jack.
- 🔑 Keep the ignition off and remove the key before beginning.
- 👓 Wear safety glasses because dirt may fall from the underbody.
- 🔋 Battery registration or programming is not required after this repair.
🔧 Required Tools
You'll need the following tools for this repair:
- 10mm socket
- 13mm socket
- 15mm socket
- 3/8-inch drive ratchet
- 3/8-inch drive 6-inch extension
- 3/8-inch drive universal joint
- 3/8-inch drive torque wrench rated 5-80 Nm
- Flat-blade screwdriver
- Floor jack rated 3-ton minimum
- Jack stands rated 3-ton minimum
- Wheel chocks
- Mechanic’s work light
- Safety glasses
- Mechanic’s gloves
🔩 Required Parts
HowToo sells all the parts you need for this repair:
- Starter motor for 3.7L V6 engine - Qty: 1
📋 Before You Begin
- 🅿️ Park your F-150 on firm, level ground. Shift into Park and apply the parking brake.
- 🛞 Place wheel chocks securely against both sides of the left rear tire.
- 🌡️ Wait until the engine and exhaust are cool enough to touch safely.
- 📻 Make note of saved radio stations and personal settings before disconnecting the battery.
- 🔍 Compare the replacement starter with the original before installation. The mounting holes, electrical terminals, and starter gear housing must match.
🔨 Step-by-Step Instructions
Follow these steps in order:
Step 1: Disconnect the Battery
- Open the hood and locate the battery on the passenger side.
- Use a 10mm socket and 3/8-inch drive ratchet to loosen the negative battery-terminal clamp.
- Lift the negative cable from the battery post and position it where it cannot spring back into contact.
- Disconnecting negative first prevents accidental short circuits.
Step 2: Raise and Support the Truck
- Place a floor jack rated 3-ton minimum beneath the front crossmember and raise the front of your F-150.
- Position jack stands rated 3-ton minimum beneath the approved frame support points on both sides.
- Lower the truck slowly onto the stands with the floor jack rated 3-ton minimum.
- Push gently on the body to verify that it is stable before going underneath.
- Position a mechanic’s work light so you can see the lower passenger side of the engine.
Step 3: Remove the Underbody Shield if Equipped
- If an underbody or engine shield blocks access, use a 13mm socket or 15mm socket with the 3/8-inch drive ratchet to remove its fasteners.
- Support the shield with one hand while removing its final fastener.
- Set the shield and fasteners aside in their original positions.
Step 4: Locate and Inspect the Starter
- Use the mechanic’s work light to locate the starter low on the passenger side, next to the transmission bellhousing. The bellhousing is the large casing joining the engine and transmission.
- Inspect the wire routing before removal. Take a reference photo if necessary.
- Use safety glasses and mechanic’s gloves while working beneath the starter.
Step 5: Disconnect the Starter Wiring
- Use a flat-blade screwdriver to carefully release or move the protective terminal cover without damaging it.
- Use a 13mm socket, 3/8-inch drive extension, and 3/8-inch drive ratchet to remove the nut securing the large battery cable.
- Lift the large cable terminal off its stud and move it aside.
- Use a 10mm socket, 3/8-inch drive extension, and 3/8-inch drive ratchet to remove the small starter-control wire nut.
- Lift the small wire terminal from its stud. Pull only on the terminal, not the wire.
- Keep each nut with its matching terminal.
Step 6: Remove the Starter Motor
- Support the starter with one hand because it will drop when the final bolt is removed.
- Use a 13mm socket, 3/8-inch drive 6-inch extension, and 3/8-inch drive ratchet to loosen the two starter mounting bolts.
- Use the 3/8-inch drive universal joint with the extension if the upper bolt cannot be reached in a straight line.
- Remove the lower bolt first, then remove the upper bolt while holding the starter securely.
- Move the starter rearward until its nose clears the bellhousing, then lower it from the vehicle.
Step 7: Compare and Position the New Starter
- Place the old and new starters together and visually compare the mounting flange, terminal locations, and starter nose.
- Use a mechanic’s work light to inspect the bellhousing mounting surface. Remove loose dirt with a clean gloved hand.
- Raise the replacement starter into position and align its mounting holes.
- Install both mounting bolts by hand for several turns. This prevents cross-threading.
Step 8: Tighten the Starter Mounting Bolts
- Use a 13mm socket, 3/8-inch drive extension, and 3/8-inch drive torque wrench rated 5-80 Nm to tighten both starter mounting bolts.
- Torque the starter mounting bolts to 35 Nm (26 ft-lbs).
- Confirm that the starter sits flat against the bellhousing with no trapped wires.
Step 9: Reconnect the Starter Wiring
- Place the small control-wire terminal onto its correct stud and start its nut by hand.
- Use a 10mm socket and 3/8-inch drive torque wrench rated 5-80 Nm to tighten the small terminal nut to 5 Nm (44 in-lbs).
- Place the large battery-cable terminal onto the large stud and start its nut by hand.
- Use a 13mm socket and 3/8-inch drive torque wrench rated 5-80 Nm to tighten the large terminal nut to 12 Nm (106 in-lbs).
- Use a flat-blade screwdriver only if needed to guide the protective cover back over the terminal.
- Check that both cables are secure and cannot touch the exhaust or rotating components.
- Do not overtighten the insulated electrical studs.
Step 10: Reinstall the Underbody Shield
- If removed, hold the underbody shield in position and start every fastener by hand.
- Use the same 13mm socket or 15mm socket and 3/8-inch drive ratchet to tighten the fasteners evenly.
- Verify that the shield is secure and does not trap any wiring.
Step 11: Lower the Truck
- Use the floor jack rated 3-ton minimum to raise the front slightly off the jack stands.
- Remove both jack stands rated 3-ton minimum.
- Use the floor jack rated 3-ton minimum to lower your F-150 slowly to the ground.
- Remove the wheel chocks after the truck is fully lowered.
Step 12: Reconnect the Battery
- Place the negative battery cable fully onto the negative battery post.
- Use a 10mm socket and 3/8-inch drive torque wrench rated 5-80 Nm to tighten the negative terminal clamp to 5 Nm (44 in-lbs).
- Check the clamp by hand. It should not rotate on the battery post.
✅ After Repair
- 🔑 Turn the key to Start and confirm that the engine cranks normally without grinding, clicking, or scraping noises.
- 👂 Start the engine two or three times, allowing at least 15 seconds between attempts.
- 🔍 With the engine off, inspect the starter area for loose wiring or contact with the exhaust.
- ⚡ If the starter does not operate, stop testing and recheck the battery charge, battery terminals, starter connections, and related fuses.
- 📻 Restore the clock, radio presets, and other settings lost during battery disconnection.
- ✅ No scan-tool programming, starter relearn, or battery registration is normally required.
💰 DIY vs Shop Cost
Shop Cost: ₹25,000-₹50,000 (parts + labor)
DIY Cost: ₹16,000-₹35,000 (parts only)
You Save: ₹9,000-₹15,000 by doing it yourself!
Local labor and imported-part prices vary. This repair takes a shop approximately 1-2 hours.
🎯 Ready to get started?
HowToo makes it easy: same-day/2-day shipping on every part, plus all the tools and specialty tools you need! Check out the parts and tools sections below to add everything to your cart.