

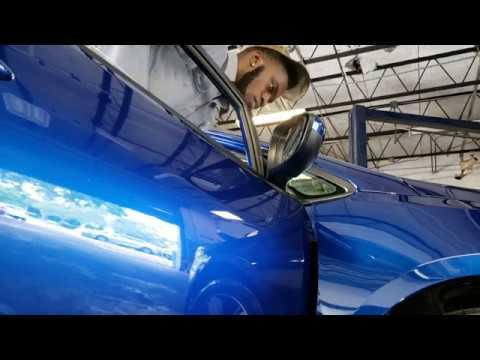






How to Replace the Side View Mirror on a 2017-2018 Kia Forte (Body: Sedan)
Step-by-step power mirror replacement with tools, parts, torque specs, and safety tips for 2017, 2018
How to Replace the Side View Mirror on a 2017-2018 Kia Forte (Body: Sedan)
Step-by-step power mirror replacement with tools, parts, torque specs, and safety tips for 2017, 2018


🔧 Forte - Side View Mirror Assembly Replacement
This procedure replaces the complete driver-side or passenger-side mirror assembly. On your Forte, the mirror is secured from inside the front door by three nuts and connected by an electrical plug.
Assumption: These instructions cover the factory power-adjustable mirror; transfer the painted cap if your replacement mirror does not include one.
Difficulty Level: Beginner | Estimated Time: 0.5-1 hour per side
⚠️ Safety & Precautions
- 🛑 Wear safety glasses and gloves because door-trim clips can release suddenly.
- 🔋 Disconnect the negative battery cable before unplugging the power mirror.
- 🚪 Do not close the door while tools are resting near the window or door opening.
- 🪞 Support the mirror before removing its final nut so it cannot fall against the paint.
- ⚠️ Do not pry against the window glass or use metal tools on painted surfaces.
🔧 Required Tools
You'll need the following tools for this repair:
- 10mm socket
- 1/4-inch drive ratchet
- 1/4-inch drive 3-inch extension
- 10mm combination wrench
- 2-20 Nm inch-pound torque wrench
- Plastic interior trim removal tool
- Small flat-blade screwdriver
- Masking tape
- Protective fender cover
- Safety glasses
- Mechanic’s gloves
🔩 Required Parts
HowToo sells all the parts you need for this repair:
- Driver-side power mirror assembly - Qty: 1 if damaged
- Passenger-side power mirror assembly - Qty: 1 if damaged
- Mirror mounting gasket - Qty: 1 per replaced mirror
- Interior sail-panel retaining clips - Qty: As needed
Side mirrors do not have to be replaced in pairs. Match the replacement to the original connector, heating feature, housing finish, and turn-signal equipment.
📋 Before You Begin
- 🅿️ Park your Forte on level ground, apply the parking brake, switch off the ignition, and lower the window on the side being repaired.
- 🧼 Clean around the mirror base so dirt cannot scratch the paint.
- 🎨 Place masking tape around the outside edge of the mirror base and position a protective fender cover over the door.
- 🔋 Open the hood. Use a 10mm combination wrench to loosen the negative battery-terminal nut, remove the cable, and isolate it from the terminal.
- ⏱️ Wait at least three minutes before disconnecting the mirror wiring.
🔨 Step-by-Step Instructions
Follow these steps in order:
Step 1: Remove the interior sail panel
- Open the front door and locate the triangular plastic panel directly opposite the mirror. This is called the sail panel.
- Use a plastic interior trim removal tool at the upper edge and gently pull the panel inward.
- Release the retaining clips one at a time, then lift the panel away from the door.
- If a clip remains in the door, use the plastic interior trim removal tool to remove it and reinstall it on the panel.
- Pull near each clip to prevent cracking.
Step 2: Disconnect the mirror electrical connector
- Locate the mirror wiring connector behind the sail panel.
- Press its locking tab with your finger and separate the connector by holding its plastic body.
- If the tab is difficult to press, use a small flat-blade screwdriver gently. Do not pull on the wires.
- Release the wiring harness from any door-mounted retaining clip using the plastic interior trim removal tool.
Step 3: Support the old mirror
- Hold the outside mirror housing firmly with one hand or have a helper support it.
- Check that the painted area around the mirror base is protected with masking tape.
- Do not let the mirror hang from its wiring.
Step 4: Remove the mirror mounting nuts
- Use a 10mm socket, 3-inch extension, and 1/4-inch drive ratchet to remove the three mounting nuts inside the door.
- Keep each nut in the socket as it comes off so it cannot fall into the door.
- While supporting the mirror, pull the assembly straight away from the door and guide its connector through the opening.
- Stuff a clean glove below the nuts.
Step 5: Inspect the mounting area
- Use your gloved fingers to remove loose dirt from the mounting surface.
- Inspect the mounting holes, wiring opening, and sheet metal for damage.
- Confirm that the new mirror has an intact mounting gasket. The gasket is the foam or rubber seal between the mirror and door.
- Compare the old and new electrical connectors before installation.
Step 6: Transfer the painted mirror cap if required
- Skip this step if the replacement assembly already has the correct outer cap.
- Use a plastic interior trim removal tool to release the old cap’s perimeter tabs carefully.
- Do not use a metal screwdriver on the painted cap.
- Align the cap on the replacement mirror and press around its edges until every tab clicks into place.
- Warm plastic is less likely to crack.
Step 7: Install the replacement mirror
- Guide the replacement mirror connector through the door opening.
- Align the locating pins and mounting studs while holding the mirror flush against the door.
- Verify that the gasket lies flat and is not folded or trapped.
- Thread all three mounting nuts by hand before using tools. This prevents cross-threading.
Step 8: Tighten the mounting nuts
- Use a 10mm socket, 3-inch extension, and 2-20 Nm inch-pound torque wrench to tighten the three nuts evenly.
- Torque to 8-10 Nm (71-89 in-lbs).
- Do not overtighten the nuts. Excess force can crack the mirror base or distort the door sheet metal.
Step 9: Reconnect the mirror wiring
- Push the electrical connector halves together by hand until the locking tab clicks.
- Use the plastic interior trim removal tool to seat the wiring harness in its original retaining clip.
- Make sure the wiring cannot contact the window glass or become pinched behind the sail panel.
Step 10: Reconnect the battery and test the mirror
- Place the negative battery cable back on its terminal.
- Use a 10mm combination wrench to tighten the terminal nut until the cable cannot rotate by hand. Do not overtighten it.
- Switch the ignition on and use the factory mirror-control switch to move the glass left, right, up, and down.
- If equipped, check mirror heating with the rear-window defogger switched on. If equipped with a mirror turn signal, test the hazard lights.
Step 11: Reinstall the sail panel
- Switch the ignition off after testing.
- Align the sail-panel clips with their holes.
- Press the panel into place by hand until each clip clicks.
- Use your fingers to check that the panel sits evenly without trapping the mirror wiring.
- Remove the masking tape and protective fender cover.
✅ After Repair
- ✅ Adjust the mirror to your normal driving position and confirm that the glass remains steady.
- 🔍 Open and close the door while watching the mirror wiring area for pinching or movement.
- 💧 Verify that the mounting gasket is flat against the door to help prevent wind noise and water entry.
- 🪟 Reset the automatic window function if it stopped working after battery disconnection: close the window fully and continue holding the switch upward for approximately one second.
- 🕒 Recheck the mirror mounting after a short drive if the housing vibrates or produces wind noise.
💰 DIY vs Shop Cost
Shop Cost: $250-$550 per side (parts + labor)
DIY Cost: $80-$300 per side (parts only)
You Save: $170-$250 per side by doing it yourself!
Shop labor rates vary but typically run $100-$150/hour. This repair takes a shop approximately 0.5-1 hour per side.
🎯 Ready to get started?
HowToo makes it easy: same-day/2-day shipping on every part, plus all the tools and specialty tools you need! Check out the parts and tools sections below to add everything to your cart.