

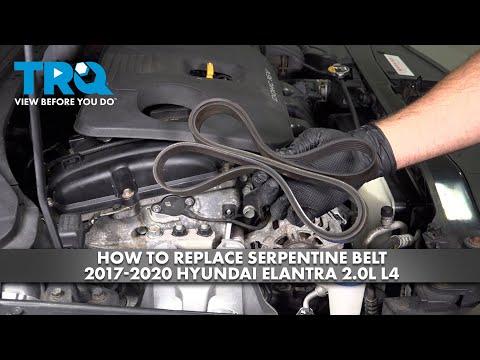





How to Replace the Serpentine Belt on a 2017-2021 Hyundai Elantra (Trim: SE | Engine: Inline 4 2.0L)
Step-by-step DIY instructions with required tools, belt routing, safety tips, and torque specs for 2017, 2018, 2019, 2020
How to Replace the Serpentine Belt on a 2017-2021 Hyundai Elantra (Trim: SE | Engine: Inline 4 2.0L)
Step-by-step DIY instructions with required tools, belt routing, safety tips, and torque specs for 2017, 2018, 2019, 2020


🔧 Elantra - Serpentine Belt Replacement
The serpentine belt drives the alternator, water pump, and air-conditioning compressor on your Elantra. Replacement requires removing the right-front splash shield, releasing the automatic belt tensioner, and installing the new belt in the original routing.
Difficulty Level: Beginner | Estimated Time: 0.75-1.5 hours
⚠️ Safety & Precautions
- ⚠️ Allow the engine to cool completely before working near the belt and pulleys.
- ⚠️ Keep fingers away from the tensioner and pulley pinch points.
- ⚠️ Support your Elantra with a jack stand. Never work under a vehicle supported only by a floor jack.
- ⚠️ Do not loosen the center bolt on the automatic tensioner pulley; rotate the tensioner only by its provided hex point.
- ⚠️ Battery disconnection is not required, but keep the ignition switched off and the key away from the vehicle.
🔧 Required Tools
You'll need the following tools for this repair:
- 17mm six-point socket
- 21mm six-point socket
- 10mm six-point socket
- 3/8-inch-drive long-handle ratchet
- 1/2-inch-drive breaker bar
- 1/2-inch-drive torque wrench rated 20-150 ft-lbs
- 6-inch socket extension
- Trim-clip removal tool
- Serpentine belt tool with 17mm adapter (specialty)
- Floor jack rated 2-ton minimum
- Jack stand rated 2-ton minimum
- Wheel chocks
- LED work light
- Mechanic’s gloves
- Safety glasses
🔩 Required Parts
HowToo sells all the parts you need for this repair:
- Vehicle-matched serpentine drive belt - Qty: 1
- Right-front splash-shield retaining clips - Qty: As needed
📋 Before You Begin
- 📋 Park your Elantra on firm, level ground, select Park, apply the parking brake, and switch the engine off.
- 📋 Place wheel chocks securely behind both rear tires.
- 📋 Open the hood and photograph the existing belt routing. Also locate the factory routing diagram near the radiator support or underside of the hood.
- 📋 Compare the new belt with the old belt before installation. The rib count and effective length must match.
- 📋 An automatic tensioner is a spring-loaded arm that keeps the belt tight without manual adjustment.
🔨 Step-by-Step Instructions
Follow these steps in order:
Step 1: Loosen the Right-Front Wheel
- Use the 21mm six-point socket and 1/2-inch-drive breaker bar to loosen each right-front lug nut about one-half turn.
- Do not remove the lug nuts while the tire is still supporting the vehicle.
Step 2: Raise and Support the Vehicle
- Position the 2-ton floor jack under the reinforced right-front jacking point and raise your Elantra.
- Place the 2-ton jack stand beneath the nearby reinforced support point, then lower the vehicle securely onto the stand.
- Gently shake the body to verify that it is stable before continuing.
Step 3: Remove the Right-Front Wheel
- Use the 21mm six-point socket and 1/2-inch-drive breaker bar to remove the loosened lug nuts.
- Remove the wheel and place it flat away from the work area.
Step 4: Remove the Belt Access Shield
- Use the trim-clip removal tool to lift the centers of the plastic retainers in the right-front inner splash shield.
- Use the 10mm six-point socket, 6-inch extension, and 3/8-inch-drive ratchet to remove any shield bolts.
- Move the lower section of the shield aside to expose the crankshaft pulley and belt.
- Keep fasteners arranged in removal order.
Step 5: Record the Belt Routing
- Use the LED work light to trace the belt around every pulley.
- Confirm the routing against your photograph and the factory routing label before removing the belt.
- Notice that the belt’s ribbed side contacts grooved pulleys, while its smooth back contacts smooth pulleys.
Step 6: Release Belt Tension
- From the wheel-well opening, place the serpentine belt tool with 17mm adapter securely on the automatic tensioner’s hex point.
- Slowly rotate the tensioner clockwise to move it away from the belt and create slack.
- Hold the tensioner in the released position and slide the belt off one easily reached smooth pulley.
- Slowly return the tensioner to its resting position. Do not let it snap back.
- Do not loosen or remove the tensioner pulley’s center bolt.
Step 7: Remove and Inspect the Old Belt
- Remove the belt from the remaining pulleys by hand while using the LED work light to check the lower pulley area.
- Inspect the old belt for missing ribs, cracking, glazing, frayed edges, or oil contamination.
- If the belt is oily, locate and repair the engine-oil or coolant leak before installing the replacement.
Step 8: Inspect the Pulleys and Tensioner
- With the engine off, rotate each accessible idler and accessory pulley by hand while wearing mechanic’s gloves.
- The pulleys should rotate smoothly without grinding, wobbling, or side-to-side looseness.
- Inspect each pulley groove with the LED work light. Remove trapped belt debris before installation.
- Replace a noisy, loose, seized, or visibly misaligned pulley before fitting the new belt.
Step 9: Route the New Belt
- Route the new belt by hand according to the factory diagram and the photograph taken earlier.
- Begin around the crankshaft pulley, then work around the remaining pulleys while leaving one accessible smooth pulley until last.
- Use the LED work light to confirm that every rib is seated in a matching pulley groove.
- Keep the belt flat. It must not be twisted between pulleys.
- Use clips only to hold, never pry.
Step 10: Seat the Belt on the Final Pulley
- Place the serpentine belt tool with 17mm adapter on the tensioner hex point.
- Slowly rotate the tensioner clockwise and slide the belt over the final smooth pulley by hand.
- Keep your fingers outside the pulley gap, then slowly release the tensioner against the belt.
- Use the LED work light to inspect every pulley. The belt must be centered, with no rib hanging over an edge.
Step 11: Reinstall the Splash Shield
- Position the splash shield and install its bolts using the 10mm six-point socket, 6-inch extension, and 3/8-inch-drive ratchet.
- Tighten the small shield bolts only until snug; do not crush the plastic shield.
- Install the plastic retainers by hand and press their center pins flush.
Step 12: Reinstall the Wheel
- Place the wheel onto the hub and start all five lug nuts by hand.
- Use the 21mm six-point socket and 1/2-inch-drive breaker bar to snug the nuts in a star pattern.
- Use the 2-ton floor jack to raise the vehicle slightly, remove the 2-ton jack stand, and lower the tire to the ground.
- Use the 21mm six-point socket and 1/2-inch-drive torque wrench to tighten the lug nuts in a star pattern: Torque to 107-127 Nm (79-94 ft-lbs).
✅ After Repair
- ✅ Before starting the engine, inspect the entire visible belt path once more with the LED work light.
- ✅ Remove all tools from the engine compartment and wheel-well area.
- ✅ Start the engine and observe the belt from a safe distance for approximately 30 seconds. It should run centrally without wandering, slapping, or squealing.
- ✅ Switch the air conditioning on and listen for abnormal noise as the compressor engages.
- ✅ Stop the engine immediately if the belt moves off-center, squeals continuously, or the tensioner shakes excessively.
- ✅ After a short drive, switch the engine off and recheck belt alignment and wheel-lug torque.
💰 DIY vs Shop Cost
Shop Cost: ₹3,000-₹6,500 (parts + labor)
DIY Cost: ₹1,200-₹2,800 (parts only)
You Save: ₹1,800-₹3,700 by doing it yourself!
Labor rates around Sonīpat vary by workshop. This repair takes a shop approximately 0.5-1.0 hour.
🎯 Ready to get started?
HowToo makes it easy: same-day/2-day shipping on every part, plus all the tools and specialty tools you need! Check out the parts and tools sections below to add everything to your cart.