

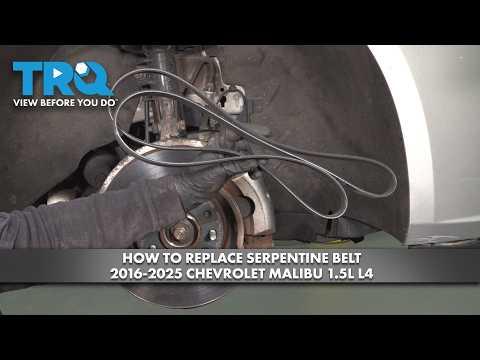





How to Replace the Serpentine Belt on a 2016-2025 Chevrolet Malibu 1.5L Turbo (Trim: LS | Engine: Inline 4 1.5L)
Step-by-step DIY instructions with required tools, belt routing, safety tips, and torque specs for 2016, 2017, 2018, 2019, 2020, 2021
How to Replace the Serpentine Belt on a 2016-2025 Chevrolet Malibu 1.5L Turbo (Trim: LS | Engine: Inline 4 1.5L)
Step-by-step DIY instructions with required tools, belt routing, safety tips, and torque specs for 2016, 2017, 2018, 2019, 2020, 2021


🔧 Malibu - Serpentine Belt Replacement
The serpentine belt drives the alternator and air-conditioning compressor on your Malibu. Replacement requires releasing the spring-loaded automatic tensioner, removing the old belt, and routing the new belt correctly around every pulley.
Difficulty Level: Beginner | Estimated Time: 0.5-1.0 hour
Assumption: This procedure applies to the stock U.S.-market 1.5L turbo engine with an automatic belt tensioner.
⚠️ Safety & Precautions
- ⚠️ Let the engine cool completely before working near the belt and exhaust components.
- ⚠️ Keep fingers away from the tensioner and pulley pinch points.
- ⚠️ Never work beneath a vehicle supported only by a floor jack.
- ⚠️ Do not start the engine until all tools are removed from the engine compartment.
- 🔋 Battery disconnection is not normally required, but keep the key away from the vehicle so the engine cannot be started accidentally.
🔧 Required Tools
You'll need the following tools for this repair:
- 3/8-inch drive breaker bar
- 15mm six-point socket
- 7mm socket
- 10mm socket
- 3/8-inch drive ratchet
- 3/8-inch drive 6-inch extension
- Flat-blade screwdriver
- Plastic trim-clip removal tool
- Floor jack rated 2-ton minimum
- Jack stands rated 2-ton minimum
- Wheel chocks
- 22mm wheel socket
- 1/2-inch drive breaker bar
- 1/2-inch drive torque wrench rated to 150 ft-lbs
- Work light
- Mechanic gloves
- Safety glasses
🔩 Required Parts
HowToo sells all the parts you need for this repair:
- Serpentine drive belt for 1.5L turbo engine - Qty: 1
📋 Before You Begin
- 🅿️ Park your Malibu on firm, level ground. Shift into Park and apply the parking brake.
- 🛞 Place wheel chocks securely behind both rear tires.
- 🌡️ Open the hood and allow the engine to cool.
- 📷 Photograph the belt routing before removal. Also locate the factory routing diagram under the hood, if equipped.
- 🔑 Keep the key or remote away from the vehicle during the repair.
🔨 Step-by-Step Instructions
Follow these steps in order:
Step 1: Inspect the Belt Routing
- Use the work light to identify the crankshaft pulley, alternator pulley, air-conditioning compressor pulley, idler pulley, and automatic tensioner.
- The automatic tensioner is a spring-loaded arm that keeps the belt tight without manual adjustment.
- Use a phone or camera to take a clear routing photograph before disturbing the belt.
- Notice that the belt’s ribbed side runs against grooved pulleys, while its smooth side runs against smooth pulleys.
Step 2: Raise the Right Front Corner
- Use the 22mm wheel socket and 1/2-inch drive breaker bar to loosen the right-front wheel nuts approximately one-quarter turn. Do not remove them yet.
- Position the 2-ton floor jack at the right-front reinforced lifting point and raise the vehicle.
- Place a 2-ton jack stand beneath the approved body support point, then lower the vehicle securely onto the stand.
- Gently rock the vehicle to verify that it is stable before continuing.
Step 3: Remove the Right-Front Wheel
- Use the 22mm wheel socket and 1/2-inch drive breaker bar to remove the wheel nuts.
- Remove the wheel and place it flat away from the work area.
- Slide the wheel under the rocker as backup protection.
Step 4: Open the Belt Access Area
- Use the 7mm socket, 10mm socket, and 3/8-inch drive ratchet as applicable to remove the right-front splash-shield screws covering the belt area.
- Use the plastic trim-clip removal tool to lift any push-pin fasteners without breaking them.
- Use the flat-blade screwdriver only to help release a stubborn clip; do not pry against painted metal.
- Move the flexible splash shield aside to expose the crankshaft pulley and belt.
- Keep each fastener organized according to its location because lengths may differ.
Step 5: Check the Tensioner and Pulleys
- Use the work light to inspect the tensioner and all visible pulleys before removing the belt.
- Look for pulley wobble, belt dust, coolant or oil contamination, and a tensioner arm sitting against its travel stop.
- If a pulley is visibly crooked or the tensioner is damaged, do not install only a new belt; the failed component must also be replaced.
Step 6: Release Belt Tension
- Fit the 15mm six-point socket and 3/8-inch drive breaker bar onto the tensioner pulley bolt or tensioner drive point.
- Rotate the tensioner slowly in the direction that moves it away from the belt. Spring pressure will be strong.
- While holding the tensioner released, slide the belt off one accessible smooth pulley with your free hand.
- Slowly return the tensioner to its resting position. Do not let it snap back.
- Keep the 15mm socket squarely seated so it cannot slip.
Step 7: Remove the Old Belt
- Use your hands to remove the belt from each remaining pulley and guide it out through the wheel-well opening.
- Compare the old and new belts side by side. The new belt should have the same width and number of ribs.
- A slightly shorter-looking new belt is normal because the old belt may have stretched.
Step 8: Inspect the Pulleys by Hand
- Use mechanic gloves to rotate the accessible idler and tensioner pulleys by hand.
- They should turn smoothly without grinding, looseness, or side-to-side wobble.
- Do not force the alternator or air-conditioning compressor pulley to turn.
- Use the work light to verify that every pulley groove is clean and free of old rubber.
Step 9: Route the New Belt
- Use the routing photograph or underhood diagram to place the new belt around the pulleys.
- Route the belt around every pulley except one easily reached smooth pulley.
- Use your fingers to make sure every belt rib sits fully inside every grooved pulley.
- Do not twist the belt. The ribs must face the grooved pulleys.
- Leave the easiest smooth pulley until last.
Step 10: Seat the Belt
- Install the 15mm socket and 3/8-inch drive breaker bar on the tensioner again.
- Rotate the tensioner slowly to create enough slack for the belt to slide over the final smooth pulley.
- Use your free hand to position the belt, then slowly release the tensioner.
- Remove the breaker bar and 15mm socket.
- No tensioner bolt is loosened or tightened during this procedure, so no tensioner fastener torque is required.
Step 11: Verify the Belt Installation
- Use the work light to inspect every pulley from above and through the wheel well.
- Confirm that the belt follows the original routing and is centered on each smooth pulley.
- Confirm that every rib is seated in its matching groove. A belt hanging over one groove can be destroyed immediately after startup.
- If alignment is incorrect, use the 15mm socket and 3/8-inch drive breaker bar to release the tensioner and reposition the belt.
Step 12: Reinstall the Splash Shield
- Move the splash shield into its original position.
- Use the plastic trim-clip removal tool by hand to align the openings, then reinstall the push-pin fasteners.
- Use the 7mm socket, 10mm socket, and 3/8-inch drive ratchet as applicable to reinstall the original screws.
- Tighten the small splash-shield fasteners only until snug; overtightening can strip the plastic retainers.
Step 13: Reinstall the Wheel
- Place the wheel on the hub and install all wheel nuts by hand to prevent cross-threading.
- Use the 22mm wheel socket and 1/2-inch drive breaker bar to snug the nuts in a star pattern.
- Use the 2-ton floor jack to raise the vehicle slightly, remove the jack stand, and lower the tire onto the ground.
- Use the 22mm wheel socket and 1/2-inch drive torque wrench to tighten the wheel nuts in a star pattern: Torque to 140 Nm (103 ft-lbs).
- Remove the floor jack and wheel chocks.
✅ After Repair
- ✅ Remove every tool and loose item from the engine compartment.
- 👀 Start the engine and observe the belt from a safe distance for 20-30 seconds. It should run centered without fluttering, walking sideways, or making a chirping sound.
- ⚠️ Keep hands, clothing, hair, and tools away from the moving belt.
- 🔇 Turn the air conditioning on and listen for unusual squealing or knocking.
- 🛑 Shut the engine off immediately if the belt moves off-center or makes persistent noise.
- 🔍 After shutting the engine off, inspect the belt again to confirm that all ribs remain fully seated.
- 🛞 Recheck the wheel-nut torque after approximately 80-160 km of driving.
💰 DIY vs Shop Cost
Shop Cost: ₹7,000-₹14,000 (parts + labor)
DIY Cost: ₹2,500-₹5,500 (parts only)
You Save: ₹4,500-₹8,500 by doing it yourself!
Local labor and imported U.S.-market parts pricing can vary. This repair takes a shop approximately 0.5-1.0 hour.
🎯 Ready to get started?
HowToo makes it easy: same-day/2-day shipping on every part, plus all the tools and specialty tools you need! Check out the parts and tools sections below to add everything to your cart.