

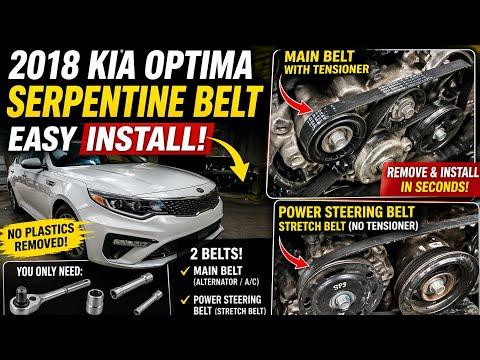





How to Replace the Serpentine Belt on a 2016-2020 Kia Optima 2.4L (Engine: Inline 4 2.4L)
Step-by-step belt routing, tensioner, tools, parts, and safety instructions for 2016, 2017, 2018, 2019, 2020
How to Replace the Serpentine Belt on a 2016-2020 Kia Optima 2.4L (Engine: Inline 4 2.4L)
Step-by-step belt routing, tensioner, tools, parts, and safety instructions for 2016, 2017, 2018, 2019, 2020


🔧 Optima - Serpentine Belt Replacement
The serpentine belt drives your Optima’s alternator, air-conditioning compressor, and water pump. Replacement involves releasing the spring-loaded tensioner, removing the old belt, and routing the new belt correctly around every pulley.
Difficulty Level: Beginner | Estimated Time: 0.5-1 hour
⚠️ Safety & Precautions
- ⚠️ Let the engine cool completely before working near the belt and pulleys.
- ⚠️ Keep fingers clear of the spring-loaded belt tensioner while releasing it.
- ⚠️ Never start the engine until all tools are removed from the engine compartment.
- ⚠️ Disconnecting the battery is not required, but keep the smart key away from your Optima while working.
- ⚠️ If raising your Optima, support it with a jack stand; never work under a vehicle supported only by a jack.
🔧 Required Tools
You'll need the following tools for this repair:
- 17mm six-point socket
- 1/2-inch-drive long-handle breaker bar
- 1/2-inch-drive ratchet
- 10mm socket
- 12mm socket
- 6-inch socket extension
- Trim-clip removal tool
- Flat-blade screwdriver
- Torque wrench rated 20-150 Nm
- Floor jack rated 2-ton minimum
- Jack stand rated 2-ton minimum
- Wheel chocks
- Work light
- Mechanic's gloves
- Safety glasses
🔩 Required Parts
HowToo sells all the parts you need for this repair:
- Serpentine drive belt for 2.4L engine - Qty: 1
- Passenger-side splash-shield clips - Qty: As needed
📋 Before You Begin
- 📍 Park your Optima on level, solid ground. Shift into Park, apply the parking brake, and switch the engine off.
- 🔑 Move the smart key away from the vehicle so the engine cannot be started accidentally.
- 🧊 Wait until the engine and exhaust components are cool.
- 📷 Photograph the original belt routing and locate the routing diagram under the hood. If the diagram is missing, make a clear sketch before removing the belt.
- 🛞 Place wheel chocks behind both rear wheels. The clearest access is through the passenger-side wheel-well area.
🔨 Step-by-Step Instructions
Follow these steps in order:
Step 1: Raise and Support the Passenger Side
- Use the floor jack at the front passenger-side factory jacking point to raise your Optima.
- Position the jack stand beneath the reinforced support point, then lower the vehicle securely onto it.
- Use the 1/2-inch-drive ratchet and appropriate socket to remove the passenger-front wheel if it blocks access.
- Place the wheel under the rocker panel for backup.
Step 2: Remove the Lower Splash Shield
- Use the trim-clip removal tool to lift the center pins from the plastic retainers around the passenger-side splash shield.
- Use the 10mm socket, 12mm socket, extension, and ratchet to remove any shield bolts fitted to your Optima.
- Use the flat-blade screwdriver only if needed to gently release a stubborn clip.
- Set the shield, bolts, and clips aside in installation order.
Step 3: Record the Belt Routing
- Use the work light to inspect the belt path around the crankshaft pulley, air-conditioning compressor, alternator, water-pump pulley, idler, and tensioner.
- Compare the routing with the under-hood diagram and your photograph.
- Notice that the belt’s ribbed side contacts grooved pulleys. Its smooth back contacts smooth pulleys.
Step 4: Release the Automatic Tensioner
- The automatic tensioner is a spring-loaded arm that maintains belt tension without manual adjustment.
- Fit the 17mm six-point socket and long-handle breaker bar squarely onto the tensioner’s cast hex.
- Rotate the tensioner slowly against spring pressure until the belt becomes loose. Do not use an impact wrench.
- While holding the breaker bar securely, slide the belt off one easy-to-reach smooth pulley.
- Slowly return the tensioner to its resting position. Never let it snap back.
Step 5: Remove the Old Belt
- Use your gloved hands to work the belt off the remaining pulleys and remove it through the wheel-well opening.
- Compare the old and new belts side by side. The new belt should have the same width, number of ribs, and nearly the same effective length.
- Small length differences can result from stretching, but a major difference indicates an incorrect replacement belt.
Step 6: Inspect the Pulleys and Tensioner
- Use your gloved hand to rotate each accessible idler and accessory pulley with the belt removed.
- Replace any pulley that feels rough, binds, wobbles, or produces grinding noise.
- Inspect the tensioner for looseness, leakage from its damping area, or a crooked pulley.
- Check all pulley grooves for stones, rubber deposits, and damaged ribs.
- Do not continue if the crankshaft pulley’s outer ring is separating from its rubber isolator.
Step 7: Route the New Belt
- Use your routing photograph or under-hood diagram and place the new belt around every pulley except one easily reached smooth pulley.
- Use your fingers to confirm that every belt rib sits fully inside every grooved pulley.
- Keep the belt centered on each smooth pulley with no edge hanging over.
- Leave the easiest smooth pulley until last.
Step 8: Apply Belt Tension
- Fit the 17mm socket and long-handle breaker bar onto the tensioner again.
- Rotate the tensioner slowly against spring pressure.
- Use your free hand to slide the belt over the final smooth pulley, keeping fingers away from pinch points.
- Slowly release the breaker bar until the tensioner rests against the belt.
- Remove the 17mm socket and breaker bar from the engine compartment.
Step 9: Verify the Installation
- Use the work light to inspect every pulley from above and through the wheel well.
- Confirm that the belt follows the original route and that every rib is fully seated.
- Check behind the crankshaft pulley carefully; a belt can appear installed while sitting one rib off.
- Do not start the engine if the belt is twisted, loose, or hanging over a pulley edge.
Step 10: Reinstall the Splash Shield and Wheel
- Position the splash shield and install its bolts with the 10mm socket, 12mm socket, extension, and ratchet. Tighten the small shield fasteners snugly without crushing the plastic.
- Use the trim-clip removal tool and your fingers to reset each clip, insert its body, and press the center pin flush.
- If the wheel was removed, install it and snug the wheel nuts in a star pattern with the 1/2-inch-drive ratchet and appropriate socket.
- Use the floor jack to lift your Optima slightly, remove the jack stand, and lower the vehicle.
- Use the torque wrench and appropriate socket to tighten the wheel nuts in a star pattern to Torque to 107-127 Nm (79-94 ft-lbs).
✅ After Repair
- ✅ Make one final check that all tools are clear of the engine compartment.
- ✅ Start the engine and observe the belt from a safe distance for 30-60 seconds. It should run centrally without fluttering or walking sideways.
- ✅ Switch the air conditioning on and listen for squealing, chirping, rattling, or grinding.
- ✅ Shut the engine off immediately if the belt moves off-center or the tensioner jumps excessively.
- ✅ After a short drive, switch off the engine and recheck belt alignment and splash-shield security.
- ✅ No belt adjustment, scan-tool reset, coding, or infotainment procedure is required.
💰 DIY vs Shop Cost
Shop Cost: ₹4,500-₹9,000 (parts + labor)
DIY Cost: ₹1,800-₹4,000 (parts only)
You Save: ₹2,700-₹5,000 by doing it yourself!
Labor rates around Sonīpat vary by workshop. This repair takes a shop approximately 0.5-1 hour.
🎯 Ready to get started?
HowToo makes it easy: same-day/2-day shipping on every part, plus all the tools and specialty tools you need! Check out the parts and tools sections below to add everything to your cart.