







How to Replace the Serpentine Belt on a 2015-2021 Chevrolet Trax 1.4L Turbo (Trim: LT | Engine: Inline 4 1.4L)
Step-by-step DIY instructions with required tools, belt routing, and safety tips for 2015, 2016, 2017, 2018, 2021
How to Replace the Serpentine Belt on a 2015-2021 Chevrolet Trax 1.4L Turbo (Trim: LT | Engine: Inline 4 1.4L)
Step-by-step DIY instructions with required tools, belt routing, and safety tips for 2015, 2016, 2017, 2018, 2021


🔧 Trax - Serpentine Belt Replacement
The serpentine belt drives the alternator and air-conditioning compressor on your Trax. Replace it if it is cracked, frayed, contaminated with oil, missing ribs, or making persistent squealing noises.
Difficulty Level: Beginner | Estimated Time: 0.5-1 hour
⚠️ Safety & Precautions
- ⚠️ Let the engine cool completely before working near the belt and pulleys.
- 🔑 Keep the ignition off and remove the key from the vehicle.
- 🧤 Keep fingers clear of the spring-loaded belt tensioner.
- 🚫 Never run the engine while tools or hands are inside the belt area.
- 🔋 Battery disconnection is not normally required for this repair.
- 🛢️ Repair any oil or coolant leak contaminating the belt before installing the new one.
🔧 Required Tools
You'll need the following tools for this repair:
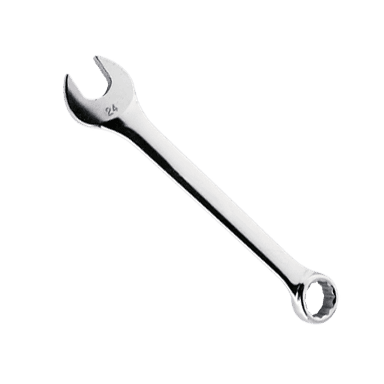
- 15mm six-point combination wrench
- 15mm shallow socket
- 3/8-inch-drive long-handle ratchet
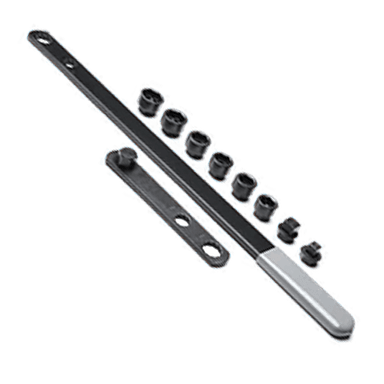
- Serpentine belt tool with 15mm adapter (specialty)
- Inspection mirror with LED light
- Plastic trim-clip removal tool
- Flat-blade screwdriver with 6-inch shaft
- Mechanic's gloves
- Safety glasses
🔩 Required Parts
HowToo sells all the parts you need for this repair:
- Accessory serpentine belt for 1.4L turbocharged engine - Qty: 1
📋 Before You Begin
- 🅿️ Park your Trax on level ground, select Park, and engage the parking brake.
- ❄️ Allow the engine to cool completely.
- 📸 Photograph the original belt routing before removal. A routing diagram may also be located in the engine compartment.
- 🔍 Inspect the tensioner and every pulley for wobbling, rough bearings, or belt-tracking damage.
- 📌 The tensioner is a spring-loaded arm that automatically keeps the belt tight.
🔨 Step-by-Step Instructions
Follow these steps in order:
Step 1: Open the Belt Working Area
- Open the hood and support it securely.
- Use the LED inspection mirror to locate the belt, tensioner, alternator pulley, air-conditioning compressor pulley, and crankshaft pulley on the passenger side of the engine.
- If the air-intake duct limits hand access, use the flat-blade screwdriver to release its clamp and the plastic trim-clip removal tool to release any retaining clip. Move the duct aside without pulling on attached hoses.
Step 2: Record the Belt Routing
- Use the LED inspection mirror to examine how the old belt passes around every pulley.
- Take a clear photograph or draw the routing before releasing the tensioner.
- Confirm that the ribbed side contacts grooved pulleys and the smooth back of the belt contacts smooth pulleys.
- Take two photos from different angles.
Step 3: Release Belt Tension
- Fit the 15mm serpentine belt tool onto the tensioner fastener. A serpentine belt tool is a long, thin handle that provides leverage in a narrow space.
- If there is enough clearance, use the 15mm shallow socket and 3/8-inch-drive long-handle ratchet instead.
- Rotate the tensioner clockwise against its spring until the belt becomes loose. Do not loosen or remove the tensioner fastener.
- While holding the tensioner, slide the belt off the easiest accessible smooth pulley.
- Slowly return the tensioner to its resting position. Do not allow it to snap back.
Step 4: Remove the Old Belt
- Remove the old belt from the remaining pulleys by hand while wearing mechanic's gloves.
- Guide the belt carefully through the narrow opening without forcing it against hoses or wiring.
- Compare the old and new belts side by side. Their rib count, width, and effective length must match.
Step 5: Inspect the Pulleys and Tensioner
- Use mechanic's gloves to rotate each accessible free-spinning pulley by hand.
- Use the LED inspection mirror to check for damaged grooves, rust, oil, coolant, or rubber buildup.
- Check the tensioner for side-to-side looseness, binding, or a weak spring. Replace damaged components before installing the belt.
- Do not rotate the alternator pulley with a metal tool.
Step 6: Route the New Belt
- Route the new belt by hand according to your photograph or the under-hood routing diagram.
- Leave the easiest accessible smooth pulley until last.
- Seat every rib completely inside its matching pulley groove. The belt must not hang over a pulley edge.
- Start at the lowest pulley first.
Step 7: Install the Belt Over the Final Pulley
- Use the 15mm serpentine belt tool to rotate the tensioner clockwise.
- Slide the belt over the final smooth pulley by hand while keeping fingers away from the tensioner pinch points.
- Slowly release the serpentine belt tool so the tensioner applies pressure to the belt.
- No fasteners are removed during the standard belt procedure, so no installation torque is required.
Step 8: Verify Belt Alignment
- Use the LED inspection mirror to examine every pulley.
- Confirm that all ribs are seated correctly and the belt is centered on each smooth pulley.
- If the intake duct was moved, reinstall it by hand, tighten its clamp with the flat-blade screwdriver, and reinstall its retaining clip with finger pressure.
- Remove the 15mm serpentine belt tool and every other tool from the engine compartment.
✅ After Repair
- 👀 Stand clear of the engine compartment and start the engine.
- 🔄 Observe the belt briefly from a safe distance. It should run centrally without fluttering, wandering, or squealing.
- 🛑 Switch the engine off immediately if the belt moves toward a pulley edge or makes abnormal noise.
- 🔍 Turn the engine off and perform one final alignment inspection with the LED inspection mirror.
- 📏 Recheck the belt after several days of driving for edge wear or contamination.
💰 DIY vs Shop Cost
Shop Cost: ₹4,000-₹9,000, depending on imported-parts availability
DIY Cost: ₹1,800-₹4,500 for the belt
You Save: ₹2,200-₹4,500 by doing it yourself!
Labour rates around Sonīpat vary, and imported U.S.-spec Trax parts can affect the final price. This repair takes a shop approximately 0.5-1 hour.
🎯 Ready to get started?
HowToo makes it easy: same-day/2-day shipping on every part, plus all the tools and specialty tools you need! Check out the parts and tools sections below to add everything to your cart.