






How to Replace the Serpentine Belt on a 2015-2020 Chevrolet Tahoe 5.3L V8 (Engine: V8 5.3L)
Step-by-step DIY instructions with required tools, belt routing, and safety tips for 2015, 2016, 2017, 2018, 2019, 2020
How to Replace the Serpentine Belt on a 2015-2020 Chevrolet Tahoe 5.3L V8 (Engine: V8 5.3L)
Step-by-step DIY instructions with required tools, belt routing, and safety tips for 2015, 2016, 2017, 2018, 2019, 2020


🔧 Tahoe - Serpentine Belt Replacement
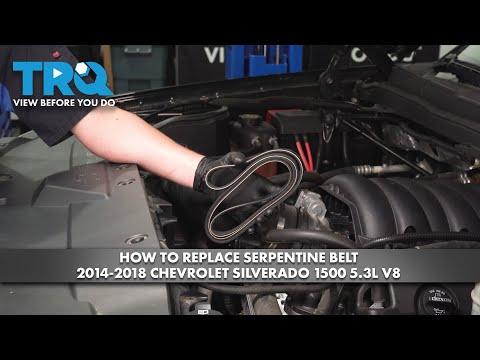
This procedure replaces the main serpentine belt that drives the alternator and water pump on your Tahoe’s 5.3L V8. The air-conditioning compressor uses a separate stretch belt, so it does not need to be removed when replacing only the main belt.
Difficulty Level: Beginner | Estimated Time: 30-60 minutes
⚠️ Safety & Precautions
- ⚠️ Let the engine cool completely before working near the belt and pulleys.
- ⚠️ Keep fingers clear of the spring-loaded belt tensioner. It can move forcefully.
- ⚠️ Disconnect the negative battery cable so the electric cooling fans cannot start unexpectedly.
- ⚠️ Never start the engine while a tool is attached to the tensioner.
- ⚠️ Replace the belt if it has missing ribs, exposed cords, heavy cracking, or oil contamination.
🔧 Required Tools
You'll need the following tools for this repair:
- 10mm socket
- 3/8-inch-drive ratchet
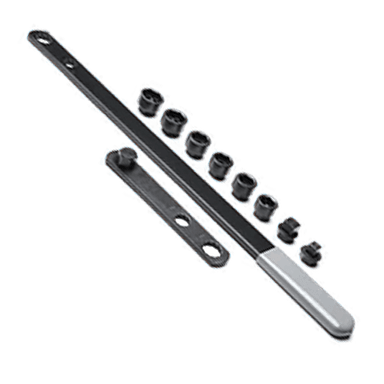
- 15mm serpentine-belt tool (specialty)
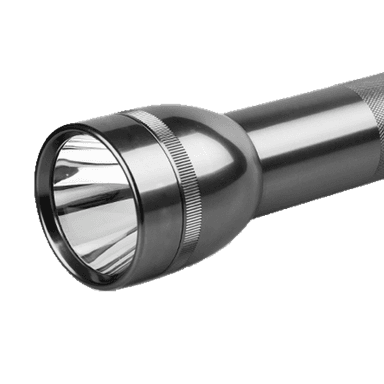
- LED work light
- Mechanic’s inspection mirror
- Safety glasses
- Nitrile mechanic’s gloves
🔩 Required Parts
HowToo sells all the parts you need for this repair:
- Main serpentine drive belt - Qty: 1
📋 Before You Begin
- Park your Tahoe on level ground, select Park, apply the parking brake, and switch off the ignition.
- Remove the key or move the key fob away from the vehicle.
- Open the hood and wait until the engine is cool.
- Locate the belt-routing diagram on the fan shroud or radiator support. Use that diagram as the authoritative routing path.
- The separate air-conditioning stretch belt is lower on the engine. Do not pry it off when replacing only the main serpentine belt.
🔨 Step-by-Step Instructions
Follow these steps in order:
Step 1: Disconnect the Battery
- Put on the safety glasses and mechanic’s gloves.
- Use a 10mm socket and 3/8-inch-drive ratchet to loosen the negative battery-terminal clamp.
- Lift the negative cable away from the terminal and position it where it cannot spring back into contact.
Step 2: Record the Belt Routing
- Use the LED work light to find the factory belt-routing diagram near the radiator support or fan shroud.
- Use the mechanic’s inspection mirror to view the lower crankshaft pulley and confirm how the belt passes around each pulley.
- Remember that the belt’s ribbed side runs against grooved pulleys. The flat side runs against smooth pulleys.
- Compare every pulley before removing the old belt.
Step 3: Release Belt Tension
- Locate the automatic tensioner at the front of the engine. The tensioner is a spring-loaded arm that keeps the belt tight.
- Fit the 15mm serpentine-belt tool securely onto the tensioner fastener.
- Slowly rotate the tensioner clockwise to remove tension from the belt.
- While holding the tensioner, slip the belt off the nearest accessible smooth pulley.
- Slowly return the tensioner to its resting position. Do not let it snap back.
Step 4: Remove the Old Belt
- Use the LED work light and remove the loose belt from the alternator, water-pump, tensioner, idler, and crankshaft pulleys.
- Guide the belt upward and out of the engine compartment without disturbing the lower air-conditioning stretch belt.
- Turn each accessible pulley by hand while wearing mechanic’s gloves. A pulley that grinds, wobbles, or binds should be repaired before installing the new belt.
Step 5: Route the New Belt
- Use the factory routing diagram to place the new belt around the crankshaft pulley and the remaining pulleys.
- Use the LED work light and mechanic’s inspection mirror to verify that every rib is seated inside its matching pulley groove.
- Leave the belt off one easily reached smooth pulley until the final installation step.
- Do not place the belt over the air-conditioning compressor; that compressor has its own separate stretch belt.
- Leave the easiest smooth pulley for last.
Step 6: Seat the Belt
- Install the 15mm serpentine-belt tool on the tensioner again.
- Slowly rotate the tensioner clockwise until the new belt can slide over the final smooth pulley.
- Use your gloved hand to hold the belt fully on the pulley, then slowly release the serpentine-belt tool.
- Remove the tool completely from the engine compartment.
- No mounting bolts are removed during this repair, so there are no component fasteners requiring a torque specification.
Step 7: Inspect the Installation
- Use the LED work light and mechanic’s inspection mirror to inspect every pulley.
- Confirm that no rib hangs over a pulley edge and that the belt is centered on each smooth pulley.
- Confirm that the belt follows the factory routing diagram exactly.
- If the belt is misaligned, use the 15mm serpentine-belt tool to release tension and correct it before starting the engine.
Step 8: Reconnect the Battery
- Place the negative battery clamp fully onto the battery terminal.
- Use the 10mm socket and 3/8-inch-drive ratchet to tighten the clamp securely without overtightening it.
- Check by hand that the clamp cannot rotate on the terminal.
✅ After Repair
- ✅ Remove every tool from the engine compartment before starting your Tahoe.
- ✅ Start the engine and observe the belt from a safe distance for 20-30 seconds.
- ✅ Switch off the engine immediately if the belt walks toward a pulley edge, squeals continuously, flaps excessively, or produces a burning-rubber smell.
- ✅ After shutting off the engine, use the LED work light to perform one final alignment check.
- ✅ A brief initial chirp can occur, but persistent noise usually indicates incorrect routing, contamination, or a worn pulley or tensioner.
💰 DIY vs Shop Cost
Shop Cost: ₹4,500-₹9,000 (parts + labor)
DIY Cost: ₹2,000-₹5,000 (parts only)
You Save: ₹2,500-₹4,000 by doing it yourself!
Local labor and imported-part prices vary. This repair takes a shop approximately 0.5-1.0 hour.
🎯 Ready to get started?
HowToo makes it easy: same-day/2-day shipping on every part, plus all the tools and specialty tools you need! Check out the parts and tools sections below to add everything to your cart.