








How to Replace the Serpentine Belt on a 2015-2019 Hyundai Sonata 2.4L (Engine: Inline 4 2.4L)
Step-by-step DIY instructions with tools, belt routing, safety tips, and torque specs for 2015, 2016, 2017, 2018, 2019
How to Replace the Serpentine Belt on a 2015-2019 Hyundai Sonata 2.4L (Engine: Inline 4 2.4L)
Step-by-step DIY instructions with tools, belt routing, safety tips, and torque specs for 2015, 2016, 2017, 2018, 2019


🔧 Sonata - Serpentine Belt Replacement
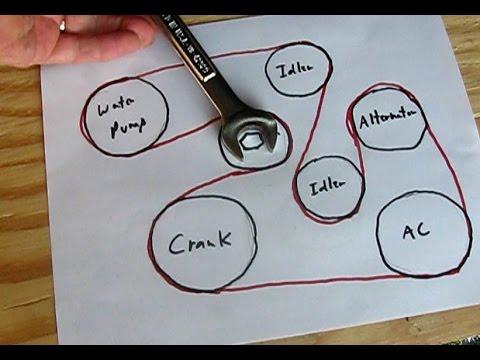
The serpentine belt drives the alternator, air-conditioning compressor, and other engine accessories on your Sonata. Replacement involves opening the spring-loaded tensioner, removing the old belt, and installing the new belt in the factory routing.
Difficulty Level: Beginner | Estimated Time: 0.5-1 hour
Assumption: This procedure is for the stock 2.4L engine accessory-drive system.
⚠️ Safety & Precautions
- ⚠️ Work only with the engine switched off and completely cool.
- ⚠️ Keep fingers away from the belt and pulleys whenever the tensioner is loaded.
- ⚠️ Never start the engine while a tool is attached to the tensioner.
- ⚠️ Support your Sonata with a jack stand; never work beneath a vehicle supported only by a jack.
- ⚠️ Disconnecting the battery is not required, but keep the smart key away from the vehicle while working.
- ⚠️ Do not rotate the tensioner beyond its normal stop or allow it to snap back.
🔧 Required Tools
You'll need the following tools for this repair:
- 17mm six-point socket
- 21mm deep socket
- 3/8-inch drive long-handle ratchet
- 1/2-inch drive breaker bar
- 1/2-inch drive torque wrench rated 150 ft-lbs
- Trim-clip removal tool
- Flat-blade screwdriver
- Floor jack rated 2-ton minimum
- Jack stand rated 2-ton minimum
- Wheel chocks
- LED work light
- Mechanic gloves
- Safety glasses
🔩 Required Parts
HowToo sells all the parts you need for this repair:
- Serpentine belt for 2.4L engine - Qty: 1
- Passenger-side splash-shield clips - Qty: As needed
📋 Before You Begin
- 📋 Park your Sonata on level, solid ground and shift the transmission into Park.
- 📋 Apply the parking brake and place wheel chocks behind both rear tires.
- 📋 Open the hood and locate the belt-routing diagram near the radiator support or underside of the hood.
- 📋 Take a clear photo of the installed belt before removing it. Use that photo if the routing label is missing or damaged.
- 📋 A tensioner is the spring-loaded pulley assembly that keeps the belt tight automatically.
- 📋 No infotainment setting, scan-tool command, coding, or battery registration is required.
🔨 Step-by-Step Instructions
Follow these steps in order:
Step 1: Loosen the Passenger-Side Front Wheel
- Use the 21mm deep socket and 1/2-inch drive breaker bar to loosen each wheel lug nut about one-quarter turn.
- Do not remove the lug nuts while the tire is still supporting the vehicle.
Step 2: Raise and Support the Vehicle
- Use the floor jack rated 2-ton minimum at the passenger-side front reinforced pinch-weld jacking point.
- Place the jack stand rated 2-ton minimum beneath the adjacent reinforced body support and lower the vehicle onto it.
- Gently push the vehicle to confirm that it is stable before continuing.
Step 3: Remove the Passenger-Side Front Wheel
- Use the 21mm deep socket to remove the loosened lug nuts.
- Remove the wheel and place it flat away from the work area.
Step 4: Open the Belt Access Area
- Use the trim-clip removal tool to lift the center pins from the passenger-side lower splash-shield clips.
- Use the flat-blade screwdriver only where additional leverage is needed.
- Remove or move the splash shield aside until the crankshaft pulley and belt are visible.
- Keep the clips together so they can be returned to their original positions.
Step 5: Record the Belt Routing
- Use the LED work light to compare the installed belt with the factory routing label.
- Confirm that the ribbed side of the belt runs against grooved pulleys and the smooth back of the belt runs against smooth pulleys.
- Pay close attention to the belt path around the crankshaft, air-conditioning compressor, alternator, idler, and tensioner.
- Take another photo from the wheel opening.
Step 6: Release Belt Tension
- Fit the 17mm six-point socket and 3/8-inch drive long-handle ratchet onto the cast hex of the automatic tensioner.
- Slowly rotate the tensioner clockwise, as viewed from the passenger side, to remove tension from the belt.
- While holding the tensioner open, slide the belt off an easy-to-reach smooth pulley.
- Slowly return the tensioner to its resting position. Do not let it snap back.
Step 7: Remove and Inspect the Old Belt
- Remove the belt from each pulley by hand and guide it out through the wheel opening.
- Use the LED work light to inspect the old belt for cracks, missing ribs, glazing, oil contamination, or frayed edges.
- Rotate the idler and tensioner pulleys by hand. They should turn smoothly without grinding, wobbling, or looseness.
- Stop the repair if a pulley is rough, loose, crooked, or seized; the defective pulley or tensioner must also be replaced.
Step 8: Route the New Belt
- Use the factory routing label and your reference photos to route the new belt around every pulley except one easy-to-reach smooth pulley.
- Seat every belt rib fully inside its matching pulley groove.
- Make sure the belt is not twisted and is centered on each smooth pulley.
- Leave the most accessible smooth pulley for last; do not force the belt over a pulley lip with a screwdriver.
Step 9: Load the Tensioner
- Use the 17mm six-point socket and 3/8-inch drive long-handle ratchet to rotate the tensioner clockwise again.
- Slide the belt over the final smooth pulley by hand.
- Slowly release the ratchet so the tensioner applies pressure to the belt.
- Remove the ratchet and socket from the engine compartment immediately.
Step 10: Verify Belt Alignment
- Use the LED work light to inspect every pulley from above and through the wheel opening.
- Confirm that no rib is riding on a pulley edge and that the belt follows the exact factory path.
- If the belt is misaligned, use the 17mm six-point socket and 3/8-inch drive long-handle ratchet to unload the tensioner and reposition it.
Step 11: Reinstall the Splash Shield
- Position the splash shield in its original location.
- Install its clips by hand, then use the flat-blade screwdriver to press each center pin flush.
- Replace any clip that is cracked or no longer holds the shield securely.
Step 12: Reinstall the Wheel
- Place the wheel onto the hub and start every lug nut by hand.
- Use the 21mm deep socket to snug the lug nuts in a crossing pattern.
- Use the floor jack rated 2-ton minimum to lift the vehicle slightly, remove the jack stand, and lower the tire to the ground.
- Use the 21mm deep socket and 1/2-inch drive torque wrench rated 150 ft-lbs to tighten the lug nuts in a crossing pattern: Torque to 108-127 Nm (80-94 ft-lbs).
✅ After Repair
- ✅ Remove every tool from the engine compartment before starting the engine.
- ✅ Start the engine and watch the belt from a safe distance for 20-30 seconds.
- ✅ Switch the air conditioning on and confirm the belt remains centered without squealing, flapping, or walking sideways.
- ✅ Shut the engine off immediately if the belt moves toward a pulley edge or makes abnormal noise.
- ✅ After a short drive, switch the engine off and visually recheck the belt alignment and splash shield.
- ✅ Recheck wheel-lug torque after approximately 50 miles.
💰 DIY vs Shop Cost
Shop Cost: $150-$260 (parts + labor)
DIY Cost: $30-$70 (parts only)
You Save: $120-$190 by doing it yourself!
Shop labor rates vary but typically run $100-$150/hour. This repair takes a shop approximately 0.5-1 hour.
🎯 Ready to get started?
HowToo makes it easy: same-day/2-day shipping on every part, plus all the tools and specialty tools you need! Check out the parts and tools sections below to add everything to your cart.