

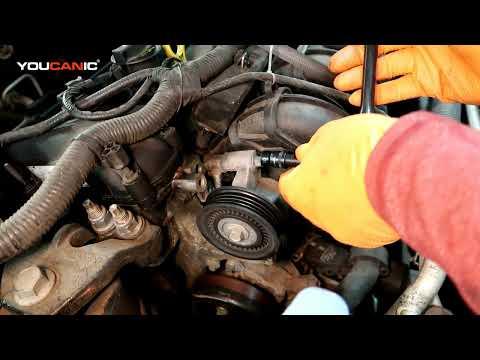







How to Replace the Serpentine Belt on a 2013-2020 Ford Fusion 2.5L (Engine: Inline 4 2.5L)
Step-by-step instructions for replacing the main and stretch-fit A/C belts safely for 2013, 2014, 2015, 2016, 2017, 2018, 2019, 2020
How to Replace the Serpentine Belt on a 2013-2020 Ford Fusion 2.5L (Engine: Inline 4 2.5L)
Step-by-step instructions for replacing the main and stretch-fit A/C belts safely for 2013, 2014, 2015, 2016, 2017, 2018, 2019, 2020


🔧 Fusion - Serpentine Belt Replacement
Your Fusion uses a tensioned main serpentine belt and a separate stretch-fit A/C compressor belt. The A/C belt sits in front of the main belt, so it must be removed first and replaced rather than reused.
Difficulty Level: Intermediate | Estimated Time: 1-2 hours
Assumption: This procedure covers the stock 2.5L engine with factory air conditioning.
⚠️ Safety & Precautions
- ⚠️ Let the engine cool completely before working near the belt drive.
- ⚠️ Keep fingers away from pulleys whenever the belt tensioner is loaded.
- ⚠️ Support your Fusion with a jack stand. Never work beneath a vehicle supported only by a floor jack.
- ⚠️ Turn the crankshaft clockwise only when viewed from the passenger-side wheel opening.
- ⚠️ Do not reuse the removed stretch-fit A/C belt.
- ⚠️ Battery disconnection is not required, but keep the ignition switched off and the key away from the vehicle.
🔧 Required Tools
You'll need the following tools for this repair:
- Floor jack rated 2-ton minimum
- Jack stand rated 2-ton minimum
- Wheel chocks
- 19mm lug-nut socket
- 18mm deep socket
- 15mm six-point socket
- 8mm socket
- 3/8-inch-drive ratchet
- 1/2-inch-drive breaker bar
- 1/2-inch-drive torque wrench rated to 150 ft-lbs
- Serpentine belt tool with 15mm adapter (specialty)
- Stretch-fit belt removal and installation tool (specialty)
- Trim-clip removal tool
- Flat-blade screwdriver
- Work light
- Mechanic’s gloves
- Safety glasses
🔩 Required Parts
HowToo sells all the parts you need for this repair:
- Main serpentine belt for 2.5L engine - Qty: 1
- Stretch-fit A/C compressor belt for 2.5L engine - Qty: 1
- Passenger-side splash-shield clips - Qty: As needed
📋 Before You Begin
- 🅿️ Park your Fusion on level, solid ground. Select Park and apply the parking brake.
- 🛞 Place wheel chocks securely behind both rear tires.
- 📷 Photograph the existing belt routing and locate the factory routing diagram under the hood.
- 🧊 Wait until the engine and exhaust components are cool.
- 🔑 Switch the ignition off and keep the key away from the vehicle.
🔨 Step-by-Step Instructions
Follow these steps in order:
Step 1: Raise the Passenger Side
- Use the 19mm lug-nut socket and 1/2-inch-drive breaker bar to loosen the passenger-front wheel nuts about one-half turn.
- Place the floor jack beneath the passenger-front reinforced jacking point and raise your Fusion.
- Position the jack stand beneath the adjacent reinforced body support point, then lower the vehicle securely onto it.
- Gently rock the vehicle to verify that it is stable before continuing.
Step 2: Remove the Passenger-Front Wheel
- Use the 19mm lug-nut socket and 1/2-inch-drive breaker bar to remove the loosened wheel nuts.
- Remove the wheel and place it flat away from the work area.
Step 3: Remove the Inner Splash Shield
- Use the 8mm socket and 3/8-inch-drive ratchet to remove the screws retaining the passenger-side lower splash shield.
- Use the trim-clip removal tool to lift the center pins and remove the plastic retainers.
- If a clip is stubborn, use the flat-blade screwdriver carefully without tearing the shield.
- Move the shield aside to expose the crankshaft pulley and belt drive.
Step 4: Inspect and Record the Belt Routing
- Use the work light to compare the installed main belt with the factory routing diagram.
- Confirm that the A/C stretch belt occupies the outer crankshaft pulley groove and runs directly to the A/C compressor.
- Take another clear photograph before removing either belt.
- A routing photo prevents installation mistakes.
Step 5: Remove the Stretch-Fit A/C Belt
- A stretch-fit belt is an elastic belt with no separate tensioner. It must be walked off and on the pulleys with a dedicated guide tool.
- Fit the stretch-fit belt removal tool to the crankshaft pulley and A/C belt according to the tool’s marked removal direction.
- Install the 18mm deep socket and 1/2-inch-drive breaker bar on the crankshaft pulley bolt.
- Turn the crankshaft clockwise slowly while the specialty tool guides the A/C belt off the pulley.
- Remove and discard the old A/C belt. Do not pry it off with a screwdriver because that can damage the pulley grooves.
Step 6: Release the Main Belt Tension
- Use the serpentine belt tool with 15mm adapter on the automatic tensioner’s hex fitting.
- Rotate the tensioner clockwise to unload the main serpentine belt.
- While holding the tensioner securely, slip the belt off an accessible smooth pulley.
- Allow the tensioner to return slowly to its stop. Do not let it snap back.
Step 7: Remove and Inspect the Main Belt
- Remove the old belt from each pulley by hand.
- Use the work light to inspect every pulley groove for rubber deposits, stones, or damaged ribs.
- Turn the idler and tensioner pulleys by hand. They should rotate smoothly without grinding, wobbling, or looseness.
- Stop the repair and replace any noisy or loose pulley before installing the new belt.
Step 8: Route the New Main Serpentine Belt
- Route the new main belt according to the factory diagram and your photograph.
- Place the belt’s ribbed side into every grooved pulley. Place its smooth side against every smooth pulley.
- Leave one easily reached smooth pulley until last.
- Use the work light to confirm that every belt rib is centered in its matching pulley groove.
Step 9: Seat the Main Serpentine Belt
- Use the serpentine belt tool with 15mm adapter to rotate the automatic tensioner clockwise.
- Slip the belt over the final smooth pulley, then release the tensioner slowly.
- Inspect the complete belt path with the work light. No rib may hang over a pulley edge.
- The automatic tensioner sets belt tension; no manual adjustment or tensioner-bolt torque is required.
Step 10: Install the New Stretch-Fit A/C Belt
- Position the new A/C belt around the A/C compressor pulley and partially over the outer crankshaft pulley groove.
- Fit the stretch-fit belt installation tool to the crankshaft pulley as directed by the tool manufacturer.
- Use the 18mm deep socket and 1/2-inch-drive breaker bar to rotate the crankshaft clockwise slowly.
- Guide the belt with the specialty tool until it walks completely onto the pulley.
- Remove the tool and use the work light to verify that the A/C belt is straight and fully seated.
- Rotate the crankshaft clockwise two complete turns with the 18mm deep socket and recheck both belts.
Step 11: Reinstall the Splash Shield
- Position the splash shield without trapping it against either belt.
- Install the plastic retainers by hand, then press their center pins flush.
- Use the 8mm socket and 3/8-inch-drive ratchet to snug the shield screws. Do not overtighten the plastic-mounted fasteners.
Step 12: Reinstall the Wheel
- Install the wheel and start all wheel nuts by hand.
- Use the 19mm lug-nut socket and 1/2-inch-drive breaker bar to snug the nuts in a star pattern.
- Use the floor jack to raise the vehicle slightly, remove the jack stand, and lower your Fusion completely.
- Use the 19mm lug-nut socket and 1/2-inch-drive torque wrench to tighten the wheel nuts in a star pattern: Torque to 135 Nm (100 ft-lbs).
✅ After Repair
- 👀 From a safe distance, watch the belts while a helper starts the engine. Keep hands, clothing, and tools clear.
- 👂 Listen for squealing, slapping, chirping, or grinding. Shut the engine off immediately if a belt wanders sideways.
- ❄️ Switch the A/C on and verify that the compressor belt continues running straight.
- 🔍 Shut the engine off after one minute and recheck that both belts remain fully seated.
- 🛞 Recheck the wheel-nut torque after approximately 80-160 km.
💰 DIY vs Shop Cost
Shop Cost: ₹8,000-₹16,000 (parts + labor)
DIY Cost: ₹3,500-₹7,500 (parts only)
You Save: ₹4,500-₹8,500 by doing it yourself!
Panipat labor and imported-parts pricing vary. This repair takes a shop approximately 1-1.5 hours.
🎯 Ready to get started?
HowToo makes it easy: same-day/2-day shipping on every part, plus all the tools and specialty tools you need! Check out the parts and tools sections below to add everything to your cart.