

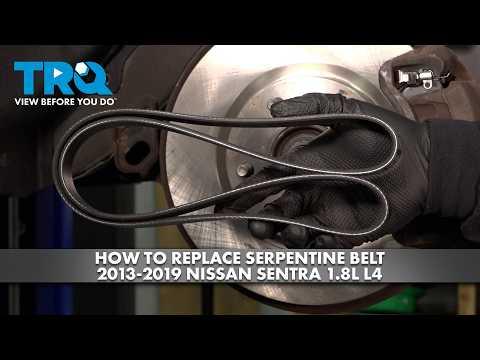





How to Replace the Serpentine Belt on a 2013-2019 Nissan Sentra 1.8L (Engine: Inline 4 1.8L)
Step-by-step instructions with required tools, belt tension specs, torque values, and safety tips for 2013, 2014, 2015, 2016, 2017, 2018, 2019
How to Replace the Serpentine Belt on a 2013-2019 Nissan Sentra 1.8L (Engine: Inline 4 1.8L)
Step-by-step instructions with required tools, belt tension specs, torque values, and safety tips for 2013, 2014, 2015, 2016, 2017, 2018, 2019


🔧 Sentra - Serpentine Belt Replacement
Your Sentra uses a manually adjusted drive belt rather than a spring-loaded automatic tensioner. You will loosen the alternator, remove the old belt, install the new belt, and then set its tension with a belt-tension gauge.
Difficulty Level: Intermediate | Estimated Time: 1-1.5 hours
Assumption: Factory air-conditioning system and original accessory drive.
⚠️ Safety & Precautions
- ⚠️ Allow the engine to cool completely before working near the belt and exhaust components.
- ⚠️ Disconnect the negative battery cable because your hands and tools will be close to the alternator terminals.
- ⚠️ Never work beneath your Sentra while it is supported only by a floor jack.
- ⚠️ Keep oil, coolant, and belt dressing off the new belt.
- ⚠️ Do not overtighten the belt. Excessive tension can damage the alternator, water-pump, and air-conditioning compressor bearings.
🔧 Required Tools
You'll need the following tools for this repair:
- 10mm socket
- 12mm socket
- 14mm socket
- 21mm deep socket
- 3/8-inch-drive ratchet
- 1/2-inch-drive breaker bar
- 6-inch socket extension
- Flat-blade trim-clip tool
- Drive-belt tension gauge (specialty)
- Torque wrench rated 5-60 Nm
- Torque wrench rated 40-150 Nm
- Floor jack rated 2-ton minimum
- Jack stands rated 2-ton minimum
- Wheel chocks
- Mechanic's gloves
- Safety glasses
- Work light
🔩 Required Parts
HowToo sells all the parts you need for this repair:
- Serpentine drive belt for 1.8L engine with air conditioning - Qty: 1
- Right-front splash-shield clips - Qty: As needed
📋 Before You Begin
- 📍 Park your Sentra on firm, level ground. Select Park or first gear, apply the parking brake, and switch off the ignition.
- 🛞 Place wheel chocks securely behind both rear tires.
- 🔑 Keep the ignition off and the key away from the vehicle while your hands are near the belt.
- 🔋 Open the hood. Record any saved audio settings, then disconnect the negative battery terminal.
- 💡 Use a work light to inspect the existing belt routing before removal. Take a clear reference photo.
🔨 Step-by-Step Instructions
Follow these steps in order:
Step 1: Disconnect the Battery
- Use a 10mm socket and 3/8-inch-drive ratchet to loosen the negative battery-terminal nut.
- Lift the terminal from the negative post and position it where it cannot spring back into contact.
- Wear safety glasses and avoid placing metal tools across the battery terminals.
Step 2: Raise the Right-Front Corner
- Use a 21mm deep socket and 1/2-inch-drive breaker bar to loosen the right-front wheel nuts one-half turn while the tire remains on the ground.
- Position the 2-ton floor jack beneath the reinforced front jacking point. Raise your Sentra and support it securely with a 2-ton jack stand.
- Remove the wheel nuts with the 21mm deep socket, then remove the right-front wheel.
- Slide the wheel underneath as an extra precaution.
Step 3: Remove the Right Splash Shield
- Use a flat-blade trim-clip tool to lift the centers of the plastic retainers around the right-front splash shield.
- Remove any shield screws with the 10mm socket and 3/8-inch-drive ratchet.
- Move the shield aside to expose the crankshaft pulley and lower belt path.
- A trim clip is a reusable plastic fastener with a small center pin that releases the clip when lifted.
Step 4: Record the Belt Routing
- Use the work light to follow the belt around every pulley.
- Confirm that the ribbed side of the belt contacts grooved pulleys and the smooth side contacts smooth pulleys.
- Compare the routing with your reference photo before loosening anything.
Step 5: Loosen the Alternator
- Locate the alternator adjusting mechanism at the front of the engine.
- Use a 14mm socket, 6-inch extension, and 3/8-inch-drive ratchet to loosen the alternator mounting or lock bolt. Do not remove it.
- Use a 12mm socket and 3/8-inch-drive ratchet to turn the belt-adjusting bolt counterclockwise.
- Continue backing off the adjuster until the alternator moves inward and the belt becomes loose.
- The adjusting bolt changes belt tension; it is not a spring-loaded tensioner.
Step 6: Remove and Inspect the Old Belt
- Using gloved hands, slip the loose belt off the easiest upper pulley first.
- Remove it from the remaining pulleys and guide it out through the wheel-well opening.
- Use the work light to inspect each pulley for damaged grooves, wobble, or fluid contamination.
- Turn accessible pulleys by hand. Replace any component that feels rough, loose, or noisy before installing the belt.
- A damaged pulley quickly ruins a new belt.
Step 7: Install the New Belt
- Compare the old and new belts side by side. The new belt should have the same rib count and nearly the same effective length.
- Route the new belt around the lower pulleys first, following your reference photo.
- Leave the easiest upper pulley until last, then slide the belt over it by hand.
- Use the work light to verify that every rib is centered in every pulley groove.
- Do not use screwdrivers or pry bars to force the belt onto a pulley.
Step 8: Set the Belt Tension
- Install the drive-belt tension gauge at the center of the longest accessible belt span. A belt-tension gauge measures how tightly the belt is stretched.
- Use the 12mm socket and 3/8-inch-drive ratchet to turn the adjusting bolt clockwise in small increments.
- Set the new belt to approximately 815-893 N (183-201 lbf) of tension.
- If the gauge manufacturer supplies a model-specific conversion scale, follow that scale exactly.
- Do not estimate final tension by twisting or pressing the belt with your fingers.
Step 9: Tighten the Alternator Fasteners
- Hold the adjustment in position and use the 14mm socket with the 5-60 Nm torque wrench to tighten the alternator lock bolt to 25 Nm (18 ft-lbs).
- Use the 12mm socket with the 5-60 Nm torque wrench to snug the adjustment-lock fastener, if equipped, to 8 Nm (71 in-lbs).
- Do not apply final tightening torque to the adjustment screw itself unless it also uses a separate lock nut.
- Recheck the tension with the drive-belt tension gauge. Readjust if tightening the lock bolt changed the measurement.
Step 10: Reinstall the Splash Shield
- Position the right-front splash shield in its original location.
- Use the flat-blade trim-clip tool by hand to reinstall serviceable clips. Replace clips that are cracked or no longer hold firmly.
- Install the shield screws with the 10mm socket and tighten them to 5 Nm (44 in-lbs).
Step 11: Reinstall the Wheel
- Mount the wheel and install all wheel nuts by hand to prevent cross-threading.
- Use the 21mm deep socket and 3/8-inch-drive ratchet to snug the nuts in a crisscross pattern.
- Remove the jack stand and lower your Sentra with the 2-ton floor jack.
- Use the 21mm deep socket and 40-150 Nm torque wrench to tighten the wheel nuts in a crisscross pattern to 113 Nm (83 ft-lbs).
Step 12: Reconnect the Battery
- Fit the negative terminal fully onto the battery post.
- Use the 10mm socket and 5-60 Nm torque wrench to tighten the terminal nut to 5.4 Nm (48 in-lbs).
- Do not overtighten the terminal because the clamp can crack.
✅ After Repair
- ✅ Make one final visual check that the belt is centered on every pulley before starting the engine.
- 🔊 Start the engine and observe the belt from a safe distance. Do not place hands, clothing, or tools near the moving belt.
- 👂 Listen for squealing, slapping, chirping, or grinding. Shut the engine off immediately if the belt walks toward a pulley edge.
- ❄️ Switch the air conditioning on and off while listening for abnormal belt noise.
- 🔍 Shut the engine off after several minutes and recheck belt alignment and tension once the engine has cooled.
- 📏 Recheck the tension after approximately 10-15 minutes of engine operation because a new belt can settle slightly.
- 🕒 Reset the clock and restore saved audio settings if they were lost during battery disconnection.
💰 DIY vs Shop Cost
Shop Cost: ₹3,500-₹7,500 (parts + labor)
DIY Cost: ₹1,200-₹3,000 (belt only)
You Save: ₹2,300-₹4,500 by doing it yourself!
Local labor rates vary. This repair takes a shop approximately 0.7-1.0 hour.
🎯 Ready to get started?
HowToo makes it easy: same-day/2-day shipping on every part, plus all the tools and specialty tools you need! Check out the parts and tools sections below to add everything to your cart.