






How to Replace the Serpentine Belt on a 2013-2018 Toyota Avalon V6 (Engine: V6 3.5L)
Step-by-step instructions with required tools, belt routing, safety tips, and wheel torque specs for 2013, 2014, 2015, 2016, 2017, 2018
How to Replace the Serpentine Belt on a 2013-2018 Toyota Avalon V6 (Engine: V6 3.5L)
Step-by-step instructions with required tools, belt routing, safety tips, and wheel torque specs for 2013, 2014, 2015, 2016, 2017, 2018


🔧 Avalon - Serpentine Belt Replacement
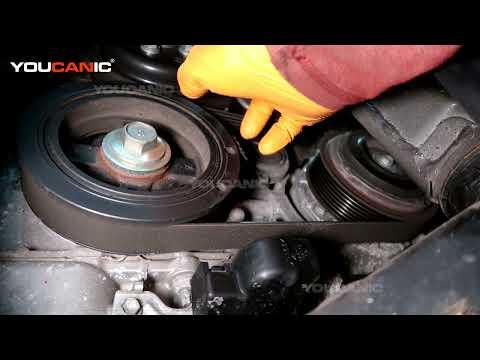
The serpentine belt drives the alternator, air-conditioning compressor, and water pump on your Avalon. Replacement requires releasing the automatic belt tensioner, routing the new belt correctly, and checking that every rib is seated in its pulley groove.
Difficulty Level: Intermediate | Estimated Time: 1-1.5 hours
⚠️ Safety & Precautions
- ⚠️ Let the engine cool completely before working near the belt and pulleys.
- 🛑 Keep the engine switched off and the key away from the vehicle while your hands are near the belt.
- 🔋 Battery disconnection is not normally required, but do not switch the ignition on during the repair.
- 🚗 Support your Avalon with a jack stand. Never work beneath a vehicle supported only by a floor jack.
- 🔧 Release the spring-loaded tensioner slowly; it can snap back with considerable force.
🔧 Required Tools
You'll need the following tools for this repair:
- 19mm deep socket
- 14mm 6-point socket
- 10mm socket
- 3/8-inch-drive long-handled ratchet
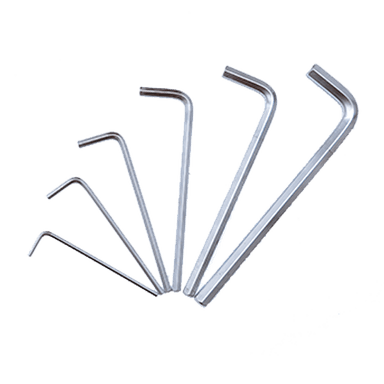
- 5mm hex key
- Flat plastic trim-clip tool
- Torque wrench rated 20-150 Nm
- Floor jack rated 2-ton minimum
- Jack stand rated 2-ton minimum
- Wheel chocks
- LED inspection light
- Mechanic gloves
- Safety glasses
🔩 Required Parts
HowToo sells all the parts you need for this repair:
- V6 engine serpentine drive belt - Qty: 1
📋 Before You Begin
- 📍 Park your Avalon on firm, level ground. Shift to Park, apply the parking brake, and switch off the engine.
- 🧊 Wait until the engine and cooling system are completely cold.
- 📷 Use an LED inspection light and photograph the original belt routing from above and through the right-front wheel opening.
- 📝 Follow the factory routing decal under the hood if fitted. The ribbed side of the belt contacts grooved pulleys; the smooth side contacts smooth pulleys.
- 🔒 Place wheel chocks securely behind both rear wheels.
🔨 Step-by-Step Instructions
Follow these steps in order:
Step 1: Loosen the Right-Front Wheel
- Use a 19mm deep socket and long-handled ratchet to loosen each right-front wheel nut approximately one-half turn.
- Do not remove the nuts while the tire is still supporting the vehicle.
Step 2: Raise and Support the Vehicle
- Use the 2-ton floor jack at the designated front jacking point to raise your Avalon.
- Place the 2-ton jack stand beneath the right-front factory support point, then lower the vehicle onto it.
- Confirm that the vehicle is stable before continuing.
Step 3: Remove the Right-Front Wheel
- Use the 19mm deep socket and long-handled ratchet to remove the loosened wheel nuts.
- Remove the wheel and place it flat away from the work area.
Step 4: Open the Belt Access Area
- Use the flat plastic trim-clip tool to release the clips securing the right-front inner splash shield.
- Use the 10mm socket and long-handled ratchet to remove any 10mm splash-shield fasteners present.
- Move the splash shield aside far enough to expose the crankshaft pulley and belt.
- Keep clips organized for easier reassembly.
Step 5: Record the Belt Routing
- Use the LED inspection light to compare the installed belt with the under-hood routing decal.
- Use the LED inspection light to identify every grooved and smooth pulley before removing the belt.
- If the routing decal is missing, rely on your photographs and note that the belt’s ribs must contact only grooved pulley surfaces.
Step 6: Release and Lock the Tensioner
- Fit the 14mm 6-point socket and long-handled ratchet onto the automatic tensioner pulley fastener.
- A belt tensioner is the spring-loaded arm that keeps the belt tight automatically.
- Slowly rotate the tensioner clockwise for at least three seconds. Do not jerk it.
- When the locking holes align, insert the 5mm hex key to hold the tensioner in its released position.
- Ease pressure off the long-handled ratchet and verify that the 5mm hex key is securely holding the tensioner.
Step 7: Remove the Old Belt
- Use mechanic gloves to slip the loose belt off an easily reached smooth pulley first.
- Remove the belt from the remaining pulleys and guide it out through the right-front access opening.
- Use the LED inspection light to check the tensioner, idler pulleys, alternator pulley, water-pump pulley, and air-conditioning pulley.
- Rotate accessible pulleys by hand while wearing mechanic gloves. Stop if any pulley grinds, wobbles, binds, or feels rough.
Step 8: Compare the Belts
- Lay the old and new belts beside each other and use the LED inspection light to compare their width, rib count, and approximate length.
- The used belt may be slightly longer from normal stretching, but the rib count and width must match exactly.
Step 9: Route the New Belt
- Use mechanic gloves to route the new belt according to the factory routing decal and your photographs.
- Leave one easily reached smooth pulley until last.
- Use the LED inspection light to confirm that the ribbed side is fully seated in every grooved pulley.
- Verify that the belt is centered on every smooth pulley and is not twisted.
- Start low and finish at the easiest pulley.
Step 10: Apply Belt Tension
- Fit the 14mm 6-point socket and long-handled ratchet to the tensioner again.
- Rotate the tensioner clockwise slightly to remove pressure from the 5mm hex key.
- Remove the 5mm hex key, then slowly allow the tensioner to return against the new belt.
- Never let the tensioner snap back.
Step 11: Inspect the Installed Belt
- Use the LED inspection light to inspect each pulley from above and through the wheel opening.
- Confirm that no belt rib is riding on the edge of a pulley.
- Confirm that the belt follows the same route shown on the factory decal and your original photographs.
Step 12: Reinstall the Splash Shield
- Position the splash shield and install its clips using your fingers and the flat plastic trim-clip tool.
- Install the 10mm fasteners using the 10mm socket and long-handled ratchet.
- Tighten the small splash-shield fasteners only until seated; do not crush the plastic shield.
Step 13: Reinstall the Wheel
- Install the right-front wheel and start all wheel nuts by hand.
- Use the 19mm deep socket and long-handled ratchet to snug the nuts in a crossing pattern.
- Use the 2-ton floor jack to raise the vehicle slightly, remove the jack stand, and lower the tire to the ground.
- Use the torque wrench and 19mm deep socket to tighten the wheel nuts in a crossing pattern: Torque to 103 Nm (76 ft-lbs).
✅ After Repair
- 🔍 Open the hood and use the LED inspection light for one final belt-routing and pulley-alignment check.
- ▶️ Start the engine and observe the belt from a safe distance. Keep hands, clothing, hair, and tools away from moving parts.
- 👂 Switch the air conditioning on and listen for squealing, chirping, slapping, or grinding.
- 🛑 Switch off the engine immediately if the belt wanders sideways or rides over a pulley edge.
- ✅ After a short drive, switch off the engine and recheck the belt alignment once the engine has cooled.
💰 DIY vs Shop Cost
Shop Cost: ₹5,000-₹11,000 including parts and labor
DIY Cost: ₹2,000-₹5,000 for the belt
You Save: ₹3,000-₹6,000 by doing it yourself!
Sonīpat labor rates vary by independent workshop and Toyota dealer. This repair normally takes a shop approximately 0.7-1.0 hour.
🎯 Ready to get started?
HowToo makes it easy: same-day/2-day shipping on every part, plus all the tools and specialty tools you need! Check out the parts and tools sections below to add everything to your cart.