







How to Replace the Serpentine Belt on a 2011-2023 Ford F-150 3.7L (Engine: V8 5.0L)
Step-by-step main accessory belt routing, tensioner tool, inspection, and safety guide for 2011, 2012, 2013, 2014, 2015, 2016, 2017, 2018, 2019, 2020, 2021, 2022, 2023
How to Replace the Serpentine Belt on a 2011-2023 Ford F-150 3.7L (Engine: V8 5.0L)
Step-by-step main accessory belt routing, tensioner tool, inspection, and safety guide for 2011, 2012, 2013, 2014, 2015, 2016, 2017, 2018, 2019, 2020, 2021, 2022, 2023


🔧 F-150 - Serpentine Belt Replacement
Your F-150’s main serpentine belt drives the engine accessories and is held tight by an automatic spring-loaded tensioner. You will release the tensioner, remove the old belt, inspect the pulleys, and install the new belt in the factory routing.
Difficulty Level: Beginner | Estimated Time: 30-60 minutes
Assumption: This procedure is for the main accessory belt. The separate lower A/C compressor belt is a stretch-fit belt and requires a different procedure.
⚠️ Safety & Precautions
- ⚠️ Switch off the engine, remove the key, and let the engine cool completely.
- ⚠️ Keep your fingers out of the spaces between the belt and pulleys.
- ⚠️ The automatic tensioner is strongly spring-loaded. Maintain control of the tool and release it slowly.
- ⚠️ Never run the engine while your hands or tools are inside the engine compartment.
- ⚠️ Do not use oil, grease, silicone spray, or belt dressing on the new belt.
- ⚠️ Battery disconnection is not required for this repair.
🔧 Required Tools
You'll need the following tools for this repair:
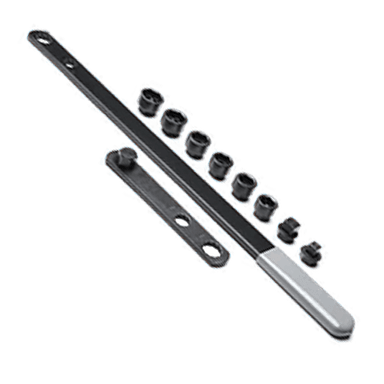
- 1/2-inch-drive serpentine belt tool (specialty)
- 15mm six-point socket
- 1/2-inch-drive breaker bar
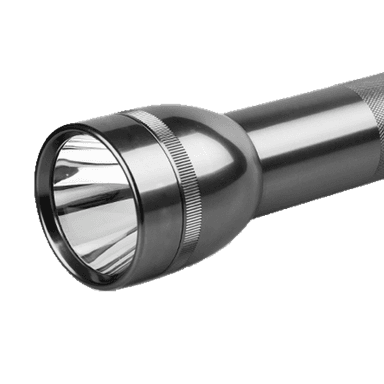
- LED work light
- Inspection mirror
- Mechanic’s gloves
- Safety glasses
🔩 Required Parts
HowToo sells all the parts you need for this repair:
- Main serpentine belt for the 3.7L engine - Qty: 1
📋 Before You Begin
- 📋 Park your F-150 on level ground, select Park, apply the parking brake, and open the hood.
- 📋 Find the belt-routing decal in the engine compartment and take a clear picture of the installed belt before removing it.
- 📋 The tensioner is the spring-loaded arm and pulley that maintains belt tension automatically.
- 📋 Do not remove the separate stretch-fit A/C compressor belt when replacing only the main serpentine belt.
- 📋 No infotainment setting, scan tool, coding, or manual belt adjustment is required.
🔨 Step-by-Step Instructions
Follow these steps in order:
Step 1: Verify the Replacement Belt
- Use the LED work light to identify the long main accessory belt at the front of the engine.
- Compare the new belt with the installed belt. Confirm that its width and number of ribs match.
- Use the routing decal and your photograph to note how the belt passes around each pulley.
Step 2: Position the Tensioner Tool
- Insert the 1/2-inch-drive serpentine belt tool into the square opening on the tensioner arm.
- If the square opening cannot be reached, place the 15mm six-point socket and 1/2-inch-drive breaker bar securely on the tensioner’s service boss.
- Make sure the tool is fully seated before applying force.
- Keep your free hand away from every pulley.
Step 3: Release Belt Tension
- Use the serpentine belt tool to rotate the tensioner clockwise, viewed from the front of the engine, until the belt becomes loose.
- Do not force the tensioner beyond its built-in stop.
- While holding the tensioner, slip the belt off an accessible smooth pulley with your gloved hand.
- Slowly return the tensioner to its resting position. Do not allow it to snap back.
Step 4: Remove the Old Belt
- Use your gloved hands to remove the loose belt from the remaining pulleys.
- Guide the belt out of the engine compartment without pulling on hoses or wiring.
- Use the LED work light and inspection mirror to check the routing around the lower crankshaft pulley.
Step 5: Inspect the Belt Drive
- Use your gloved hand to rotate each accessible idler and tensioner pulley.
- Check for grinding, roughness, looseness, wobbling, or binding. A faulty pulley or tensioner must be replaced before installing the belt.
- Use the LED work light to inspect the pulley grooves for stones, old rubber, oil, or coolant.
- Repair any fluid leak before installing the new belt. Fluid contamination can quickly damage it.
- Inspect the old belt for missing ribs or uneven edge wear. Uneven wear can indicate pulley misalignment.
Step 6: Route the New Belt
- Use your gloved hands to route the new belt exactly as shown on the factory decal and your reference photograph.
- Place the ribbed side of the belt against grooved pulleys and the smooth side against smooth pulleys.
- Route the belt around every pulley except one easily reached smooth pulley.
- Use the LED work light and inspection mirror to confirm that the belt is not twisted.
- Route the lowest pulleys before the upper pulleys.
Step 7: Install the Belt Over the Final Pulley
- Insert the 1/2-inch-drive serpentine belt tool into the tensioner again. Alternatively, use the 15mm six-point socket and 1/2-inch-drive breaker bar.
- Rotate the tensioner clockwise until enough slack is available.
- Use your gloved hand to slide the belt over the final smooth pulley.
- Slowly release the tensioner until it applies tension to the belt.
- No tensioner bolt was removed, so no fastener torque is required.
Step 8: Check Belt Seating
- Use the LED work light and inspection mirror to inspect every pulley.
- Confirm that all belt ribs sit completely inside their matching pulley grooves.
- Make sure no rib hangs over a pulley edge and the belt does not contact the separate A/C belt.
- If the belt is misplaced, use the serpentine belt tool to release tension and correct it before starting the engine.
✅ After Repair
- ✅ Remove every tool and loose item from the engine compartment.
- ✅ Start the engine while standing clear of the belt drive.
- ✅ Observe the belt for approximately 30 seconds. It should run centrally without walking sideways, flapping, or squealing.
- ✅ Switch off the engine immediately if the belt moves off-center or makes continuous noise.
- ✅ After shutting off the engine, use the LED work light to perform one final alignment check.
- ✅ No break-in procedure, scan-tool reset, or tension adjustment is required.
💰 DIY vs Shop Cost
Shop Cost: ₹5,000-₹10,000 (parts + labor)
DIY Cost: ₹2,500-₹5,500 (parts only)
You Save: ₹2,500-₹4,500 by doing it yourself!
Local labor and imported-part prices vary. This repair takes a shop approximately 0.5-1 hour.
🎯 Ready to get started?
HowToo makes it easy: same-day/2-day shipping on every part, plus all the tools and specialty tools you need! Check out the parts and tools sections below to add everything to your cart.