

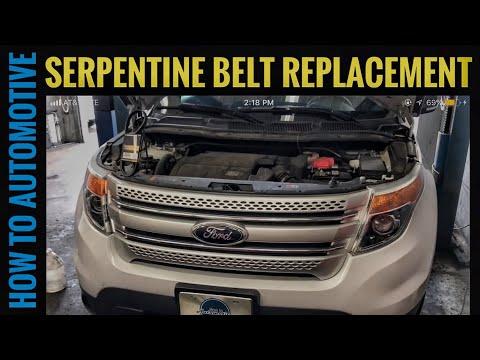






How to Replace the Serpentine Belt on a 2011-2019 Ford Explorer (Engine: V6 3.5L)
Step-by-step DIY instructions with required tools, belt routing, safety tips, and wheel torque specs for 2011, 2012, 2013, 2014, 2015, 2016, 2017, 2018, 2019
How to Replace the Serpentine Belt on a 2011-2019 Ford Explorer (Engine: V6 3.5L)
Step-by-step DIY instructions with required tools, belt routing, safety tips, and wheel torque specs for 2011, 2012, 2013, 2014, 2015, 2016, 2017, 2018, 2019


🔧 Explorer - Serpentine Belt Replacement
The serpentine belt drives the alternator, water pump, power-steering pump, and air-conditioning compressor on your Explorer. Replacement requires releasing the automatic belt tensioner, removing the old belt, and routing the new belt exactly as shown on the under-hood routing diagram.
Difficulty Level: Beginner | Estimated Time: 1-1.5 hours
⚠️ Safety & Precautions
- ⚠️ Let the engine cool completely before working near the belt and pulleys.
- 🛑 Keep the ignition off and the key away from the vehicle while your hands are near the belt.
- 🔒 Never work beneath your Explorer while it is supported only by a floor jack.
- 🧤 The automatic tensioner is spring-loaded. Keep your fingers away from the belt and pulley pinch points.
- 🔋 Battery disconnection is not required for this repair.
🔧 Required Tools
You'll need the following tools for this repair:
- 19mm deep socket
- 15mm socket
- 3/8-inch-drive ratchet
- 1/2-inch-drive breaker bar
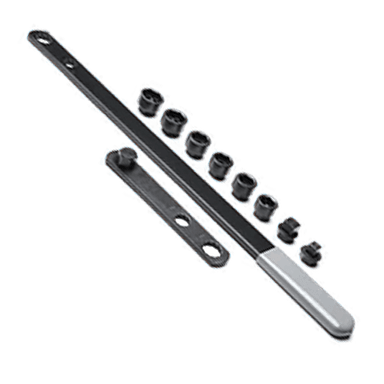
- Serpentine belt tool with 15mm adapter (specialty)
- 80-150 ft-lb torque wrench
- Automotive trim-clip removal tool
- Floor jack rated 2-ton minimum
- Jack stands rated 2-ton minimum
- Wheel chocks
- LED work light
- Mechanic's gloves
- Safety glasses
🔩 Required Parts
HowToo sells all the parts you need for this repair:
- Six-rib serpentine drive belt - Qty: 1
📋 Before You Begin
- 🅿️ Park your Explorer on firm, level ground. Shift into Park, apply the parking brake, and switch off the ignition.
- 🧊 Allow the engine to cool completely.
- 📖 Locate the factory belt-routing diagram in the engine compartment and take a clear picture of it. Follow that diagram because every ribbed and smooth pulley must contact the correct side of the belt.
- 🔍 Compare the new belt with the old belt before installation. The rib count and overall length must match.
- 🚫 No infotainment setting, scan-tool command, or battery registration is required.
🔨 Step-by-Step Instructions
Follow these steps in order:
Step 1: Secure and Raise the Vehicle
- Place the wheel chocks firmly against the front and rear of the left-rear tire.
- Use the 19mm deep socket and 1/2-inch-drive breaker bar to loosen each right-front wheel nut about one-half turn. Do not remove them yet.
- Use the floor jack rated 2-ton minimum at the specified front jacking point to lift the right-front corner.
- Support your Explorer at the reinforced body support point with a jack stand rated 2-ton minimum. Lower the vehicle gently onto the stand.
- Wear safety glasses and mechanic's gloves throughout the repair.
Step 2: Remove the Right-Front Wheel
- Use the 19mm deep socket and 1/2-inch-drive breaker bar to remove the wheel nuts.
- Remove the right-front wheel and place it flat away from the work area.
Step 3: Open the Belt Access Area
- Use the automotive trim-clip removal tool to release the retainers securing the front section of the right wheel-well splash shield.
- A trim-clip tool is a fork-shaped hand tool that removes plastic retainers without damaging them.
- Move the splash shield aside far enough to see the crankshaft pulley and belt.
- Use the LED work light to illuminate the belt path.
- Keep every clip for reinstallation.
Step 4: Record the Existing Belt Routing
- Use the LED work light to trace the belt around every pulley.
- Compare the installed routing with the factory diagram under the hood.
- Check that the ribbed side of the belt contacts grooved pulleys and the smooth back of the belt contacts smooth pulleys.
- Take a second photo before removing anything.
Step 5: Release Belt Tension
- Fit the serpentine belt tool with 15mm adapter onto the belt-tensioner hex.
- The tensioner is the spring-loaded arm that keeps the belt tight automatically.
- Move the tool slowly to rotate the tensioner away from the belt. Do not force it against its stop.
- While holding the tensioner, slide the belt off the easiest accessible smooth pulley.
- Slowly return the tensioner to its resting position. Never allow it to snap back.
Step 6: Remove and Inspect the Old Belt
- Remove the old belt through the wheel-well opening by hand, noting how it passes around each pulley.
- Use the LED work light to inspect the belt for cracks, missing ribs, shiny glazed areas, frayed edges, or oil contamination.
- Spin each accessible idler pulley by hand. It should turn smoothly without grinding, looseness, or wobble.
- Move the tensioner gently with the serpentine belt tool with 15mm adapter. Replace a noisy, binding, loose, or weak tensioner before installing the belt.
Step 7: Route the New Belt
- Route the new six-rib serpentine drive belt around the pulleys according to the factory under-hood diagram.
- Leave one easy-to-reach smooth pulley until last.
- Use the LED work light to verify that every belt rib sits inside a matching pulley groove.
- Make sure the belt is not twisted and has not slipped behind a pulley.
- One misplaced rib can quickly destroy the belt.
Step 8: Apply Tension to the New Belt
- Use the serpentine belt tool with 15mm adapter to rotate the automatic tensioner away from the belt.
- Slip the belt over the final smooth pulley by hand.
- Slowly release the tensioner until it rests firmly against the belt.
- Remove the belt tool and use the LED work light to inspect every pulley again.
- No belt-tension adjustment or tensioner-bolt tightening is required; the spring-loaded tensioner sets belt tension automatically.
Step 9: Reinstall the Splash Shield
- Position the wheel-well splash shield in its original location.
- Push the retained clips into place by hand, then seat them with the automotive trim-clip removal tool if needed.
- Confirm the shield does not touch the belt or crankshaft pulley.
Step 10: Reinstall the Wheel
- Install the right-front wheel and thread all wheel nuts by hand.
- Use the 19mm deep socket and 3/8-inch-drive ratchet to snug the nuts in a star pattern.
- Use the floor jack rated 2-ton minimum to raise your Explorer slightly, remove the jack stand, and lower the vehicle completely.
- Use the 19mm deep socket and 80-150 ft-lb torque wrench to tighten the wheel nuts in a star pattern: Torque to 135 Nm (100 ft-lbs).
- Remove the wheel chocks.
✅ After Repair
- 🔍 Before starting the engine, perform one final visual check that the belt is centered on every pulley.
- ▶️ Start the engine and observe the belt from a safe distance. Keep hands, clothing, tools, and hair away from rotating parts.
- 👂 Shut the engine off immediately if the belt walks sideways, flaps, squeals continuously, or produces a grinding sound.
- 💡 Confirm the battery warning light remains off and the steering assistance and air conditioning operate normally.
- 🛞 Recheck the right-front wheel-nut torque after approximately 80-160 km.
💰 DIY vs Shop Cost
Shop Cost: ₹6,000-₹12,000 (parts + labor)
DIY Cost: ₹2,500-₹5,500 (parts only)
You Save: ₹3,500-₹6,500 by doing it yourself!
Local labor rates vary. This repair takes a shop approximately 0.7-1.0 hour.
🎯 Ready to get started?
HowToo makes it easy: same-day/2-day shipping on every part, plus all the tools and specialty tools you need! Check out the parts and tools sections below to add everything to your cart.