

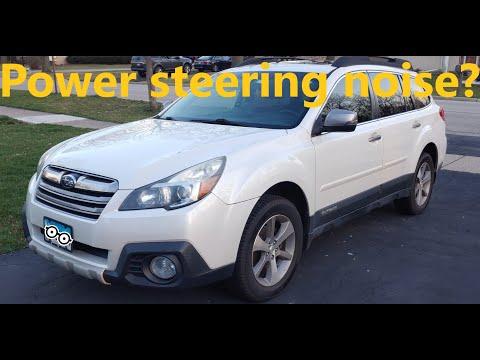




How to Replace the Power Steering Pump on a 2010-2014 Subaru Outback 3.6L (Engine: Flat 6 3.6L)
Step-by-step instructions with tools, parts, torque specs, safety tips, and bleeding procedure for 2010, 2011, 2012, 2013, 2014
How to Replace the Power Steering Pump on a 2010-2014 Subaru Outback 3.6L (Engine: Flat 6 3.6L)
Step-by-step instructions with tools, parts, torque specs, safety tips, and bleeding procedure for 2010, 2011, 2012, 2013, 2014


🔧 Outback - Power Steering Pump Replacement
Your Outback uses an engine-driven hydraulic power steering pump. Replacing it requires removing the drive belt, disconnecting two fluid lines, transferring the pulley if necessary, and carefully bleeding air from the system.
Difficulty Level: Intermediate | Estimated Time: 2-4 hours
Assumption: The replacement pump does not include a pulley.
⚠️ Safety & Precautions
- ⚠️ Let the engine cool completely before working near the radiator and exhaust.
- ⚠️ Power steering fluid damages paint. Wipe spills up immediately.
- ⚠️ Never work beneath your Outback when it is supported only by a floor jack.
- ⚠️ Keep fingers and tools away from the drive belt whenever the engine is running.
- ⚠️ Do not hold the steering wheel against either stop during bleeding. This can damage the new pump.
- ⚠️ A battery disconnect is not normally required for this repair.
🔧 Required Tools
You'll need the following tools for this repair:
- 3/8-inch drive ratchet
- 1/2-inch drive ratchet
- 10mm socket
- 12mm socket
- 14mm socket
- 17mm socket
- 14mm combination wrench
- 17mm combination wrench
- 6-inch socket extension
- 3/8-inch drive torque wrench rated 10-80 Nm
- 1/2-inch drive torque wrench rated 30-150 Nm
- Power steering pulley puller and installer set (specialty)
- Hose clamp pliers
- Plastic trim removal tool
- Fluid transfer syringe rated 500mL
- Drain pan rated 5-litre minimum
- Rubber vacuum caps assortment
- Floor jack rated 2-ton minimum
- Jack stands rated 2-ton minimum
- Wheel chocks
- Funnel with fine mesh screen
- Shop towels
- Nitrile gloves
- Safety glasses
🔩 Required Parts
HowToo sells all the parts you need for this repair:
- Hydraulic power steering pump for 3.6L engine - Qty: 1
- Power steering pressure-line sealing washers - Qty: 2
- Power steering suction-hose O-ring - Qty: 1
- Dexron III-compatible automatic transmission fluid - Qty: 2 litres
- Accessory drive belt - Qty: 1 if worn, cracked, or fluid-soaked
- Power steering reservoir-to-pump hose - Qty: 1 if hardened, swollen, or leaking
📋 Before You Begin
- 📋 Park your Outback on level, solid ground. Select Park, apply the parking brake, and chock both rear wheels.
- 📋 Confirm the new pump has the same hose connections and mounting points as the original.
- 📋 Check whether the new pump includes its pulley. Transfer the original pulley only when the replacement does not include one.
- 📋 A pulley puller removes a press-fit pulley without bending it. Its installer presses the pulley onto the new shaft without hammering.
- 📋 No infotainment setting, scan-tool command, coding, or battery registration is required.
- 📋 Have vacuum caps ready before opening the hoses to reduce fluid loss and contamination.
🔨 Step-by-Step Instructions
Follow these steps in order:
Step 1: Remove Fluid From the Reservoir
- Put on safety glasses and nitrile gloves.
- Open the power steering reservoir cap. Use the 500mL fluid transfer syringe to remove as much old fluid as possible.
- Empty the syringe into the drain pan. Do not reuse the old fluid.
Step 2: Remove the Engine Air Intake Duct
- Use the plastic trim removal tool to release the intake-duct clips.
- Use a 10mm socket and ratchet to remove any intake retaining bolts.
- Lift the duct out without pulling on nearby wiring or vacuum hoses.
- Photograph the belt routing before removal.
Step 3: Remove the Accessory Drive Belt
- Locate the automatic belt tensioner at the front of the engine. The tensioner is the spring-loaded arm that keeps the belt tight.
- Fit a 14mm socket and long ratchet onto the tensioner fastener.
- Rotate the tensioner slowly to release belt tension. Slide the belt off the power steering pump pulley.
- Release the tensioner slowly. Never let it snap back.
- Remove the belt and inspect it for cracks, glazing, missing ribs, or power steering fluid contamination.
Step 4: Disconnect the Reservoir Hose
- Position the drain pan under the pump.
- Use hose clamp pliers to move the clamp away from the pump connection.
- Twist the hose gently by hand, then pull it off the pump inlet. Do not pry against the aluminium pump housing.
- Close the hose with a rubber vacuum cap.
- Remove and discard the old inlet O-ring if one is fitted at the pump connection.
Step 5: Disconnect the High-Pressure Line
- Clean dirt from around the pressure-line connection with shop towels.
- Use the correctly fitting 17mm socket or 17mm combination wrench to loosen the pressure-line union or banjo bolt.
- A banjo bolt is a hollow bolt that allows fluid to pass through the hose fitting.
- Remove the fitting and both sealing washers. Keep the line elevated and cap its open end.
- Do not bend, twist, or place weight on the rigid section of the pressure line.
Step 6: Remove the Power Steering Pump
- Use a 14mm socket, 6-inch extension, and ratchet to remove the pump mounting bolts.
- Support the pump with one hand while removing the final bolt.
- Lift the pump from its bracket without striking the radiator or pinching the hoses.
- Keep the mounting bolts arranged by their original locations if their lengths differ.
Step 7: Transfer the Pulley if Required
- Skip this step if the replacement pump includes the correct pulley already installed.
- Compare the pulley offset and diameter before transferring it.
- Fit the power steering pulley puller around the original pulley hub. Do not grip the pulley’s outer rim.
- Use a 17mm combination wrench and the pulley puller set to draw the pulley straight off the shaft.
- Use the pulley installer set to press the pulley onto the new pump shaft until its position matches the original pump.
- Do not hammer the pulley or apply pressure through the pump body.
- Match pulley alignment before installing the belt.
Step 8: Install the New Pump
- Place the new pump into its mounting bracket.
- Start every mounting bolt by hand to prevent cross-threading.
- Use a 14mm socket and torque wrench to tighten the pump mounting bolts evenly to 22 Nm (16 ft-lbs).
- Confirm the pulley is aligned with the other accessory pulleys.
Step 9: Connect the Fluid Lines
- Lubricate the new suction-hose O-ring with fresh Dexron III-compatible fluid and install it without twisting.
- Push the reservoir hose fully onto the pump. Use hose clamp pliers to return the clamp to its original position.
- Install new sealing washers on both sides of the pressure-line banjo fitting when that fitting style is used.
- Start the pressure fitting by hand. Use the 17mm socket and torque wrench to tighten the banjo bolt to 39 Nm (29 ft-lbs).
- If the replacement pump uses a threaded flare fitting rather than a banjo bolt, do not apply the banjo-bolt torque; tighten it to the fitting manufacturer’s specified value.
Step 10: Reinstall the Drive Belt
- Route the belt around all pulleys according to the under-hood routing label or your reference photograph.
- Use the 14mm socket and ratchet to rotate the automatic tensioner.
- Slip the belt over the final smooth pulley, then release the tensioner slowly.
- Inspect every pulley. Each belt rib must sit fully inside its matching groove.
Step 11: Fill and Bleed the System With the Engine Off
- Use the floor jack at the front center lifting point to raise your Outback. Position both jack stands at the approved front side support points.
- Lower the vehicle securely onto the stands so both front tyres are clear of the ground.
- Use the funnel to fill the reservoir with fresh Dexron III-compatible fluid to the cold-level mark.
- With the engine off, turn the steering wheel slowly from near one stop to near the other 15-20 times.
- Check the reservoir every few turns and keep it above the minimum mark. Never allow the reservoir to run dry.
- Wait several minutes if the fluid becomes foamy. Foam means air remains in the system.
Step 12: Bleed the System With the Engine Running
- Confirm all tools are clear of the belt and pulleys.
- Start the engine and let it idle. Do not raise engine speed.
- Use the funnel to maintain the fluid at the proper level.
- Turn the steering wheel slowly from side to side several times. Stop just before each steering limit.
- Switch the engine off if the pump becomes loud or the fluid turns foamy. Wait for the bubbles to clear, then continue.
- Repeat until the fluid stays clear and the pump operates quietly.
Step 13: Reassemble and Lower the Vehicle
- Use the 10mm socket and ratchet to reinstall the air-intake retaining bolts. Tighten them only until snug because the duct is plastic.
- Use the plastic trim removal tool by hand to reinstall the retaining clips.
- Use the floor jack to raise your Outback slightly, remove both jack stands, and lower it onto the ground.
- Remove the wheel chocks only after the final inspection.
✅ After Repair
- ✅ With the engine idling, inspect both pump connections for leaks. Keep hands away from the moving belt.
- ✅ Verify the steering is smooth and quiet while turning in both directions.
- ✅ Check the fluid at operating temperature and adjust it to the reservoir’s hot-level mark. Do not overfill it.
- ✅ Take a slow test drive, then inspect the pump, hoses, and fluid level again.
- ✅ Recheck for leaks and belt alignment after approximately 50 kilometres.
- ✅ If the fluid remains foamy or the pump whines, stop driving and repeat the bleeding procedure. A leaking suction hose can continually draw air into the system.
💰 DIY vs Shop Cost
Shop Cost: ₹35,000-₹75,000 (parts + labor)
DIY Cost: ₹22,000-₹55,000 (parts only)
You Save: ₹10,000-₹25,000 by doing it yourself!
Local independent labor commonly runs ₹800-₹2,000 per hour. Imported US-market pump pricing can vary significantly; this repair takes a shop approximately 2-3 hours.
🎯 Ready to get started?
HowToo makes it easy: same-day/2-day shipping on every part, plus all the tools and specialty tools you need! Check out the parts and tools sections below to add everything to your cart.