







How to Replace the MAF Sensor on a 2016-2022 Toyota Prius 1.8L Hybrid (Engine: Inline 4 1.8L)
Step-by-step DIY instructions with required tools, safety tips, and torque specs for 2016, 2017, 2018, 2019, 2020, 2021, 2022
How to Replace the MAF Sensor on a 2016-2022 Toyota Prius 1.8L Hybrid (Engine: Inline 4 1.8L)
Step-by-step DIY instructions with required tools, safety tips, and torque specs for 2016, 2017, 2018, 2019, 2020, 2021, 2022


🔧 Prius - Mass Air Flow Sensor Replacement
The mass air flow (MAF) sensor measures the air entering your Prius so the engine computer can calculate fuel delivery. Replacement is straightforward because the sensor sits on top of the engine air-cleaner housing.
Difficulty Level: Beginner | Estimated Time: 15-30 minutes
⚠️ Safety & Precautions
- Allow the engine to cool, switch the ignition completely off, and keep the smart key away from the vehicle.
- Do not touch or clean the delicate sensing elements inside the new sensor.
- Do not switch the ignition on while the MAF sensor is disconnected.
- The 12-volt battery does not need to be disconnected for this repair.
- Do not touch any orange high-voltage cables or connectors.
🔧 Required Tools
You'll need the following tools for this repair:
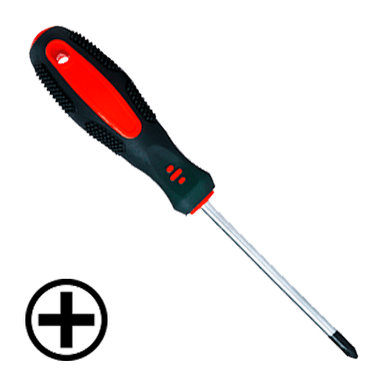
- JIS No. 2 screwdriver
- Inch-pound torque screwdriver (specialty)
- 1/4-inch drive Phillips No. 2 bit socket
- Safety glasses
- Nitrile work gloves
- Clean microfiber cloth
🔩 Required Parts
HowToo sells all the parts you need for this repair:
- Mass air flow sensor with sealing O-ring - Qty: 1
📋 Before You Begin
- Park your Prius on level ground, select Park, apply the parking brake, and press the POWER button to turn the vehicle completely off.
- Open the hood and allow the gasoline engine to cool.
- Move the smart key at least 15 feet from the vehicle so the hybrid system cannot be activated accidentally.
- Locate the MAF sensor on the top of the engine air-cleaner housing. It is the small electrical sensor installed near the air outlet hose.
- A JIS screwdriver resembles a Phillips screwdriver but fits Japanese fasteners more securely and reduces the chance of stripping them.
🔨 Step-by-Step Instructions
Follow these steps in order:
Step 1: Secure the Vehicle
- Put on the safety glasses and nitrile work gloves.
- Verify that the instrument panel is dark and the green “READY” indicator is off. No tool is required for this check.
Step 2: Clean Around the Sensor
- Use the clean microfiber cloth to wipe loose dust away from the MAF sensor and surrounding air-cleaner housing.
- Keep dirt from falling into the opening after the sensor is removed.
Step 3: Disconnect the Electrical Connector
- Press the connector’s locking tab by hand and pull the connector straight away from the sensor. No tool is required.
- Pull only on the connector body, not the wires.
- If it resists, press the locking tab more firmly rather than prying it with a screwdriver.
Step 4: Remove the MAF Sensor
- Use the JIS No. 2 screwdriver to loosen and remove the two sensor retaining screws.
- Keep both screws in a safe place because they will be reused.
- Lift the sensor straight upward by its plastic body. Gently rock it if the sealing O-ring is holding it in place.
- Do not insert the screwdriver into the sensor opening.
- Cover the opening while preparing the new sensor.
Step 5: Inspect the Mounting Area
- Use the clean microfiber cloth to wipe only the flat mounting surface around the opening.
- Verify that the old sealing O-ring came out with the sensor. Do not leave two O-rings in the opening.
- Do not push the cloth into the air-cleaner passage.
Step 6: Install the New Sensor
- Hold the new sensor by its plastic body and align it in the same direction as the original sensor. No tool is required for positioning.
- Insert it straight into the air-cleaner housing without twisting or forcing it.
- Start both screws by hand, then lightly seat them with the JIS No. 2 screwdriver.
- Fit the 1/4-inch drive Phillips No. 2 bit socket to the inch-pound torque screwdriver.
- Tighten both screws evenly to 1.7 Nm (15 in-lbs). Do not use foot-pounds.
- The plastic housing can crack if overtightened.
Step 7: Reconnect the Sensor
- Push the electrical connector onto the new sensor by hand until the locking tab clicks. No tool is required.
- Gently pull on the connector body to verify that it is locked.
- Use the clean microfiber cloth to remove any remaining dirt around the repair area.
✅ After Repair
- Move the smart key back to the vehicle, press the brake pedal, and start your Prius. Confirm that the green “READY” indicator appears.
- Allow the gasoline engine to operate when commanded by the hybrid system. Listen for air leaks or unusual whistling near the air-cleaner housing.
- Confirm that the check-engine warning does not return during a short road test.
- If a warning remains, recheck the connector and air-intake hose connections. A stored fault may require clearing with a compatible scan tool after the underlying problem is corrected.
- Uneven operation after replacement can indicate an intake-air leak, incorrect sensor fitment, damaged wiring, or a non-compatible replacement sensor.
💰 DIY vs Shop Cost
Shop Cost: $180-$350 (parts + labor)
DIY Cost: $80-$220 (parts only)
You Save: $100-$130 by doing it yourself!
Shop labor rates vary but typically run $100-$150/hour. This repair takes a shop approximately 0.3-0.5 hours.
🎯 Ready to get started?
HowToo makes it easy: same-day/2-day shipping on every part, plus all the tools and specialty tools you need! Check out the parts and tools sections below to add everything to your cart.