







How to Replace the MAF Sensor on a 2014-2018 GMC Sierra 1500 6.2L (Engine: V8 6.2L)
Step-by-step instructions with required tools, parts, torque specs, and safety tips for 2014, 2015, 2016, 2017, 2018
How to Replace the MAF Sensor on a 2014-2018 GMC Sierra 1500 6.2L (Engine: V8 6.2L)
Step-by-step instructions with required tools, parts, torque specs, and safety tips for 2014, 2015, 2016, 2017, 2018


🔧 Sierra 1500 - Mass Airflow Sensor Replacement
The mass airflow (MAF) sensor measures the air entering your Sierra 1500’s 6.2L engine so the engine computer can calculate fuel delivery. Replacement is straightforward because the sensor is mounted in the intake tube beside the air-filter housing.
Difficulty Level: Beginner | Estimated Time: 15-30 minutes
Assumption: The original air-intake assembly is installed.
⚠️ Safety & Precautions
- ⚠️ Turn the ignition completely off and keep the key away from the vehicle.
- 🧊 Allow the engine to cool before working near the intake and radiator fan.
- 🚫 Never touch the delicate sensing elements inside the new MAF sensor.
- 🧼 Do not use compressed air, solvents, or general-purpose cleaner on the sensor.
- 🔋 Battery disconnection is not required for this repair.
🔧 Required Tools
You'll need the following tools for this repair:
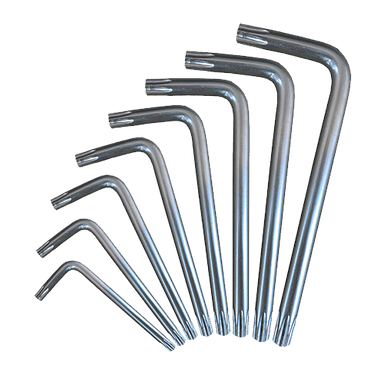
- Torx T20 screwdriver
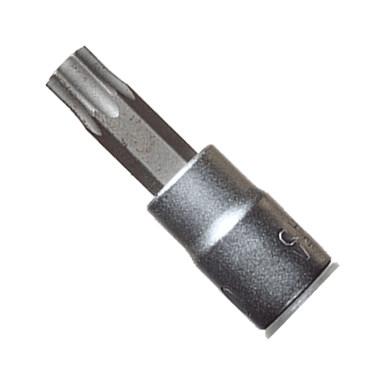
- Torx T20 bit socket
- 1/4-inch drive inch-pound torque wrench
- Clean microfiber cloth
- Nitrile gloves
- Safety glasses
🔩 Required Parts
HowToo sells all the parts you need for this repair:
- Mass airflow sensor with sealing ring - Qty: 1
📋 Before You Begin
- 🅿️ Park your Sierra 1500 on level ground, engage the parking brake, and switch off the ignition.
- 🔑 Move the key or keyless transmitter at least 15 feet away and wait two minutes before disconnecting the sensor.
- 🧹 Use a clean microfiber cloth to wipe loose dirt from the MAF sensor and surrounding intake tube.
- 🔍 Compare the new and old sensors before installation. The connector, mounting holes, airflow orientation, and sealing ring must match.
🔨 Step-by-Step Instructions
Follow these steps in order:
Step 1: Locate the MAF Sensor
- Raise the hood by hand and locate the air-filter housing on the passenger side of the engine compartment.
- Follow the large intake tube toward the engine. The MAF sensor is the small electrical sensor mounted near the air-filter housing.
- No tool is required for identification. Confirm the ignition remains off before continuing.
Step 2: Disconnect the Electrical Connector
- Use your fingers to slide or lift the connector’s secondary lock, if fitted. This colored tab prevents accidental release.
- Press the connector release and pull the plug straight away from the sensor by hand.
- Do not pull on the wires. If the connector resists, press it gently toward the sensor before pressing the release again.
- Never pry the connector with a screwdriver.
Step 3: Remove the Old Sensor
- Use a Torx T20 screwdriver to loosen and remove the two MAF sensor screws.
- Keep downward pressure on the screwdriver so the Torx recess does not strip.
- Pull the sensor straight out by hand. Rock it very gently if its sealing ring is holding it in place.
- Do not allow dirt or hardware to fall through the opening in the intake tube.
Step 4: Inspect the Mounting Opening
- Use a clean microfiber cloth to wipe only the outside edge of the opening.
- Do not push the cloth or any tool into the intake tube.
- Check that the old sealing ring came out with the sensor. Do not install the new sensor over an old seal.
Step 5: Install the New MAF Sensor
- Hold the new sensor by its plastic body with nitrile gloves. Do not touch the sensing elements inside its air passage.
- Align the new sensor exactly like the original. Its locating shape prevents correct installation in the wrong direction.
- Press the sensor evenly into the opening by hand until the flange sits flush.
- Start both screws several turns by hand to prevent cross-threading.
Step 6: Tighten the Sensor Screws
- Use a Torx T20 bit socket and a 1/4-inch drive inch-pound torque wrench to tighten both screws evenly.
- Torque to 2 Nm (18 in-lbs).
- Do not overtighten the screws. The sensor body and intake mounting surface are plastic.
Step 7: Reconnect the Electrical Connector
- Inspect the connector visually without using a tool. Confirm its terminals are straight, clean, and dry.
- Push the connector onto the new sensor by hand until the release tab clicks.
- Return the secondary lock to its locked position by hand.
- Tug lightly on the connector body to verify it is secure. Do not pull the wires.
Step 8: Perform a Final Inspection
- Use the Torx T20 screwdriver only if a screw is visibly loose; otherwise, do not tighten beyond the specified torque.
- Check by hand that the intake duct and air-filter housing are fully seated and that no wiring is trapped or stretched.
- Remove the microfiber cloth and all tools from the engine compartment before closing the hood.
✅ After Repair
- 🚙 Start the engine and let it idle for two to three minutes. A brief idle adjustment can be normal while airflow readings stabilize.
- 👂 Listen for hissing around the intake tube, which can indicate an air leak or loose duct connection.
- ⚠️ Confirm that the check-engine light is not flashing. Shut the engine off immediately if it flashes or runs severely rough.
- 🛣️ Take a gentle 10-minute test drive and verify smooth acceleration and normal idle.
- 💡 A stored MAF-related fault code may require clearing with a compatible scan tool. Disconnecting the battery merely to clear a code is not recommended.
- 🔎 If the same fault returns, inspect the intake for leaks and diagnose the circuit before replacing additional parts.
💰 DIY vs Shop Cost
Shop Cost: ₹18,000-₹40,000 (imported parts + labor)
DIY Cost: ₹12,000-₹30,000 (parts only)
You Save: ₹3,000-₹10,000 by doing it yourself!
Local labor and imported-part pricing around Sonīpat can vary considerably. This repair takes a shop approximately 0.3-0.5 hour.
🎯 Ready to get started?
HowToo makes it easy: same-day/2-day shipping on every part, plus all the tools and specialty tools you need! Check out the parts and tools sections below to add everything to your cart.