






How to Replace the Fuel Pump on a 2015-2022 Chevrolet Trax
Step-by-step fuel tank removal guide with tools, parts, torque specs, and safety tips for 2015, 2016, 2017, 2018, 2019, 2020, 2021, 2022
How to Replace the Fuel Pump on a 2015-2022 Chevrolet Trax
Step-by-step fuel tank removal guide with tools, parts, torque specs, and safety tips for 2015, 2016, 2017, 2018, 2019, 2020, 2021, 2022


🔧 Trax Fuel Pump Module - Replacement
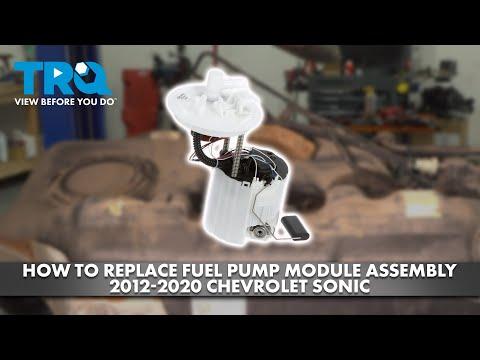
The fuel pump is part of a module mounted inside the fuel tank. Your Trax does not have an interior service opening, so the tank must be drained, supported, and lowered to replace it.
Difficulty Level: Advanced | Estimated Time: 4-7 hours
Assumption: These instructions cover the U.S.-market Trax and include separate FWD and AWD requirements.
⚠️ Safety & Precautions
- ⚠️ Gasoline vapor is extremely flammable. Work outdoors or in a professionally ventilated area with no flames, sparks, heaters, or smoking nearby.
- 🧯 Keep an ABC-rated fire extinguisher within immediate reach.
- 🔋 Disconnect the negative battery cable after relieving fuel pressure.
- 🛢️ Drain the tank with approved fuel-transfer equipment. Never siphon gasoline by mouth or use an electric household pump.
- ⬆️ Support the Trax with four jack stands on approved lift points. Never work beneath a vehicle supported only by a floor jack.
- 🧤 Wear fuel-resistant gloves and safety glasses. Fuel may remain trapped inside disconnected lines.
- 💡 Use only explosion-resistant lighting. Incandescent drop lights can ignite fuel vapor.
- 🚫 Do not power the replacement pump while it is outside the tank.
- 🧼 Clean around the pump opening before removal. Dirt entering the tank can damage the new pump.
🔧 Required Tools
You'll need the following tools for this repair:
- 3/8-inch drive metric socket set (7mm-18mm)
- 1/2-inch drive metric socket set (13mm-21mm)
- 3/8-inch drive ratchet
- 1/2-inch drive ratchet
- 3/8-inch drive extension set (3-inch and 6-inch)
- Metric combination wrench set (8mm-18mm)
- Torque wrench (5-80 Nm range)
- Fuel-line disconnect tool set (3/8-inch and 5/16-inch)
- Fuel pump module lock-ring tool (specialty)
- Brass drift punch (3/8-inch)
- Rubber mallet (16-ounce)
- Flat-blade screwdriver (6-inch)
- Long-nose pliers (8-inch)
- Trim-clip removal tool (8-inch)
- Fuel-transfer pump (gasoline-rated)
- Fuel storage containers (gasoline-rated)
- Transmission jack (rated 1,000-pound minimum)
- Floor jack (rated 2-ton minimum)
- Jack stands (rated 2-ton minimum, set of four)
- Wheel chocks (rubber, one pair)
- Drain pan (2-gallon minimum)
- Shop vacuum (wet/dry, 5-gallon minimum)
- Compressed-air blow gun (30 psi maximum)
- Digital multimeter (CAT III rated)
- OBD-II scan tool (fuel-system capable)
- Paint marker (oil-based)
- Explosion-resistant work light (12-volt LED)
- Fuel-resistant gloves (nitrile)
- Safety glasses (ANSI Z87.1)
- ABC fire extinguisher (5-pound minimum)
🔩 Required Parts
HowToo sells all the parts you need for this repair:
- Complete in-tank fuel pump module - Qty: 1
- Fuel pump module sealing ring - Qty: 1
- Fuel pump module retaining ring - Qty: 1 if damaged or corroded
- Fuel line retaining clips - Qty: As required
- Exhaust flange gasket - Qty: 1 if the exhaust is separated
- Fresh gasoline - Qty: 8-12 litres
📋 Before You Begin
- Park your Trax on firm, level ground. Select Park, apply the parking brake, and chock both front wheels.
- Run the fuel level as low as safely possible. A nearly empty tank is much easier to control.
- Record any stored diagnostic trouble codes with the OBD-II scan tool before disconnecting the battery.
- Keep each fuel container capped and away from the work area after draining the tank.
- FWD models do not have a rear propeller shaft. AWD models require additional clearance around the propeller shaft and rear driveline.
- A propeller shaft is the rotating tube that transfers power toward the rear wheels.
🔨 Step-by-Step Instructions
Follow these steps in order:
Step 1: Relieve Fuel-System Pressure
- Remove the underhood fuse-block cover with the flat-blade screwdriver.
- Use the diagram inside the cover to identify and remove the fuel-pump fuse or relay with the long-nose pliers.
- Start the engine and allow it to run until it stalls. Crank it for another five seconds, then switch the ignition off.
- Reinstall the fuse-block cover but leave the fuel-pump fuse or relay removed.
- Keep your face away from opened fuel connections.
Step 2: Disconnect the Battery
- Open the hood and use a 10mm socket with the 3/8-inch ratchet to loosen the negative battery-terminal nut.
- Lift the negative cable from the battery and position it so it cannot spring back onto the terminal.
- Wait at least two minutes before disconnecting fuel-system wiring.
- During reassembly, tighten the negative battery-terminal nut to 5 Nm (44 in-lbs).
Step 3: Drain the Fuel Tank
- Use the gasoline-rated fuel-transfer pump to move as much fuel as possible into approved fuel containers.
- Cap every container immediately after filling it.
- Place the 2-gallon drain pan beneath the filler-hose area to catch residual fuel.
- Do not use the shop vacuum for liquid gasoline. It is only used later for dry dirt around the closed pump opening.
Step 4: Raise and Support the Vehicle
- Use the 2-ton floor jack at the approved lifting points and raise your Trax high enough to lower the fuel tank.
- Position all four 2-ton jack stands beneath the approved support points, then lower the vehicle onto them.
- Push gently at one corner to confirm the vehicle is stable before going underneath.
- Position the explosion-resistant work light beneath the vehicle.
Step 5: Remove Underbody Shields
- Use the 7mm, 10mm, or 13mm socket matching the installed fasteners to remove shields blocking access to the tank.
- Use the trim-clip removal tool for plastic retainers. Keep the fasteners arranged by location.
- Inspect for fuel leaks before proceeding. Stop if the tank is damaged or actively leaking.
Step 6: Create Tank Clearance
- Use the 13mm and 15mm sockets with the 3/8-inch ratchet to remove exhaust hangers or braces that prevent the tank from lowering.
- Support any loosened exhaust section. Do not allow its weight to hang from the flex joint.
- On AWD models, use the paint marker to mark the propeller-shaft flanges before removal so the shaft returns to its original orientation.
- On AWD models, use the socket matching the installed propeller-shaft bolts with the 1/2-inch ratchet. Support the shaft and move it clear of the tank; never let it hang from a joint.
- Propeller-shaft fasteners are torque-to-spec driveline hardware. Verify the exact AWD fastener torque for the installed bolt design before reassembly rather than substituting a generic value.
Step 7: Disconnect the Filler and Vent Hoses
- Place the drain pan below the filler-neck connection.
- Use the 7mm socket or flat-blade screwdriver to loosen the filler-hose clamp.
- Use the long-nose pliers to release the vent-hose clamp, then twist the hoses gently to free them.
- Plug or cover the openings to keep dirt out. Do not use tools that can cut or puncture the hoses.
Step 8: Support the Fuel Tank
- Center the 1,000-pound transmission jack beneath the tank.
- Place a broad wooden pad between the jack and tank if needed. Do not place pressure on fuel lines or molded fittings.
- Raise the jack only until it supports the tank’s weight.
Step 9: Lower the Tank Partway
- Use the 13mm or 15mm socket matching the installed tank-strap bolts with the 1/2-inch ratchet to loosen and remove the straps.
- Lower the transmission jack only a few centimetres. Stop as soon as the top electrical connector and fuel lines become reachable.
- Do not stretch the wiring harness, evaporative-emission lines, or fuel hoses.
Step 10: Disconnect the Pump and Tank Connections
- Use the flat-blade screwdriver to release each electrical connector lock, then pull on the connector body rather than its wires.
- Clean exposed dirt with the compressed-air blow gun set below 30 psi. Keep safety glasses on.
- Wrap a shop towel around each fuel connection, then use the correctly sized 5/16-inch or 3/8-inch fuel-line disconnect tool to release it.
- A quick-connect fitting is a fuel-line coupling released by pressing its internal retainer rather than unscrewing it.
- Release the evaporative-emission vapor-line tabs by hand or with the flat-blade screwdriver. Do not force brittle plastic fittings.
Step 11: Remove the Fuel Tank
- Confirm that every hose, line, connector, and strap is detached.
- Use the transmission jack to lower the tank slowly while a helper keeps it balanced.
- Roll the tank away from your Trax and place it on a stable, padded surface.
Step 12: Clean the Pump Area
- Use the wet/dry shop vacuum only on dry dirt around the still-sealed pump opening.
- Use the compressed-air blow gun below 30 psi for remaining dust. Do not blow debris into an open tank.
- Use the paint marker to mark the pump module’s orientation relative to the tank.
Step 13: Remove the Old Pump Module
- Fit the specialty fuel pump module lock-ring tool over the retaining ring and turn it counterclockwise with the 1/2-inch ratchet.
- If the specialty tool cannot engage, use the brass drift punch and 16-ounce rubber mallet carefully. Never use a steel punch because it can create sparks.
- Remove the retaining ring, then lift the module slowly while tilting it to clear the fuel-level float.
- Drain residual fuel from the old module into the drain pan.
- Remove and discard the old sealing ring.
Step 14: Install the New Pump Module
- Compare the electrical connector, fuel fittings, float arm, and module height with the removed unit.
- Install the new sealing ring dry into the clean tank groove unless the replacement-part instructions specifically require clean engine oil as assembly lubricant.
- Lower the new module into the tank without bending the fuel-level float arm.
- Align the module and tank marks made with the paint marker.
- Install the retaining ring with the specialty fuel pump module lock-ring tool and 1/2-inch ratchet until the ring is fully seated beneath all tank locking tabs.
- Do not strike a plastic retaining ring directly with a steel tool.
Step 15: Reinstall the Fuel Tank
- Place the tank securely on the transmission jack and raise it partway.
- Push each fuel and vapor line onto its matching fitting until it clicks. Tug gently by hand to confirm it is locked.
- Reconnect the electrical connectors and engage their secondary locks with the flat-blade screwdriver.
- Raise the tank into position while checking that no hose or wiring harness is trapped.
- Install the tank straps with the matching 13mm or 15mm socket and torque wrench. Tighten the tank-strap bolts to 25 Nm (18 ft-lbs).
Step 16: Reconnect the Filler System
- Push the filler and vent hoses fully onto their fittings.
- Position each clamp over the raised locating bead.
- Use the 7mm socket or flat-blade screwdriver to tighten a worm-drive filler-hose clamp until secure without crushing the hose.
- Use the long-nose pliers to return spring clamps to their original positions.
Step 17: Reinstall Driveline, Exhaust, and Shields
- On AWD models, align the paint marks and reinstall the propeller shaft with the matching metric socket and torque wrench. Use the exact service specification for the installed fastener design.
- Use the 13mm and 15mm sockets to reinstall removed exhaust braces, heat shields, and hangers.
- Install the underbody shields with the 7mm, 10mm, or 13mm socket and reinstall plastic retainers with hand pressure.
- Confirm that the exhaust and propeller shaft do not touch the fuel tank, straps, hoses, or wiring.
Step 18: Lower and Prime the Vehicle
- Use the floor jack to raise your Trax slightly, remove all four jack stands, and lower it to the ground.
- Reinstall the fuel-pump fuse or relay with the long-nose pliers.
- Reconnect the negative battery cable with the 10mm socket and torque wrench. Torque to 5 Nm (44 in-lbs).
- Add 8-12 litres of fresh gasoline.
- Switch the ignition on for five seconds without starting the engine, then switch it off for ten seconds. Repeat this cycle three times to prime the system.
✅ After Repair
- 🔍 Inspect beneath your Trax and around the filler connection for fuel leakage before starting the engine.
- 🚗 Start the engine and let it idle. It may crank slightly longer on the first start while the fuel lines refill.
- 🛑 Switch the engine off immediately if you smell strong gasoline, see leakage, or hear the pump running abnormally.
- 📟 Use the OBD-II scan tool to clear fuel-pressure, pump-circuit, or evaporative-emission codes only after confirming the repair is leak-free.
- ⛽ Verify that the fuel gauge responds normally after adding fuel.
- 🔧 Recheck all accessible connections after a short road test. No fuel-system fitting should be damp.
- ♻️ Transfer old fuel only into approved containers and dispose of contaminated gasoline through an authorized hazardous-waste facility.
💰 DIY vs Shop Cost
Shop Cost: $650-$1,150, approximately ₹54,000-₹96,000 (parts + labor)
DIY Cost: $180-$450, approximately ₹15,000-₹38,000 (parts only)
You Save: $470-$700, approximately ₹39,000-₹58,000 by doing it yourself!
Shop labor rates vary but typically run $100-$150/hour. This repair takes a shop approximately 3-5 hours; local Sonīpat pricing and imported U.S.-spec parts availability can change the total.
🎯 Ready to get started?
HowToo makes it easy: same-day/2-day shipping on every part, plus all the tools and specialty tools you need! Check out the parts and tools sections below to add everything to your cart.