

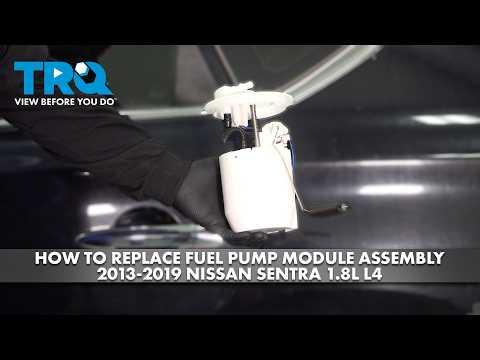






How to Replace the Fuel Pump on a 2013-2019 Nissan Sentra (Engine: Inline 4 1.8L)
Step-by-step fuel pump module replacement with tools, parts, torque specs, and safety tips for 2013, 2014, 2015, 2016, 2017, 2018, 2019
How to Replace the Fuel Pump on a 2013-2019 Nissan Sentra (Engine: Inline 4 1.8L)
Step-by-step fuel pump module replacement with tools, parts, torque specs, and safety tips for 2013, 2014, 2015, 2016, 2017, 2018, 2019


🔧 Sentra - Fuel Pump Module Replacement
The fuel pump on your Sentra is part of a complete module inside the fuel tank. Nissan provides an access opening beneath the rear seat, so the fuel tank normally does not need to be removed.
Difficulty Level: Intermediate | Estimated Time: 1.5-2.5 hours
⚠️ Safety & Precautions
- 🔥 Gasoline is extremely flammable. Work outdoors or in a well-ventilated area away from flames, heaters, sparks, and smoking materials.
- 🧯 Keep an ABC-rated fire extinguisher within reach.
- ⚠️ Relieve fuel pressure before disconnecting the fuel line.
- 🔋 Disconnect the negative battery terminal after relieving fuel pressure.
- 🧤 Wear fuel-resistant gloves and safety glasses. Avoid skin and eye contact with gasoline.
- ⛽ Perform this repair with the fuel tank below one-quarter full.
- 🚫 Do not use an impact wrench, metal hammer, test light, or shop vacuum near the open fuel tank.
- 🧼 Clean the pump area before opening the tank so dirt cannot enter.
🔧 Required Tools
You'll need the following tools for this repair:
- 10mm socket
- 3/8-inch drive ratchet
- 3/8-inch drive torque wrench rated 10-100 Nm
- Fuel pump lock-ring tool compatible with Nissan B17 (specialty)
- 3/8-inch drive breaker bar
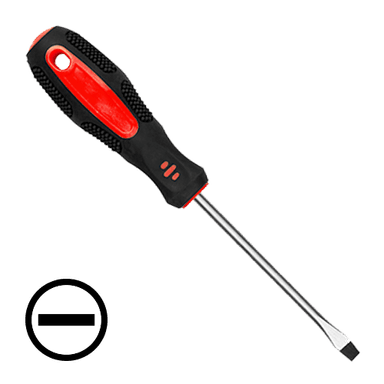
- Small flat-blade screwdriver
- Plastic trim-removal tool
- Nylon cleaning brush
- Compressed-air blow gun with regulated air supply
- Fuel-safe drain pan rated 5 liters minimum
- Fuel-safe hand-transfer pump
- Clean lint-free shop towels
- Fuel-resistant nitrile gloves
- Safety glasses
- ABC-rated fire extinguisher
🔩 Required Parts
HowToo sells all the parts you need for this repair:
- Complete in-tank fuel pump module with fuel-level sender - Qty: 1
- Fuel pump module sealing O-ring - Qty: 1
- Fuel pump module retaining ring - Qty: 1 if damaged or distorted
📋 Before You Begin
- 🅿️ Park your Sentra outdoors on firm, level ground. Select Park or Neutral, apply the parking brake, and switch the ignition off.
- ⛽ Reduce the fuel level below one-quarter tank with a fuel-safe hand-transfer pump if necessary.
- 🪟 Open the doors for ventilation and remove loose items from the rear seat area.
- 🔥 Extinguish every possible ignition source. Keep the ABC-rated fire extinguisher nearby.
- 📱 Record radio presets if desired. Battery power will be disconnected during the repair.
🔨 Step-by-Step Instructions
Follow these steps in order:
Step 1: Relieve the Fuel-System Pressure
- Open the hood and locate the engine-room fuse and relay box near the battery.
- Use the plastic trim-removal tool to release the fuse-box cover.
- Use the fuse diagram inside the cover to identify the fuel-pump fuse or relay. Remove it with the small flat-blade screwdriver only if needed to lift it gently.
- Start the engine and allow it to run until it stalls.
- Crank the engine for about five seconds to release the remaining pressure, then switch the ignition off.
- Reinstall the removed fuel-pump fuse or relay using your fingers and refit the fuse-box cover.
- Pressure relief reduces fuel spray, not all spillage.
Step 2: Disconnect the Battery
- Use the 10mm socket and 3/8-inch drive ratchet to loosen the negative battery-terminal nut.
- Lift the negative terminal from the battery post and position it where it cannot spring back into contact.
- Wait at least three minutes before working around the fuel-pump wiring.
Step 3: Remove the Rear Seat Cushion
- Reach beneath the front edge of the rear seat cushion at the left and right retention points.
- Pull upward firmly at each point to release the cushion from its floor retainers. A retainer is the clip that holds the cushion to the body.
- Guide the seat-belt buckles through their openings and lift the cushion out through a rear door.
- Use the plastic trim-removal tool if a cushion edge needs gentle assistance. Do not pry against painted metal.
Step 4: Open the Fuel-Pump Access Area
- Locate the round access cover in the floor beneath the removed seat cushion.
- Use the nylon cleaning brush and regulated compressed-air blow gun to remove all dust around the cover.
- Use the plastic trim-removal tool to lift the access cover without bending it.
- Fold the cover and its sealer aside far enough to expose the pump module.
- Use the nylon cleaning brush, compressed-air blow gun, and lint-free shop towels to clean the top of the module thoroughly.
Step 5: Disconnect the Electrical Connector
- Press the locking tab on the pump-module electrical connector with your fingers and pull the connector straight off.
- Use the small flat-blade screwdriver only to release a stubborn secondary lock. Do not pull on the wires.
- Inspect the connector for melted plastic, darkened terminals, or corrosion. Repair damaged wiring before installing the new pump.
Step 6: Disconnect the Fuel Line
- Position the 5-liter fuel-safe drain pan beside the access opening and place lint-free shop towels around the connection.
- Release the quick-connect fitting’s locking tab with your fingers. A quick-connect fitting is the plastic connector attaching the fuel line without a threaded nut.
- Push the fitting slightly toward the pump, press its release tabs, and pull it straight off the pump outlet.
- Use the small flat-blade screwdriver only if needed to lift the connector’s outer safety clip. Do not insert the screwdriver into the sealing surface.
- Catch the small amount of gasoline in the fuel-safe drain pan. Keep the open line clean.
Step 7: Mark and Remove the Retaining Ring
- Use the small flat-blade screwdriver to make a light reference mark showing the module’s installed orientation. Do not scratch deeply or create sparks.
- Fit the Nissan-compatible fuel pump lock-ring tool over the retaining ring. This tool grips the ring evenly without striking it.
- Use the 3/8-inch drive breaker bar to turn the tool counterclockwise and remove the retaining ring.
- Do not use a hammer and punch. Metal-on-metal impact can create sparks and damage the ring.
Step 8: Remove the Old Fuel Pump Module
- Place lint-free shop towels around the tank opening.
- Lift the module slowly by hand while keeping it upright.
- Tilt the module only enough to clear the fuel-level float arm without bending it.
- Allow fuel inside the module to drain back into the tank, then place the module in the fuel-safe drain pan.
- Remove the old sealing O-ring from the tank opening with your fingers. Do not reuse it.
Step 9: Prepare the New Module
- Compare the new and old modules in the fuel-safe drain pan. Confirm that the connector, outlet, float-arm shape, and locating tabs match.
- Make sure the new module includes the fuel-level sender and internal strainer in the correct positions.
- Wipe the tank’s sealing surface with a clean lint-free shop towel. Do not allow debris to fall into the tank.
- Install the new sealing O-ring into the tank opening with clean, gloved fingers. Keep it flat and free from twists.
- Do not apply petroleum grease, silicone sealer, or gasket maker to the O-ring.
Step 10: Install the New Fuel Pump Module
- Lower the new module into the tank by hand while guiding the fuel-level float through the opening.
- Align the module’s locating mark and tab with the original orientation mark.
- Press the module down evenly so the top flange sits squarely against the new O-ring.
- Start the retaining ring by hand, making sure it is not cross-threaded or sitting unevenly.
- Fit the fuel pump lock-ring tool and tighten it with the 3/8-inch drive torque wrench to 70 Nm (52 ft-lbs).
- If the supplied replacement module or retaining ring specifies a different torque, follow the part manufacturer’s vehicle-specific instruction.
Step 11: Reconnect the Fuel Line and Wiring
- Inspect the fuel-line fitting for dirt, cracks, or a damaged internal seal.
- Push the fuel-line quick connector straight onto the pump outlet by hand until it clicks.
- Pull back gently on the connector to confirm it is locked. Reinstall its safety clip with your fingers if equipped.
- Push the electrical connector onto the module by hand until its locking tab clicks.
- Do not install the access cover yet. The connections must remain visible for the leak check.
Step 12: Prime the System and Check for Leaks
- Use the 10mm socket and 3/8-inch drive ratchet to reconnect the negative battery terminal.
- Tighten the negative battery-terminal nut securely without overtightening the soft lead terminal.
- Switch the ignition to ON for five seconds without starting the engine, then switch it OFF for ten seconds.
- Repeat the ON/OFF cycle three times to fill and pressurize the new pump.
- Use a clean lint-free shop towel to check around the fuel-line connector and module seal. There must be no wetness or gasoline odor.
- If a leak appears, switch the ignition off immediately, disconnect the negative battery terminal with the 10mm socket, and correct the connection before continuing.
Step 13: Reinstall the Access Cover and Rear Seat
- After confirming there are no leaks, press the access cover and its original sealer back into place by hand.
- Use the plastic trim-removal tool to press down any lifted edges without puncturing the cover.
- Place the rear seat cushion inside your Sentra and guide the seat-belt buckles through their openings.
- Align the cushion’s floor retainers, then press firmly downward above each retainer until it locks.
- Pull upward gently at both front corners to verify that the cushion is secured.
✅ After Repair
- 🚗 Start the engine. A slightly longer first crank is normal while the system finishes priming.
- 👃 Let the engine idle and check beneath the rear seat for fuel odor, dampness, or unusual pump noise.
- ⛽ Confirm that the fuel gauge responds normally. It may take a short drive to stabilize.
- 🛣️ Take a short, low-speed test drive, then recheck for gasoline odor or leakage.
- ⚠️ Stop the engine immediately if you see fuel, smell a strong persistent odor, or notice the access area becoming wet.
- ♻️ Transfer old gasoline only into an approved container and dispose of the old module according to local Haryana hazardous-waste requirements.
💰 DIY vs Shop Cost
Shop Cost: ₹18,000-₹35,000 (parts + labor)
DIY Cost: ₹9,000-₹22,000 (parts only)
You Save: ₹9,000-₹13,000 by doing it yourself!
Local labor rates and imported U.S.-market parts availability vary. This repair takes a shop approximately 1-2 hours.
🎯 Ready to get started?
HowToo makes it easy: same-day/2-day shipping on every part, plus all the tools and specialty tools you need! Check out the parts and tools sections below to add everything to your cart.