

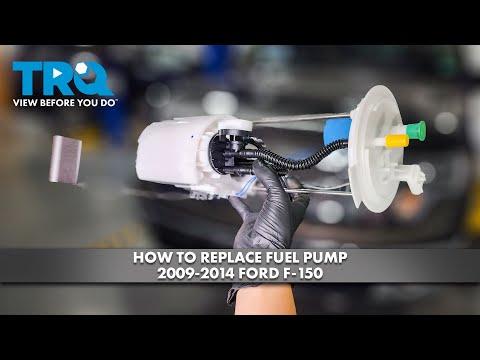







How to Replace the Fuel Pump on a 2009-2014 Ford F-150 (Trim: STX | Engine: V8 5.0L)
Step-by-step fuel tank removal and pump module installation with tools, torque specs, and safety tips for 2009, 2010
How to Replace the Fuel Pump on a 2009-2014 Ford F-150 (Trim: STX | Engine: V8 5.0L)
Step-by-step fuel tank removal and pump module installation with tools, torque specs, and safety tips for 2009, 2010


🔧 F-150 - Fuel Pump Module Replacement
The fuel pump is part of a module installed through the top of your F-150’s fuel tank. The tank must be safely drained, supported, and lowered before the module can be replaced.
Assumption: These instructions cover the original-style gasoline/flex-fuel tank and in-tank pump module; the replacement module must match the installed fuel-tank capacity.
Difficulty Level: Advanced | Estimated Time: 4-6 hours
⚠️ Safety & Precautions
- 🔥 Work outdoors or in a highly ventilated area, away from flames, heaters, sparks, and smoking materials.
- 🧯 Keep a Class B fire extinguisher within immediate reach.
- 🛢️ Run the fuel level as low as possible first. A full tank is extremely heavy and difficult to control.
- ⚡ Relieve fuel pressure before opening a fuel connection, then disconnect the negative battery cable.
- 🚫 Never use an incandescent work light, shop vacuum, impact wrench, or unapproved electric pump around gasoline vapors.
- 🛞 Support your F-150 with jack stands under the frame. Never work beneath a vehicle supported only by a jack.
- ⚠️ The fuel tank is plastic. Use a broad transmission-jack pad and do not crush or puncture it.
- 🔨 Do not strike the fuel-pump retaining ring with steel tools. A spark can ignite fuel vapor.
🔧 Required Tools
You'll need the following tools for this repair:
- Class B fire extinguisher
- Safety glasses
- Fuel-resistant nitrile gloves
- Wheel chocks
- Floor jack rated 3-ton minimum
- Jack stands rated 3-ton minimum
- Transmission jack rated 1,000-pound minimum
- 10mm socket
- 13mm socket
- 15mm socket
- 3/8-inch drive ratchet
- 3/8-inch drive 12-inch extension
- 3/8-inch drive torque wrench rated 10-80 Nm
- Fuel-line disconnect tool set sized 5/16-inch and 3/8-inch
- Fuel-pump lock-ring tool 310-123 or equivalent (specialty)
- Non-sparking brass drift (specialty)
- Rubber mallet
- Gasoline-rated fluid-transfer pump (specialty)
- Gasoline-approved fuel containers
- Plastic trim removal tool
- Long-nose pliers
- Compressed-air blow gun with regulated air supply
- Shop towels
- Paint marker
🔩 Required Parts
HowToo sells all the parts you need for this repair:
- Complete in-tank fuel pump module matched to installed tank capacity and flex-fuel system - Qty: 1
- Fuel pump module sealing O-ring - Qty: 1
- Fuel pump module retaining ring - Qty: 1
- Fuel-safe silicone lubricant - Qty: 1
- Fuel-line retaining clips - Qty: As required
- Gasoline-absorbent pads - Qty: As required
📋 Before You Begin
- 🅿️ Park your F-150 outdoors on firm, level ground. Shift into Park, apply the parking brake, and chock the front wheels.
- ⛽ Drive until the tank is nearly empty. The tank has no convenient service drain plug.
- 📏 Match the replacement module to the installed tank capacity. Extended-cab trucks can have different tank options, and the pump-module depth differs.
- 🧹 Clean dirt from around every fuel connection before disconnecting it.
- 📱 No infotainment service mode, scan-tool fuel-pump command, coding, or battery registration is required.
🔨 Step-by-Step Instructions
Follow these steps in order:
Step 1: Relieve Fuel-System Pressure
- Open the under-hood power-distribution box and use the diagram inside its cover to identify and remove the fuel-pump power fuse with long-nose pliers.
- Start the engine and let it run until it stalls. Crank it for about five additional seconds to release remaining pressure.
- Turn the ignition off and use a 10mm socket to disconnect the negative battery terminal. Isolate the cable so it cannot spring back onto the post.
- Reinstall the fuel-pump fuse after pressure has been relieved.
Step 2: Raise and Secure the Truck
- Use the 3-ton floor jack beneath an approved rear-frame lifting point.
- Place the 3-ton jack stands under both frame rails, ahead of the rear suspension mounting area.
- Lower your F-150 onto the stands and gently push the body to verify stability.
- Keep the suspension hanging for maximum tank clearance.
Step 3: Remove Excess Fuel
- Remove the fuel cap.
- Use only a gasoline-rated fluid-transfer pump and approved fuel containers to remove as much fuel as possible through the filler neck.
- Seal the containers immediately and move them away from the work area.
- Never siphon gasoline by mouth or use a drill-powered transfer pump.
Step 4: Disconnect the Filler and Vent Hoses
- Locate the large filler hose and smaller vent hose where they connect to the tank.
- Use a 10mm socket or long-nose pliers, depending on the installed clamp style, to release both clamps.
- Use a plastic trim removal tool to gently break each hose loose. Twist and pull the hoses from their tank necks without prying against the plastic tank.
- Use shop towels to catch residual fuel.
Step 5: Support the Fuel Tank
- Center the transmission jack beneath the tank and use a broad padded saddle to spread the load.
- Raise the jack until it just contacts the tank. Do not lift the truck from its stands.
- Use a paint marker to mark each tank strap’s installed position.
Step 6: Remove the Tank Straps
- Use a 13mm or 15mm socket, 12-inch extension, and 3/8-inch ratchet to remove the fuel-tank strap bolts. Fastener size can differ with the installed tank option.
- Lower or swing the straps away while keeping the tank fully supported by the transmission jack.
- Inspect the straps and mounting points for severe rust, bending, or damaged insulation.
Step 7: Lower the Tank Partway
- Slowly lower the transmission jack only far enough to reach the connections on top of the tank.
- Watch the filler hoses, wiring, vapor lines, and fuel line continuously. Stop immediately if anything becomes tight.
- Use shop towels to clean the connection area before opening any fitting.
Step 8: Disconnect Wiring, Fuel, and Vapor Lines
- Press the electrical-connector lock by hand or with the plastic trim removal tool, then unplug the pump-module connector. Pull on the connector body, not its wires.
- Remove any colored secondary safety clip from the fuel fitting with the plastic trim removal tool.
- Use the correctly sized 5/16-inch or 3/8-inch fuel-line disconnect tool to release the fuel line. A disconnect tool slides inside a spring-lock fitting to release its internal retainer.
- Release the evaporative-emissions vapor-line tabs by hand and pull the connector straight off. Do not force the brittle plastic fitting.
- Use shop towels to catch the small amount of fuel remaining in the line.
Step 9: Remove the Fuel Tank
- Verify that every hose, line, connector, and strap is free.
- Use the transmission jack to lower the tank slowly.
- Roll the tank from beneath your F-150 and leave it supported securely on the jack or a stable padded surface.
Step 10: Clean and Mark the Pump Module
- Use regulated compressed air and shop towels to remove all dirt from the module flange and retaining-ring area. Wear safety glasses and direct debris away from yourself.
- Use the paint marker to mark the pump module’s orientation relative to the tank.
- Do not allow dirt to enter the open tank.
Step 11: Remove the Pump Module
- Fit fuel-pump lock-ring tool 310-123 or equivalent over the retaining ring and turn it counterclockwise with the 3/8-inch ratchet.
- If access prevents use of the ring tool, tap only a non-sparking brass drift with a rubber mallet. Never use a steel punch or chisel.
- Remove the retaining ring, then lift the module slowly while tilting it to clear the float arm.
- Drain the module into an approved fuel container. Remove and discard the old sealing O-ring.
Step 12: Install the New Pump Module
- Compare the old and new modules. Confirm equal height, matching connectors, matching fuel fittings, and the same float-arm direction.
- Clean the tank’s sealing surface with a shop towel. Do not use abrasive paper or metal scrapers.
- Lightly coat the new sealing O-ring with fuel-safe silicone lubricant and place it in the tank groove.
- Lower the new module into the tank, carefully guiding the float arm past the opening.
- Align the module with the paint mark and molded tank locator.
- Install the new retaining ring with lock-ring tool 310-123 and the torque wrench. Torque to 80 Nm (59 ft-lbs).
- Confirm the seal remains flat and is not pinched beneath the module flange.
Step 13: Reinstall and Connect the Tank
- Use the transmission jack to raise the tank close enough to reconnect its top fittings.
- Push each vapor fitting on by hand until it clicks, then gently pull back to verify it is locked.
- Push the fuel line onto the module fitting by hand until it clicks. Reinstall its secondary safety clip and perform a gentle pull check.
- Connect the electrical plug by hand and engage its locking tab.
- Route every line exactly as originally installed. Nothing should be trapped above a strap or against a sharp frame edge.
Step 14: Secure the Tank and Hoses
- Use the transmission jack to lift the tank into its original position.
- Place the straps on their paint marks and install the bolts by hand to prevent cross-threading.
- Use the appropriate 13mm or 15mm socket and torque wrench to tighten each strap bolt. Torque to 47 Nm (35 ft-lbs).
- Use the plastic trim removal tool and your hands to reinstall the filler and vent hoses fully against their stops.
- Use the 10mm socket or long-nose pliers to secure the installed hose clamps in their original positions.
Step 15: Restore Power and Prime the System
- Use the 10mm socket to reconnect the negative battery terminal. Torque to 7 Nm (62 in-lbs).
- Add at least 19 liters (5 gallons) of fresh gasoline or approved E85-compatible fuel.
- Turn the ignition to ON without starting the engine for five seconds, then turn it OFF for ten seconds. Repeat this cycle three times.
- Do not crank the engine continuously if it does not start immediately. Repeat the priming cycle first.
✅ After Repair
- 🔍 With the ignition on, inspect the tank, filler hoses, and line connections for leaks before starting the engine.
- 🚙 Start the engine and let it idle. A few extra seconds of cranking can be normal while the new module fills.
- 👃 Shut the engine off immediately if you see leaking fuel or smell a strong, persistent gasoline odor.
- 🛞 Use the 3-ton floor jack to lift your F-150, remove the jack stands, and lower it carefully.
- 🧪 Road-test at low speed, then recheck beneath the tank for leaks.
- 📊 The fuel gauge may take several minutes to settle after the tank has been refilled.
- ⚠️ If the engine still does not start, verify the fuel-pump fuse, electrical connector, line engagement, and fuel-pressure diagnosis before replacing more parts.
💰 DIY vs Shop Cost
Shop Cost: ₹45,000-₹85,000 (parts + labor; imported US-market parts may increase cost)
DIY Cost: ₹18,000-₹45,000 (parts only)
You Save: ₹27,000-₹40,000 by doing it yourself!
Local labor and imported-part pricing vary significantly. This repair takes a shop approximately 3-5 hours.
🎯 Ready to get started?
HowToo makes it easy: same-day/2-day shipping on every part, plus all the tools and specialty tools you need! Check out the parts and tools sections below to add everything to your cart.