

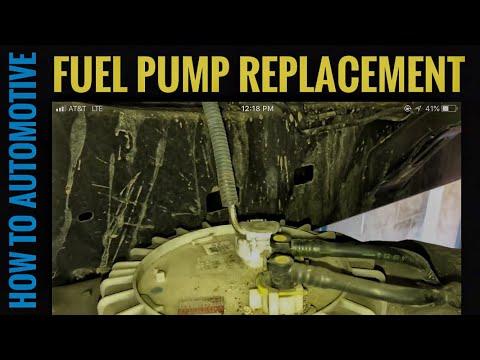





How to Replace the Fuel Pump Module on a 2010-2023 Toyota 4Runner (Engine: V6 4.0L)
Step-by-step instructions with required tools, parts, safety tips, and leak checks for 2010, 2011, 2012, 2013, 2014, 2015, 2016, 2017, 2018, 2019, 2020, 2021, 2022, 2023
How to Replace the Fuel Pump Module on a 2010-2023 Toyota 4Runner (Engine: V6 4.0L)
Step-by-step instructions with required tools, parts, safety tips, and leak checks for 2010, 2011, 2012, 2013, 2014, 2015, 2016, 2017, 2018, 2019, 2020, 2021, 2022, 2023


🔧 4Runner - Fuel Pump Module Replacement
The fuel pump is inside the fuel tank beneath the rear seating area. This procedure replaces the complete pump-and-sender module through the floor service opening, avoiding internal pump disassembly.
Difficulty Level: Advanced | Estimated Time: 3-5 hours
Assumption: A complete replacement fuel-pump module is being installed.
⚠️ Safety & Precautions
- 🔥 Gasoline vapor is extremely flammable. Work outdoors or in a well-ventilated space away from flames, heaters, sparks, and smoking.
- 🧯 Keep a Class B fire extinguisher within reach.
- ⚡ Relieve fuel pressure before disconnecting the fuel line, then disconnect the negative battery terminal.
- 🧤 Wear safety glasses and fuel-resistant gloves. Prevent gasoline from contacting your skin or eyes.
- 🚫 Do not use an incandescent work light, drill, vacuum cleaner, or other spark-producing equipment near the open tank.
- ⛽ Lower the fuel level below one-quarter tank before beginning. A full tank increases spill and vapor risk.
- 🧹 Clean the service opening thoroughly so dirt cannot enter the tank.
- 🔩 Use only non-sparking hand tools around the open fuel tank. Never strike the retaining ring with a steel hammer and punch.
🔧 Required Tools
You'll need the following tools for this repair:
- 10mm socket
- 12mm socket
- 14mm socket
- 3/8-inch drive ratchet
- 3/8-inch drive 6-inch extension
- Torque wrench rated 10-100 Nm
- Toyota fuel-pump retaining-ring wrench (specialty)
- 1/2-inch drive breaker bar
- Nylon trim-removal tool set
- Small flat-tip screwdriver
- Plastic scraper
- Soft-bristle detailing brush
- Compressed-air blow gun with regulated air supply
- Fuel-safe drain pan rated 8 litres minimum
- Shop towels
- Fuel-resistant nitrile gloves
- Safety glasses
- Class B fire extinguisher
🔩 Required Parts
HowToo sells all the parts you need for this repair:
- Complete in-tank fuel-pump and sender module - Qty: 1
- Fuel-pump module tank seal - Qty: 1
- Fuel-line connector retainer - Qty: 1
- Fuel-resistant shop towels - Qty: 1 pack
📋 Before You Begin
- 🅿️ Park your 4Runner outside on level ground. Shift into Park, apply the parking brake, and switch the ignition off.
- ⛽ Run the tank below one-quarter full. Remove and reinstall the fuel cap to release tank vapor pressure.
- 📦 Empty the rear seating and cargo areas. Open the doors for ventilation.
- 🧯 Place the fire extinguisher nearby before opening the fuel system.
- 🔋 Do not disconnect the battery until after completing the fuel-pressure relief procedure below.
- 🧼 Have clean towels ready to cover the open tank immediately after removing the module.
🔨 Step-by-Step Instructions
Follow these steps in order:
Step 1: Remove the Rear Seat Cushion
- Use the 14mm socket, extension, and ratchet to remove the accessible rear seat-cushion anchor bolts.
- Use the nylon trim-removal tool to release the seat-base trim and retainers without damaging the interior panels.
- Lift the cushion carefully and disconnect any attached electrical connector by pressing its locking tab by hand.
- Move the cushion outside the work area. Keep its bolts organized for reinstallation.
- Photograph each bracket before removing it.
Step 2: Expose the Fuel-Pump Service Cover
- Use the nylon trim-removal tool to lift the carpet and insulating pad over the fuel-pump service opening.
- Use the 10mm socket and ratchet to remove any fasteners securing the service cover.
- If the cover is sealed with reusable body sealer, use the plastic scraper to lift it gradually. Do not use a powered tool.
- Lift the cover only far enough to expose the pump electrical connector.
Step 3: Relieve Fuel-System Pressure
- Press the locking tab and disconnect the fuel-pump electrical connector by hand.
- Verify that no tools, towels, or fuel containers are near the engine or exhaust.
- Start the engine and allow it to run until it stalls from lack of fuel.
- Crank the engine for approximately five seconds with the starter, then turn the ignition completely off.
- Do not reconnect the pump connector yet.
Step 4: Disconnect the Battery
- Use the 10mm socket and ratchet to loosen the negative battery-terminal nut.
- Lift the negative terminal from the battery and position it where it cannot spring back onto the post.
- Wait at least 90 seconds before opening the fuel line.
Step 5: Clean the Pump Area
- Use the soft-bristle detailing brush to loosen dust around the module and fuel-line connection.
- Use the regulated compressed-air blow gun to blow debris away from the opening. Keep the nozzle pressure low and wear safety glasses.
- Finish with clean shop towels. No dirt should remain where it could fall into the tank.
Step 6: Disconnect the Fuel Feed Line
- Place the fuel-safe drain pan beside the opening and surround the connector with shop towels.
- Use the small flat-tip screwdriver only to release the connector's secondary retainer. Do not pry against the plastic fuel tube.
- Pull the quick connector straight off by hand while catching the small amount of gasoline that escapes.
- A quick connector is a plastic fitting that locks onto the pipe without a threaded nut.
- Cap or wrap the disconnected line with a clean fuel-resistant towel.
Step 7: Remove the Retaining Ring
- Mark the installed positions of the retaining ring and tank with the small flat-tip screwdriver using a light reference scratch outside the sealing area.
- Fit the Toyota fuel-pump retaining-ring wrench squarely onto the ring. This specialty wrench grips the ring without dangerous hammering.
- Use the 1/2-inch drive breaker bar to rotate the ring counterclockwise until it releases.
- Do not use a hammer, punch, impact wrench, or open flame.
Step 8: Remove the Old Pump Module
- Lift the module slowly by hand while keeping it upright.
- Tilt it only as needed to clear the fuel-level float arm. The float arm is the thin rod that measures fuel level.
- Allow fuel inside the reservoir to drain back into the tank, then transfer the module into the fuel-safe drain pan.
- Remove the old tank seal by hand. Do not reuse it.
- Immediately cover the tank opening with a clean shop towel.
Step 9: Install the New Module
- Use a clean shop towel to wipe the tank sealing surface. Do not push debris into the tank.
- Install the new fuel-pump seal into its tank groove by hand. Keep it flat, clean, and completely dry.
- Compare the new and old modules in the drain pan. Confirm the connector, fuel outlet, locating tabs, and float-arm shape match.
- Remove the covering towel and lower the new module into the tank by hand without bending the float arm.
- Align the module's locating tab with the corresponding tank slot. Do not rotate the module after it compresses the seal.
Step 10: Secure the Pump Module
- Start the retaining ring by hand and confirm it is not cross-threaded.
- Fit the Toyota fuel-pump retaining-ring wrench and use the 1/2-inch drive breaker bar to tighten the ring clockwise.
- Tighten until the ring reaches the original alignment position and its locking features are fully seated. Toyota's service method uses ring alignment with the dedicated wrench rather than an improvised hammer-and-punch torque method.
- Confirm the seal has not pushed outward from beneath the module flange.
Step 11: Reconnect the Fuel Line and Wiring
- Inspect the fuel-line connector by hand. Replace its retainer if it is cracked, distorted, or loose.
- Push the fuel connector straight onto the pump outlet until it clicks.
- Pull back gently by hand to confirm it is locked, then install the secondary retainer.
- Reconnect the pump electrical connector by hand until its lock clicks.
- Leave the service cover open for the leak inspection.
Step 12: Prime and Check the System
- Use the 10mm socket and ratchet to reconnect the negative battery terminal.
- Torque the negative battery-terminal nut to 5.4 Nm (48 in-lbs) using the torque wrench and 10mm socket.
- Switch the ignition to ON without starting the engine for five seconds, then switch it off for ten seconds. Repeat three times.
- Use a clean shop towel to check around the module seal and fuel connector for fresh gasoline.
- If any fuel appears or a strong odor persists, switch the ignition off immediately and correct the connection before continuing.
Step 13: Reinstall the Service Cover
- After confirming there are no leaks, position the service cover and carpet by hand.
- Use the 10mm socket and ratchet to reinstall any service-cover fasteners snugly in their original positions.
- Press reusable sealing material evenly around the cover with the plastic scraper so dust, water, and exhaust fumes cannot enter the cabin.
Step 14: Reinstall the Rear Seat
- Position the seat cushion and reconnect any electrical connector by hand.
- Engage all seat hooks and locating tabs before installing the bolts.
- Use the 14mm socket and ratchet to start every seat bolt by hand.
- Use the torque wrench and 14mm socket to tighten the seat fasteners to their Toyota specification for their exact mounting position. Do not guess or overtighten safety-related seat anchors.
- Use the nylon trim-removal tool to seat the surrounding trim clips fully.
✅ After Repair
- 🚗 Start the engine and let it idle for several minutes. A slightly longer first crank is normal while fuel pressure builds.
- 🔍 Inspect the service-cover area again for leakage or a raw-gasoline odor before driving.
- ⛽ Verify the fuel gauge responds normally. It may take one driving cycle to stabilize.
- 🛣️ Take a short local test drive, then shut the engine off and perform one final leak and odor inspection.
- ⚠️ If the engine will not start, do not repeatedly crank it. Recheck the electrical connector, fuel-line lock, and module compatibility.
- 🧯 Store or dispose of gasoline-contaminated towels according to local hazardous-waste rules in Haryana. Never place wet fuel towels in household rubbish.
💰 DIY vs Shop Cost
Shop Cost: ₹45,000-₹95,000 (parts + labor)
DIY Cost: ₹25,000-₹70,000 (parts only)
You Save: ₹20,000-₹25,000 by doing it yourself!
Local labor and imported-part pricing vary considerably. This repair takes a shop approximately 2.5-4 hours.
🎯 Ready to get started?
HowToo makes it easy: same-day/2-day shipping on every part, plus all the tools and specialty tools you need! Check out the parts and tools sections below to add everything to your cart.