






How to Replace the Engine Air Filter on a 2016-2020 Kia Optima 2.4L (Engine: Inline 4 2.4L)
Beginner-friendly steps, required parts, tools, safety tips, and final checks for 2016, 2017, 2018, 2019, 2020
How to Replace the Engine Air Filter on a 2016-2020 Kia Optima 2.4L (Engine: Inline 4 2.4L)
Beginner-friendly steps, required parts, tools, safety tips, and final checks for 2016, 2017, 2018, 2019, 2020


🔧 Optima - Engine Air Filter Replacement
The engine air filter keeps dust and debris from entering your Optima’s 2.4L engine. Replacement requires opening the air-cleaner housing, installing the new filter in the same orientation, and securing the cover.
Difficulty Level: Beginner | Estimated Time: 10-15 minutes
⚠️ Safety & Precautions
- ⚠️ Turn the engine off and allow it to cool before working under the hood.
- ⚠️ Keep loose clothing, hair, and tools away from the cooling fans because they can start automatically.
- ⚠️ Do not allow dirt, leaves, or hardware to fall into the open intake housing.
- ⚠️ Battery disconnection is not required for this repair.
🔧 Required Tools
You'll need the following tools for this repair:
- Nitrile work gloves
- Safety glasses
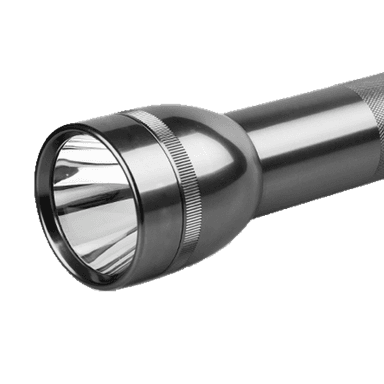
- LED inspection flashlight
- Clean microfiber cloth
🔩 Required Parts
HowToo sells all the parts you need for this repair:
- 2.4L engine air filter - Qty: 1
📋 Before You Begin
- 📍 Park your Optima on level ground, shift into Park, and apply the parking brake.
- 🔑 Switch off the ignition and remove the key from the immediate area.
- 🌡️ Wait until the engine compartment is cool enough to touch safely.
- 📱 No infotainment setting, scan tool, or service mode is required.
🔨 Step-by-Step Instructions
Follow these steps in order:
Step 1: Open and Secure the Hood
- Wear the safety glasses and nitrile work gloves.
- Pull the hood-release lever beneath the driver’s side dashboard.
- Release the secondary latch under the front edge of the hood, then raise the hood and secure it with the support rod.
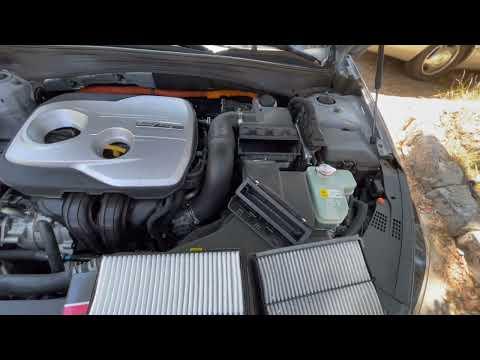
Step 2: Locate the Air-Cleaner Housing
- Use the LED inspection flashlight to locate the black plastic air-cleaner housing in the engine compartment.
- Follow the large black intake duct from the engine toward the filter housing if you need help identifying it.
- The housing cover is held by metal retaining clips. A retaining clip is a spring-loaded fastener that locks the cover in place.
Step 3: Release the Housing Cover
- Use your gloved fingers to pull each metal retaining clip outward and away from the housing cover.
- Support each clip as it releases so it does not snap against the plastic housing.
- Do not disconnect the battery or remove the intake duct for routine filter replacement.
Step 4: Remove the Old Filter
- Use your gloved hands to lift the housing cover only far enough to access the filter.
- Notice how the old filter sits inside the lower housing, then lift it straight out with your gloved hands.
- Do not start the engine while the filter is removed.
- Take a photo before removing the old filter.
Step 5: Clean and Inspect the Housing
- Use the LED inspection flashlight to check the lower housing for leaves, sand, or loose debris.
- Use the clean microfiber cloth to wipe loose debris from the housing without pushing dirt into the intake opening.
- Inspect the housing edges and intake duct for cracks, gaps, or damaged clips.
- Do not use compressed air because it can force dirt into the intake tract.
Step 6: Install the New Air Filter
- Use your gloved hands to place the new 2.4L engine air filter into the lower housing in the same orientation as the old filter.
- Make sure the filter’s sealing edge sits flat and evenly inside its channel.
- If the filter has an airflow or orientation marking, install it according to that marking.
- Do not force the filter or trim its sealing edge.
Step 7: Close the Housing
- Use your gloved hands to position the housing cover squarely over the new filter.
- Check around the complete edge with the LED inspection flashlight. No part of the filter seal should be pinched or visible outside the housing.
- Use your gloved fingers to engage every metal retaining clip fully.
- No torque specification applies because the filter cover uses hand-operated retaining clips.
Step 8: Perform a Final Check
- Use your gloved hands to gently lift the cover at each edge and confirm it is securely latched.
- Use the LED inspection flashlight to confirm the intake duct remains connected and nothing was left in the engine compartment.
- Remove the hood support rod, secure it in its holder, and close the hood firmly.
✅ After Repair
- ✅ Start the engine and let it idle for approximately one minute.
- ✅ Listen for unusual whistling or rushing-air sounds, which can indicate that the housing is not fully sealed.
- ✅ Switch the engine off and recheck the retaining clips if you hear an intake leak.
- ✅ No warning-light reset, scan-tool procedure, or filter programming is required.
- ✅ Inspect the filter more often when driving in Sonīpat’s dusty conditions, even if the normal maintenance interval has not been reached.
💰 DIY vs Shop Cost
Shop Cost: $45-$90 equivalent (parts + labor)
DIY Cost: $15-$35 equivalent (parts only)
You Save: $30-$55 by doing it yourself!
Local labor rates vary. This repair takes a shop approximately 0.2-0.4 hours.
🎯 Ready to get started?
HowToo makes it easy: same-day/2-day shipping on every part, plus all the tools and specialty tools you need! Check out the parts and tools sections below to add everything to your cart.