

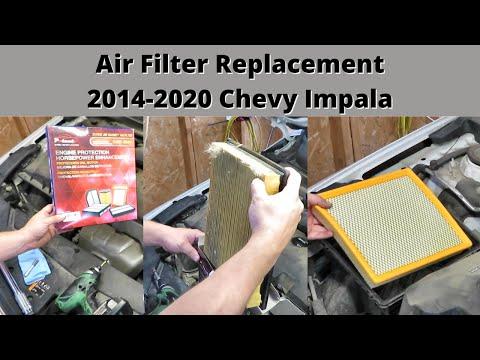





How to Replace the Engine Air Filter on a 2014-2020 Chevrolet Impala 3.6L V6 (Engine: V6 3.6L)
Step-by-step DIY instructions with required tools, safety tips, and torque specs for 2014, 2015, 2016, 2017, 2018, 2019, 2020
How to Replace the Engine Air Filter on a 2014-2020 Chevrolet Impala 3.6L V6 (Engine: V6 3.6L)
Step-by-step DIY instructions with required tools, safety tips, and torque specs for 2014, 2015, 2016, 2017, 2018, 2019, 2020


🔧 Impala - Engine Air Filter Replacement
The engine air filter is inside the black air-cleaner housing near the front passenger side of your Impala. Replacing a dirty filter restores proper airflow and helps keep dust from entering the 3.6L engine.
Difficulty Level: Beginner | Estimated Time: 10-20 minutes
⚠️ Safety & Precautions
- ⚠️ Turn the engine off and let it cool before working near the intake system.
- 🛑 Keep tools, dirt, and loose objects out of the exposed air-intake opening.
- 🔋 Battery disconnection is not required for this repair.
🔧 Required Tools
You'll need the following tools for this repair:
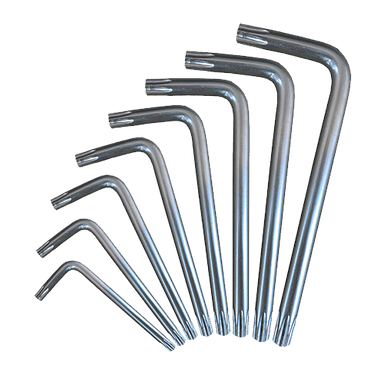
- Torx T25 screwdriver
- 1/4-inch-drive torque wrench rated 2-20 Nm
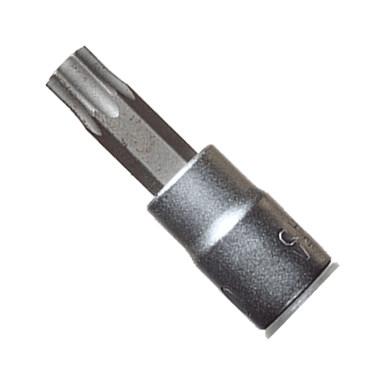
- Torx T25 socket
- Clean microfiber cloth
- Nitrile gloves
- Safety glasses
🔩 Required Parts
HowToo sells all the parts you need for this repair:
- Engine air filter for the 3.6L V6 - Qty: 1
📋 Before You Begin
- 🅿️ Park your Impala on level ground, shift into Park, and apply the parking brake.
- 🌡️ Switch off the ignition and wait for the engine compartment to cool.
- 📱 No infotainment setting, scan tool, programming, or service mode is required.
- 🧹 Open the hood and remove loose debris from around the air-cleaner housing before opening it.
🔨 Step-by-Step Instructions
Follow these steps in order:
Step 1: Locate the Air-Cleaner Housing
- Find the large black plastic box at the front passenger side of the engine compartment.
- Follow the wide intake duct from the engine toward this box if you need help identifying it.
- Use a clean microfiber cloth to wipe dust from the housing seam.
Step 2: Loosen the Housing Screws
- Use a Torx T25 screwdriver to loosen the four captive cover screws. A captive screw stays attached to the cover after it is loosened.
- Turn each screw counterclockwise until it spins freely.
- Do not force the screws or remove them from the plastic cover.
Step 3: Lift the Housing Cover
- Lift the air-cleaner cover only far enough to access the filter.
- Gently move the attached intake duct with the cover. Do not sharply bend or pull the duct.
- Do not unplug the mass airflow sensor unless extra clearance is absolutely necessary.
- Support the cover; do not strain its wiring.
Step 4: Remove the Old Filter
- Lift the old engine air filter straight out by hand while wearing nitrile gloves.
- Notice how the filter’s sealing edge sits in the housing before removing it completely.
- Keep dirt from falling into the clean-air opening leading toward the engine.
Step 5: Clean and Inspect the Housing
- Use a clean microfiber cloth to wipe loose dust from the lower housing.
- Do not push the cloth into the intake duct.
- Inspect the housing for leaves, cracks, damaged clips, or a distorted sealing channel.
- Do not use compressed air because it can drive dirt into the intake system.
Step 6: Install the New Filter
- Place the new engine air filter into the lower housing in the same orientation as the old filter.
- Press around the entire sealing edge by hand until it sits flat inside its channel.
- Confirm that no part of the filter seal is folded, raised, or trapped outside the housing.
- A flat seal prevents unfiltered air leaks.
Step 7: Refit the Housing Cover
- Lower the cover carefully while keeping the filter centered.
- Check the entire housing seam by sight and touch. The cover must sit evenly with no visible gap.
- Start all four captive screws clockwise by hand with the Torx T25 screwdriver.
Step 8: Tighten the Cover Screws
- Use the Torx T25 socket and 1/4-inch-drive torque wrench to tighten the screws evenly in a crossing pattern.
- Torque to 3 Nm (27 in-lbs).
- Do not overtighten the screws because the plastic housing threads can strip.
✅ After Repair
- ✅ Check that the air-cleaner cover is fully seated and the intake duct has not been loosened.
- 🔊 Start the engine and listen for hissing or whistling around the housing.
- 🔍 If the engine runs roughly or a warning light appears, switch it off and recheck the cover seal and nearby sensor connector.
- 📝 No maintenance reset or filter programming is required.
- ♻️ Dispose of the old filter according to local household-waste rules.
💰 DIY vs Shop Cost
Shop Cost: ₹3,000-₹7,000 (imported part + labor)
DIY Cost: ₹1,500-₹4,500 (part only)
You Save: ₹1,500-₹2,500 by doing it yourself!
Local pricing around Sonīpat can vary because Impala filters may be imported. This repair takes a shop approximately 0.2-0.4 hours.
🎯 Ready to get started?
HowToo makes it easy: same-day/2-day shipping on every part, plus all the tools and specialty tools you need! Check out the parts and tools sections below to add everything to your cart.