

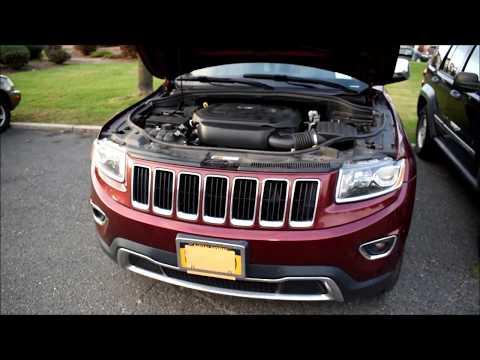




How to Replace the Engine Air Filter on a 2011-2021 Jeep Grand Cherokee (Engine: V8 5.7L)
Beginner-friendly step-by-step instructions with tools, parts, and safety tips for 2011, 2012, 2013, 2014, 2015, 2016, 2017, 2018, 2019, 2020, 2021
How to Replace the Engine Air Filter on a 2011-2021 Jeep Grand Cherokee (Engine: V8 5.7L)
Beginner-friendly step-by-step instructions with tools, parts, and safety tips for 2011, 2012, 2013, 2014, 2015, 2016, 2017, 2018, 2019, 2020, 2021


🔧 Grand Cherokee - Engine Air Filter Replacement
This is an easy first DIY job. Open the air-filter housing on the passenger side of the engine bay, exchange the filter, and make sure the new seal sits flat.
Difficulty Level: Beginner | Estimated Time: 10-20 minutes
⚠️ Safety & Precautions
- ⚠️ Switch the engine off and let it cool before reaching into the engine bay.
- ⚠️ Keep fingers, clothing, and tools away from the cooling fan. It can operate unexpectedly.
- ⚠️ Don’t allow dirt, leaves, screws, or tools to enter the clean side of the intake.
- ⚠️ Battery disconnection isn’t required for this repair.
🔧 Required Tools
You'll need the following tools for this repair:
- Nitrile work gloves
- Safety glasses
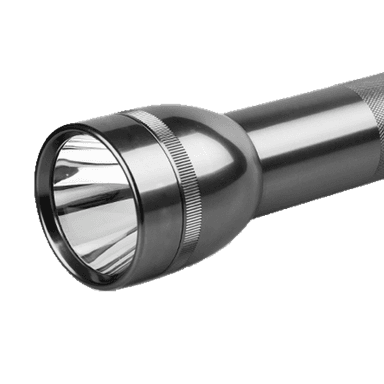
- LED inspection light
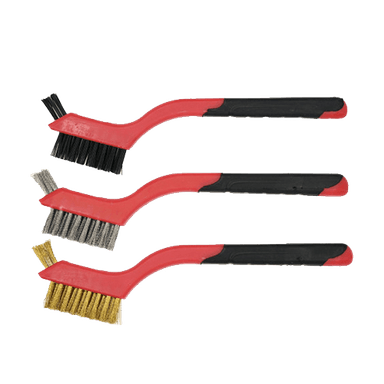
- Soft-bristle 25mm detailing brush
- Wet/dry vacuum with crevice attachment
🔩 Required Parts
HowToo sells all the parts you need for this repair:
- Direct-fit panel engine air filter - Qty: 1
📋 Before You Begin
- 📋 Park your Grand Cherokee on level ground, select Park, and apply the parking brake.
- 📋 Turn the ignition completely off and keep the key away from the vehicle.
- 📋 Open the hood and support it fully.
- 📋 Locate the large black plastic air-filter housing on the passenger side of the engine compartment.
- 📋 Compare the new and old filters before closing the housing. Their outer dimensions and seal shape must match.
🔨 Step-by-Step Instructions
Follow these steps in order:
Step 1: Clean Around the Airbox
- Use the soft-bristle 25mm detailing brush to loosen dust around the air-filter housing lid.
- Use the wet/dry vacuum with crevice attachment to remove loose leaves and grit.
- This keeps debris from falling into the intake when the housing opens.
Step 2: Release the Retaining Clips
- Use your gloved fingers to release the metal spring clips around the edge of the air-filter housing.
- Pull each clip outward only far enough to clear the lid.
- Use the LED inspection light to check around the housing and confirm every clip is released.
Step 3: Lift the Housing Lid
- Use both gloved hands to lift the loose edge of the housing lid slightly.
- Disengage the opposite edge from its locating tabs. Locating tabs are plastic guides that position the lid correctly.
- Move the lid only as far as the attached intake tube comfortably allows. Don’t pull or twist the tube.
- Plastic gets stubborn with age. Don’t force it.
Step 4: Remove the Old Filter
- Use your gloved hands to lift the old panel filter straight out.
- Notice which side faces upward so the replacement goes in the same way.
- Inspect the old filter for heavy dust, oil, water staining, leaves, or rodent damage.
Step 5: Clean the Lower Housing
- Use the wet/dry vacuum with crevice attachment to remove debris from the bottom half of the housing.
- Use the soft-bristle 25mm detailing brush for dirt trapped in the corners.
- Don’t push debris toward the clean-air outlet leading to the engine.
- Never use compressed air toward the intake opening.
Step 6: Install the New Filter
- Use your gloved hands to place the new filter into the lower housing in the same orientation as the old one.
- Press gently around the outer rubber seal. It must sit evenly inside its channel with no folded corners.
- Use the LED inspection light to check the entire perimeter.
- If the filter rocks, bows, or sits above the housing edge, remove it and reposition it.
Step 7: Refit the Housing Lid
- Use both gloved hands to engage the housing lid’s locating tabs first.
- Lower the other side over the filter without moving or pinching the filter seal.
- Check that the lid meets the lower housing evenly on every side.
Step 8: Secure the Clips
- Use your gloved fingers to snap every spring clip fully over the housing lid.
- Use the LED inspection light to inspect each clip and the full housing seam.
- No torque specification applies because the standard housing uses spring clips rather than service bolts.
- Give the lid a gentle pull. It shouldn’t lift or shift.
✅ After Repair
- ✅ Confirm that no tools or cleaning materials remain in the engine compartment.
- ✅ Check that the intake tube is secure and wasn’t pulled loose while lifting the lid.
- ✅ Start the engine and let it idle for about one minute.
- ✅ Listen for a loud sucking or whistling noise, which can indicate an unsealed housing or loose intake tube.
- ✅ No warning-light reset, programming, or battery procedure is normally required.
- ✅ In Haryana’s dusty conditions, inspect the filter more frequently than the normal maintenance interval.
💰 DIY vs Shop Cost
Shop Cost: $45-$100 equivalent, depending on local parts and labor
DIY Cost: $9-$30 for a standard disposable filter
You Save: Approximately $25-$70 by doing it yourself!
Shop labor rates vary. This repair usually takes a technician approximately 0.2-0.3 hour.
🎯 Ready to get started?
HowToo makes it easy: same-day/2-day shipping on every part, plus all the tools and specialty tools you need! Check out the parts and tools sections below to add everything to your cart.