






How to Replace the Engine Air Filter on a 2003-2024 Nissan Murano 3.5L V6 (Engine: V6 3.5L)
Beginner-friendly steps with required tools, parts, safety tips, and final checks for 2003, 2004, 2005, 2006, 2007, 2009, 2010, 2011, 2012, 2013, 2014, 2015, 2016, 2017, 2018, 2019, 2020, 2021, 2022, 2023, 2024
How to Replace the Engine Air Filter on a 2003-2024 Nissan Murano 3.5L V6 (Engine: V6 3.5L)
Beginner-friendly steps with required tools, parts, safety tips, and final checks for 2003, 2004, 2005, 2006, 2007, 2009, 2010, 2011, 2012, 2013, 2014, 2015, 2016, 2017, 2018, 2019, 2020, 2021, 2022, 2023, 2024


🔧 Murano - Engine Air Filter Replacement
The engine air filter removes dust and debris before air enters your Murano’s 3.5L V6. Replacement requires opening the air-cleaner housing, swapping the filter, and carefully reseating the housing cover.
Difficulty Level: Beginner | Estimated Time: 10-20 minutes
⚠️ Safety & Precautions
- ⚠️ Turn the engine off and let it cool before working under the hood.
- 🛑 Keep tools and loose clothing away from the cooling fans, which can start unexpectedly.
- 🔋 Battery disconnection is not required for this repair.
- 🚫 Do not start the engine while the filter is removed.
🔧 Required Tools
You'll need the following tools for this repair:
- Nitrile work gloves
- ANSI Z87.1 safety glasses
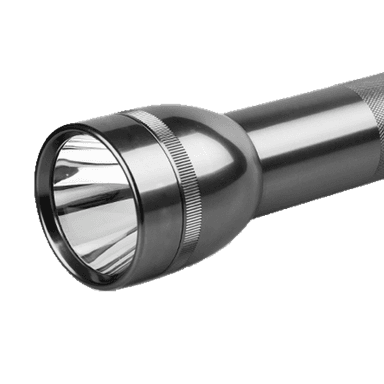
- LED inspection flashlight
- Shop vacuum with crevice attachment
- Clean microfiber cloth
🔩 Required Parts
HowToo sells all the parts you need for this repair:
- Engine air filter for 3.5L V6 - Qty: 1
📋 Before You Begin
- 🅿️ Park your Murano on level ground, select Park, apply the parking brake, and switch off the ignition.
- 🌡️ Allow the engine to cool before opening the hood.
- 📦 Remove the new filter from its packaging, but keep it clean and dry.
- 🔍 The air-cleaner housing is the black plastic box at the front-left area of the engine compartment, connected to the large intake hose.
🔨 Step-by-Step Instructions
Follow these steps in order:
Step 1: Open and Secure the Hood
- Use your gloved hand to pull the hood-release handle below the driver’s side of the dashboard.
- Release the secondary latch beneath the front edge of the hood.
- Raise the hood and verify that its support mechanism holds it securely.
Step 2: Locate the Air-Cleaner Housing
- Use the LED inspection flashlight to locate the black air-cleaner housing connected to the large ribbed intake hose.
- Identify the metal retaining clips along the edge of the housing cover.
- A retaining clip is a spring-loaded latch that holds the cover closed.
Step 3: Release the Housing Cover
- Use your gloved fingers to pull each metal retaining clip outward until it releases.
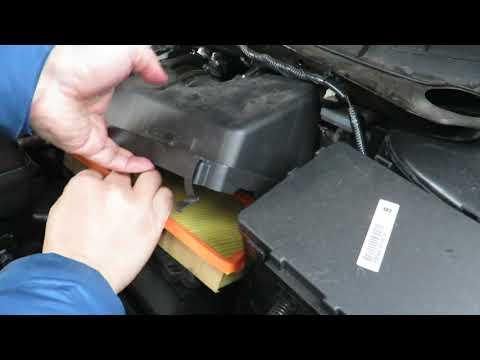
- Lift the clip-side of the cover slightly, then disengage the cover’s locating tabs from the opposite side.
- Do not pull hard on the intake hose or nearby wiring.
- Note the cover position before lifting it.
Step 4: Remove the Old Filter
- Use your gloved hand to lift the old engine air filter straight out of the lower housing.
- Observe how the filter’s rubber sealing edge sits in the housing before removing it completely.
- Keep dirt from falling into the clean-air opening leading toward the engine.
Step 5: Clean and Inspect the Housing
- Use the LED inspection flashlight to inspect the bottom of the housing for leaves, sand, or insects.
- Use the shop vacuum with crevice attachment to remove loose debris without touching the intake opening.
- Use a clean microfiber cloth to wipe the filter-sealing ledge.
- Do not use compressed air because it can push debris toward the engine.
Step 6: Install the New Filter
- Use your gloved hands to place the new filter into the lower housing in the same orientation as the old filter.
- Make sure the filter’s rubber perimeter seal lies flat and fully inside its channel.
- Do not force, bend, trim, or oil the replacement filter.
- A raised seal will cause an air leak.
Step 7: Close the Housing
- Use your gloved hands to engage the cover’s locating tabs first.
- Lower the opposite side of the cover while checking that no section of the filter seal is pinched.
- Press the cover down gently and snap each metal retaining clip fully into place.
- No fastener torque specification applies because the housing uses hand-operated clips.
Step 8: Perform a Final Inspection
- Use the LED inspection flashlight to check that the housing seam is even on every side.
- Use your gloved hand to gently check that the intake hose and nearby electrical connectors remain secure.
- Remove the microfiber cloth, shop vacuum, flashlight, and all packaging from the engine compartment.
- Lower the hood and press it closed securely.
✅ After Repair
- ✅ Start the engine and let it idle for approximately one minute.
- 👂 Listen for a loud hissing or whistling sound, which may indicate that the housing is not sealed correctly.
- 🚨 Confirm that no warning light appears on the instrument panel.
- 🔎 If the engine runs roughly, switch it off and recheck the filter seal, housing tabs, clips, intake hose, and electrical connectors.
- 🗓️ Inspect the filter during routine service and replace it sooner when driving in Sonīpat’s dusty conditions.
💰 DIY vs Shop Cost
Shop Cost: ₹1,800-₹4,000 (parts + labor)
DIY Cost: ₹900-₹2,200 (parts only)
You Save: ₹900-₹1,800 by doing it yourself!
Local labor and imported-filter prices vary. This repair takes a shop approximately 0.2-0.4 hours.
🎯 Ready to get started?
HowToo makes it easy: same-day/2-day shipping on every part, plus all the tools and specialty tools you need! Check out the parts and tools sections below to add everything to your cart.