

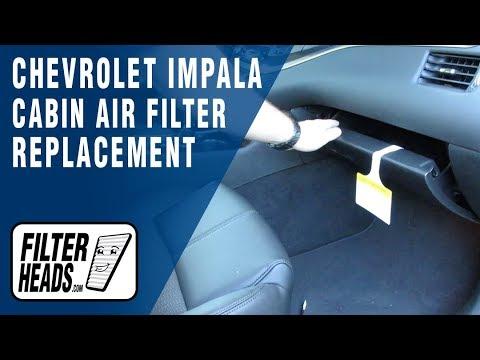





How to Replace the Cabin Air Filter in a 2014-2020 Chevrolet Impala (Engine: V6 3.6L)
Step-by-step glove box removal, filter installation, tools, and safety tips for 2014
How to Replace the Cabin Air Filter in a 2014-2020 Chevrolet Impala (Engine: V6 3.6L)
Step-by-step glove box removal, filter installation, tools, and safety tips for 2014


🔧 Impala - Cabin Air Filter Replacement
The cabin air filter is behind the glove box. Replacing it helps improve airflow and keeps dust, pollen, and debris from entering the passenger compartment.
Difficulty Level: Beginner | Estimated Time: 10-20 minutes
⚠️ Safety & Precautions
- Turn the ignition off and remove the key before beginning.
- Empty the glove box so its contents do not fall onto the floor.
- Lower the glove box gently to avoid damaging its hinges or damper arm.
- Battery disconnection is not required for this repair.
🔧 Required Tools
You'll need the following tools for this repair:
- Plastic trim removal tool
- LED flashlight
- Portable vacuum with crevice attachment
- Nitrile work gloves
- Safety glasses
🔩 Required Parts
HowToo sells all the parts you need for this repair:
- Cabin air filter - Qty: 1
📋 Before You Begin
- Park your Impala on level ground and shift the transmission into Park.
- Set the parking brake and turn the ignition completely off.
- Open the front passenger door and remove everything from the glove box.
- Compare the new filter with the old one before installation.
🔨 Step-by-Step Instructions
Follow these steps in order:
Step 1: Open and Empty the Glove Box
- Put on the nitrile work gloves and safety glasses.
- Open the glove box fully and remove all stored items by hand.
- Use the LED flashlight to inspect both sides of the glove box.
Step 2: Release the Glove-Box Damper
- Locate the small damper arm attached near the right side of the glove box. The damper arm is the plastic link that makes the glove box open slowly.
- Support the glove box with one hand.
- Use the plastic trim removal tool to gently release the damper arm from its mounting pin.
- Do not pull sharply because the plastic connection can break.
Step 3: Lower the Glove Box
- Press the left and right sides of the glove box inward by hand so the built-in stops clear the dashboard opening.
- Lower the glove box carefully toward the passenger floor.
- Leave the lower hinges connected.
- Press one side inward at a time.
Step 4: Open the Filter Access Door
- Use the LED flashlight to locate the rectangular cabin-filter access door behind the lowered glove box.
- Release the access-door retaining tabs by hand. If a tab is tight, gently press it with the plastic trim removal tool.
- Pull the access door straight outward and set it aside.
- No bolts are removed, so there is no torque specification for this repair.
Step 5: Remove the Old Filter
- Note the direction of the airflow arrow printed on the old filter before moving it.
- Pull the old filter straight out by hand. Bend it slightly only if needed to clear the opening.
- Keep the dirty side facing upward to prevent debris from spilling into the blower housing.
Step 6: Clean the Filter Housing
- Use the LED flashlight to inspect the empty filter compartment.
- Use the portable vacuum with crevice attachment to remove loose leaves and dust near the opening.
- Do not push the vacuum attachment deeply into the housing because the blower fan is below it.
Step 7: Install the New Filter
- Hold the new cabin air filter with its airflow arrow pointing downward, toward the blower motor.
- Slide the filter into the housing by hand without crushing or folding its sealing edges.
- Confirm that the filter sits flat and does not protrude from the opening.
- Airflow direction matters more than label orientation.
Step 8: Reinstall the Access Door
- Position the filter access door over the opening by hand.
- Press evenly until each retaining tab clicks securely into place.
- Use the LED flashlight to verify that the door is fully seated around its edges.
Step 9: Reinstall the Glove Box
- Raise the glove box by hand while pressing its left and right sides inward.
- Move it past the dashboard stops, then release the sides.
- Use the plastic trim removal tool if needed to guide the damper arm back onto its mounting pin.
- Open and close the glove box slowly to confirm smooth movement.
✅ After Repair
- Start your Impala and select a medium blower speed.
- Check that air flows normally from the vents without rattling or scraping noises.
- Verify that the glove box opens slowly and remains securely closed.
- Replace the filter about every 12 months or 15,000-20,000 miles, and sooner in dusty conditions.
💰 DIY vs Shop Cost
Shop Cost: ₹2,500-₹5,000 (parts + labor)
DIY Cost: ₹1,200-₹3,000 (parts only)
You Save: ₹1,300-₹2,000 by doing it yourself!
Local labor and imported Impala filter prices vary. This repair takes a shop approximately 0.2-0.4 hour.
🎯 Ready to get started?
HowToo makes it easy: same-day/2-day shipping on every part, plus all the tools and specialty tools you need! Check out the parts and tools sections below to add everything to your cart.