

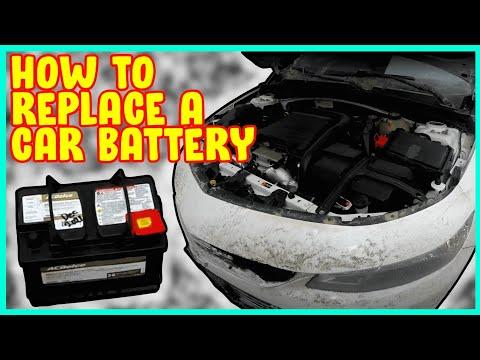






How to Replace the Battery in a 2016-2025 Chevrolet Malibu (Engine: Inline 4 1.5L)
Step-by-step AGM battery replacement with tools, torque specs, safety tips, and reset instructions for 2016, 2017, 2018, 2019, 2020, 2021, 2022, 2023, 2024, 2025
How to Replace the Battery in a 2016-2025 Chevrolet Malibu (Engine: Inline 4 1.5L)
Step-by-step AGM battery replacement with tools, torque specs, safety tips, and reset instructions for 2016, 2017, 2018, 2019, 2020, 2021, 2022, 2023, 2024, 2025


🔧 Malibu - 12-Volt Battery Replacement
Your Malibu’s start/stop system requires an OE-spec AGM battery. Replacement involves removing the battery cover, disconnecting the negative cable first, exchanging the battery, and resetting the battery-monitoring system.
Difficulty Level: Beginner | Estimated Time: 30-60 minutes
Assumption: Your Malibu retains its stock battery cables and start/stop charging system.
⚠️ Safety & Precautions
- 🛑 Turn the ignition completely off and keep the key fob away from your Malibu.
- ⚡ Always disconnect the negative terminal first and reconnect it last.
- 🔥 Never allow a tool to bridge the positive terminal and vehicle metal.
- 🧤 Wear gloves and safety glasses. Battery acid can cause severe burns.
- 🏋️ The battery is heavy. Lift it upright with both hands or use a battery carrier.
- 🔋 Install only the specified AGM type. A conventional flooded battery will not tolerate the start/stop charging strategy.
- 🚫 Do not use a memory saver through the diagnostic connector during this repair.
🔧 Required Tools
You'll need the following tools for this repair:
- 10mm socket
- 13mm socket
- 3/8-inch-drive ratchet
- 3/8-inch-drive 6-inch extension
- 3/8-inch-drive torque wrench rated 5-30 Nm
- Plastic trim removal tool
- Battery terminal cleaning brush
- AGM-compatible 12-volt battery charger
- GM-compatible bidirectional scan tool (specialty)
- Insulated battery terminal cap
- Battery lifting strap rated 50 pounds minimum
- Nitrile work gloves
- Safety glasses
🔩 Required Parts
HowToo sells all the parts you need for this repair:
- OE-spec AGM start/stop battery - Qty: 1
- Battery terminal protectant - Qty: 1
📋 Before You Begin
- 🅿️ Park your Malibu on level ground, select Park, and apply the parking brake.
- 🪟 Lower the driver’s window so you cannot accidentally lock yourself out.
- 🔌 Turn off the lights, climate control, radio, and all accessories.
- ⏱️ Switch the ignition off, remove the key fob from the vehicle, and wait at least five minutes before disconnecting the battery.
- 🔋 If the replacement battery is not fully charged, use an AGM-compatible charger before installation.
- 📻 Saved stations and personalized settings may need to be restored afterward.
🔨 Step-by-Step Instructions
Follow these steps in order:
Step 1: Open the Hood and Locate the Battery
- Use the interior hood release, then release the secondary latch and raise the hood.
- Use your hands and a plastic trim removal tool to release the battery-cover retainers without forcing them.
- Lift off the battery cover and set it aside.
Step 2: Disconnect the Negative Cable
- Identify the negative terminal by its minus symbol and black cable.
- Use a 10mm socket and ratchet to loosen the negative terminal clamp nut.
- Twist the clamp gently and lift it straight off the battery post. Do not pry against the battery case.
- Cover the disconnected clamp with an insulated terminal cap and position it where it cannot spring back.
- Do not pull on or strike the battery current sensor attached to the negative cable. This sensor measures battery charging and discharging.
Step 3: Disconnect the Positive Cable
- Open the red positive-terminal cover by hand.
- Use a 10mm socket and ratchet to loosen the positive terminal clamp nut.
- Lift the clamp straight off and move it away from the battery.
- Cover the positive clamp with an insulated terminal cap.
Step 4: Remove the Battery Hold-Down
- Locate the hold-down retainer at the bottom edge of the battery. The hold-down is the bracket that prevents the battery from moving.
- Use a 13mm socket, 6-inch extension, and ratchet to remove the hold-down bolt and retainer.
- Place the bolt and retainer somewhere clean so they are not lost.
Step 5: Remove the Old Battery
- Check that no cables, vents, or retainers remain attached.
- Attach the battery lifting strap and lift the battery straight upward with both hands.
- Keep the battery upright and place it on a stable surface.
- Use the battery terminal cleaning brush to remove corrosion from the cable clamps. Wear safety glasses and gloves.
- Lift with your legs, not your back.
Step 6: Install the New AGM Battery
- Compare the new and old batteries. The case dimensions, terminal positions, AGM marking, and electrical rating must match the specified replacement.
- Use the battery lifting strap to lower the new battery into the tray with the terminals in the original orientation.
- Make sure the battery sits flat and cannot rock.
- Reinstall the lower hold-down and bolt using the 13mm socket and extension.
- Use the torque wrench to tighten the hold-down bolt to 25 Nm (18 ft-lbs).
- Do not overtighten the hold-down because the battery case can crack.
Step 7: Connect the Positive Cable
- Remove the insulated cap from the positive cable.
- Push the positive clamp fully down onto the positive battery post.
- Use the 10mm socket and torque wrench to tighten the terminal nut to 6 Nm (53 in-lbs).
- Close the red positive-terminal cover.
- Do not hammer the terminal clamp onto the post.
Step 8: Connect the Negative Cable
- Remove the insulated cap from the negative cable.
- Push the negative clamp fully down onto the negative battery post.
- Use the 10mm socket and torque wrench to tighten the terminal nut to 6 Nm (53 in-lbs).
- Apply a light coating of battery terminal protectant after both clamps are tight.
Step 9: Reinstall the Battery Cover
- Use your hands to position the battery cover correctly over the battery and cables.
- Press each retainer into place by hand. Use the plastic trim removal tool only if a retainer needs alignment.
- Confirm that the cover does not pinch either battery cable.
Step 10: Reset the Battery Monitoring System
- Connect the GM-compatible bidirectional scan tool to the diagnostic connector beneath the driver’s side of the instrument panel.
- Switch the ignition on without starting the engine.
- Use the scan tool’s applicable path, typically Body Control Module > Configuration/Reset Functions > Battery Reset.
- Follow the scan tool prompts and confirm that a new AGM battery was installed.
- Clear only battery-disconnect-related diagnostic trouble codes.
- If a battery reset function is unavailable, switch everything off and let your Malibu remain undisturbed for at least four hours so the battery sensor can establish a new state-of-charge baseline.
✅ After Repair
- ✅ Start the engine and confirm it cranks normally.
- 🔍 Verify that the charging-system warning light turns off and no warning messages remain.
- 🧪 Use the scan tool to check the body control and charging systems for returning trouble codes.
- 🕒 Reset the clock, radio presets, express-window function, and other personalized settings if needed.
- 🪟 If express-up operation is lost, fully lower each affected window, then fully raise it and hold the switch for approximately two seconds.
- 🚦 The automatic start/stop feature may remain unavailable until the new battery is adequately charged and operating conditions are met.
- ♻️ Return the old battery to a parts store or recycling facility. Never place it in household trash.
💰 DIY vs Shop Cost
Shop Cost: $300-$500 (parts + labor)
DIY Cost: $180-$300 (parts only)
You Save: $120-$200 by doing it yourself!
Shop labor rates vary but typically run $100-$150/hour. This repair takes a shop approximately 0.5-1.0 hour.
🎯 Ready to get started?
HowToo makes it easy: same-day/2-day shipping on every part, plus all the tools and specialty tools you need! Check out the parts and tools sections below to add everything to your cart.