
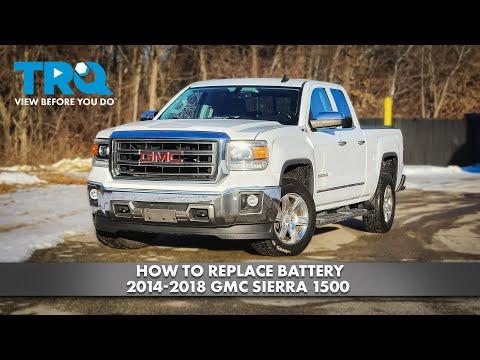






How to Replace the Battery in a 2007-2026 GMC Sierra 1500 (Engine: V8 6.2L)
Step-by-step AGM battery installation with tools, safety tips, and torque specs for 2007, 2008, 2009, 2010, 2011, 2012, 2013, 2014, 2015, 2016, 2017, 2018, 2019, 2020, 2021, 2022, 2023, 2024, 2025, 2026
How to Replace the Battery in a 2007-2026 GMC Sierra 1500 (Engine: V8 6.2L)
Step-by-step AGM battery installation with tools, safety tips, and torque specs for 2007, 2008, 2009, 2010, 2011, 2012, 2013, 2014, 2015, 2016, 2017, 2018, 2019, 2020, 2021, 2022, 2023, 2024, 2025, 2026


🔧 Sierra 1500 - Battery Replacement
Your Sierra 1500 uses a single starting battery in the passenger-side rear area of the engine compartment. Replacement involves disconnecting the negative cable first, removing the battery retainer, installing the correct AGM battery, and reconnecting the positive cable first.
Difficulty Level: Beginner | Estimated Time: 30-45 minutes
Assumption: The truck retains its stock single-battery configuration.
⚠️ Safety & Precautions
- ⚠️ Wear safety glasses and chemical-resistant gloves; batteries contain corrosive acid.
- ⚠️ The battery weighs approximately 18-23 kg (40-50 lb). Lift with both hands and keep it upright.
- ⚠️ Turn the ignition completely off and keep the key or remote away from the truck.
- ⚠️ Disconnect the negative cable first and reconnect it last to reduce short-circuit risk.
- ⚠️ Never allow a tool to bridge the positive terminal and any metal body component.
- ⚠️ Do not smoke or create sparks near the battery; battery gas can ignite.
- ⚠️ Battery disconnection is required. Battery registration or programming is not required.
🔧 Required Tools
You'll need the following tools for this repair:
- 10mm socket
- 13mm socket
- 3/8-inch-drive ratchet
- 3/8-inch-drive 10-inch extension
- 3/8-inch-drive torque wrench rated 5-30 Nm
- Battery terminal cleaning brush
- Battery lifting strap rated 23 kg minimum
- Chemical-resistant work gloves
- ANSI Z87.1 safety glasses
🔩 Required Parts
HowToo sells all the parts you need for this repair:
- BCI Group 48/H6 AGM starting battery, minimum 730 CCA - Qty: 1
- Battery terminal protectant - Qty: 1
📋 Before You Begin
- 📍 Park your Sierra 1500 on level ground, shift into Park, engage the parking brake, and open the hood.
- 🔑 Turn off the ignition, remove all charging accessories, and keep the remote at least 5 m (15 ft) away.
- ⏱️ Wait at least two minutes before disconnecting the battery so the electronic modules can shut down.
- 🪟 Lower the driver-side window before disconnecting power so you cannot accidentally lock yourself out.
- 💾 Save radio favorites and personal settings if desired. The clock and some learned settings may reset.
- 🔋 Verify the replacement battery is AGM, Group 48/H6, and has its positive and negative terminals in the same positions as the original.
🔨 Step-by-Step Instructions
Follow these steps in order:
Step 1: Locate and uncover the battery
- Find the battery near the passenger-side rear corner of the engine compartment.
- Use your hands to release the battery cover tabs, then lift the cover away.
- Identify the negative terminal marked “−” and the positive terminal under the red “+” cover.
Step 2: Disconnect the negative cable
- Use the 10mm socket and 3/8-inch-drive ratchet to loosen the negative terminal clamp nut.
- Twist the clamp gently and lift it straight off the negative battery post.
- Move the cable aside where it cannot spring back onto the post.
- Never pry against the plastic battery case.
Step 3: Disconnect the positive cable
- Open the red positive-terminal cover by hand.
- Use the 10mm socket and 3/8-inch-drive ratchet to loosen the positive terminal clamp nut.
- Lift the positive cable assembly straight off the battery post and position it safely aside.
- Do not let the positive cable touch body metal.
Step 4: Remove the battery retainer
- Locate the retaining wedge at the bottom edge of the battery tray.
- Use the 13mm socket, 10-inch extension, and 3/8-inch-drive ratchet to remove the retainer bolt.
- Lift out the bolt and retaining wedge. A battery retainer is the clamp that prevents the battery from moving while driving.
Step 5: Remove the old battery
- Fit the battery lifting strap rated 23 kg minimum securely around the battery.
- Lift the battery straight upward with both hands while keeping it upright.
- Set it on a stable surface away from children, flames, and metal objects.
- Lift with your legs, not your back.
Step 6: Inspect and clean the connections
- Wear the chemical-resistant work gloves and ANSI Z87.1 safety glasses.
- Use the battery terminal cleaning brush to remove dry corrosion from the inner surfaces of both cable clamps.
- Inspect the tray, hold-down wedge, and cables for cracks, swelling, acid damage, or loose connections.
- Do not install the new battery if a cable clamp is cracked or cannot tighten securely.
Step 7: Install the new battery
- Use the battery lifting strap rated 23 kg minimum to lower the new battery squarely into the tray.
- Position it exactly like the original, with the terminals correctly aligned with their cables.
- Make sure the battery sits completely flat and no cable is trapped underneath it.
Step 8: Reinstall the battery retainer
- Position the retaining wedge against the lower lip of the battery case.
- Start the retaining bolt by hand to prevent crossed threads.
- Use the 13mm socket, 10-inch extension, and 3/8-inch-drive torque wrench to tighten the retainer bolt to 25 Nm (18 ft-lbs).
- Push the battery firmly by hand to confirm it cannot move.
Step 9: Connect the positive cable
- Push the positive cable clamp fully down onto the positive battery post.
- Use the 10mm socket and 3/8-inch-drive torque wrench to tighten the terminal clamp nut to 6 Nm (53 in-lbs).
- Close the red positive-terminal cover.
- Do not overtighten the clamp; excessive force can damage the battery post.
Step 10: Connect the negative cable
- Push the negative cable clamp fully down onto the negative battery post.
- Use the 10mm socket and 3/8-inch-drive torque wrench to tighten the terminal clamp nut to 6 Nm (53 in-lbs).
- Apply a light coat of battery terminal protectant to both connected terminals.
- Reinstall the battery cover by hand and engage all retaining tabs.
✅ After Repair
- ✅ Start the engine and confirm it cranks strongly without clicking or warning messages.
- ✅ Check that the battery warning light turns off after the engine starts.
- ✅ Verify the headlights, power windows, locks, radio, and climate controls operate normally.
- ✅ Reset the clock and saved radio stations if they were erased.
- ✅ Turn the steering wheel fully left and right once if a stability-control message appears, then drive briefly. The system should relearn automatically.
- ✅ Battery registration is not required on your Sierra 1500.
- ♻️ Return the old battery to a battery retailer or authorized recycling center. Do not place it in household waste.
💰 DIY vs Shop Cost
Shop Cost: $250-$450 (parts + labor)
DIY Cost: $180-$320 (parts only)
You Save: $70-$130 by doing it yourself!
Local pricing in Sonīpat may vary. A shop typically needs 0.3-0.5 labor hour for this repair.
🎯 Ready to get started?
HowToo makes it easy: same-day/2-day shipping on every part, plus all the tools and specialty tools you need! Check out the parts and tools sections below to add everything to your cart.