

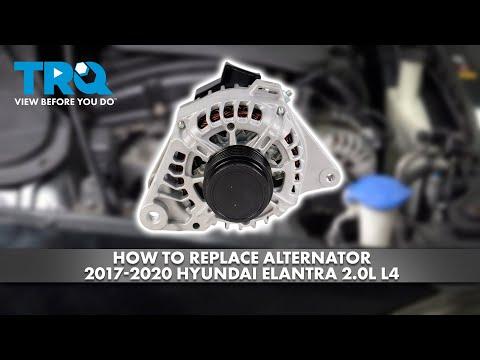




How to Replace the Alternator on a 2017-2020 Hyundai Elantra 2.0L (Trim: SE | Engine: Inline 4 2.0L)
Step-by-step DIY instructions with tools, parts, torque specs, safety tips, and charging tests for 2017, 2018, 2019, 2020
How to Replace the Alternator on a 2017-2020 Hyundai Elantra 2.0L (Trim: SE | Engine: Inline 4 2.0L)
Step-by-step DIY instructions with tools, parts, torque specs, safety tips, and charging tests for 2017, 2018, 2019, 2020


🔧 Elantra - Alternator Replacement
The alternator charges the battery and supplies electricity while your Elantra is running. Replacement requires disconnecting the battery, releasing the serpentine belt, disconnecting the alternator wiring, and removing its mounting bolts.
Difficulty Level: Intermediate | Estimated Time: 1.5-2.5 hours
Assumption: This procedure applies to the stock U.S.-market 2.0L gasoline engine.
⚠️ Safety & Precautions
- ⚠️ Disconnect the negative battery terminal before touching the alternator wiring. The main alternator cable is always connected to battery power.
- 🧊 Allow the engine to cool completely before working near the belt and exhaust components.
- 🔑 Keep the ignition switched off and the key away from the vehicle while your hands are near the belt.
- 🛡️ Wear safety glasses and mechanic’s gloves.
- 🔌 Never test the alternator by disconnecting the battery while the engine is running. That can damage vehicle electronics.
- 🧯 Do not allow a metal tool to bridge the positive alternator terminal and any grounded metal component.
🔧 Required Tools
You'll need the following tools for this repair:
- 10mm socket
- 12mm socket
- 14mm socket
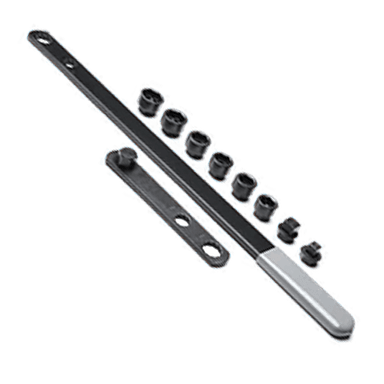
- 17mm serpentine-belt wrench
- 3/8-inch-drive ratchet
- 3/8-inch-drive 150mm extension
- 3/8-inch-drive torque wrench (5-80 Nm)
- Small flat-blade screwdriver
- Serpentine-belt routing diagram marker
- Digital multimeter (specialty)
- Protective terminal cap
- Mechanic’s gloves
- Safety glasses
🔩 Required Parts
HowToo sells all the parts you need for this repair:
- Alternator for 2.0L engine - Qty: 1
- Serpentine drive belt - Qty: 1 if worn, cracked, glazed, or contaminated
📋 Before You Begin
- 🅿️ Park your Elantra on level ground, select Park or first gear, engage the parking brake, and switch off all electrical accessories.
- 🌡️ Let the engine cool before beginning.
- 📷 Photograph the serpentine-belt routing before removing it. A serpentine belt is the single long belt that drives the alternator and other accessories.
- 🪟 Lower the driver’s window before disconnecting the battery so you cannot accidentally lock yourself out.
- 💾 Record saved radio stations if desired. Battery disconnection may reset the clock and certain learned settings.
🔨 Step-by-Step Instructions
Follow these steps in order:
Step 1: Disconnect the Battery
- Open the hood and locate the battery on the driver’s side of the engine compartment.
- Use a 10mm socket and 3/8-inch-drive ratchet to loosen the negative battery-terminal clamp.
- Lift the negative clamp from the battery post and position it where it cannot spring back into contact.
- Use a 10mm socket to disconnect the positive terminal only if its cable restricts access. Cover the disconnected positive clamp with a protective terminal cap.
Step 2: Record the Belt Routing
- Use a serpentine-belt routing diagram marker to draw the routing or mark the belt’s direction of rotation if it will be reused.
- Inspect the belt for cracks, missing ribs, shiny glazed surfaces, frayed edges, or oil contamination.
- Replace a questionable belt while access is open.
Step 3: Release the Serpentine Belt
- Place the 17mm serpentine-belt wrench on the automatic tensioner’s hex-shaped boss.
- Rotate the tensioner slowly against spring pressure until the belt becomes loose. An automatic tensioner is the spring-loaded pulley that keeps the belt tight.
- Slide the belt off the alternator pulley while holding the tensioner securely.
- Slowly return the tensioner to its resting position. Do not let it snap back.
- Leave the belt routed around the remaining pulleys if possible.
Step 4: Disconnect the Alternator Wiring
- Press the locking tab on the small alternator electrical connector and pull the connector straight out. Use a small flat-blade screwdriver only if the tab cannot be released by hand.
- Pull back the rubber cover from the large B+ output terminal. “B+” is the heavy cable that carries charging current to the battery.
- Use a 12mm socket, 3/8-inch-drive ratchet, and 150mm extension to remove the B+ terminal nut.
- Lift the cable eyelet from the terminal and cover it with a protective terminal cap.
- Do not pull on either wire to release a connector.
Step 5: Remove the Alternator
- Support the alternator with one hand before removing its final fastener.
- Use a 14mm socket, 3/8-inch-drive ratchet, and 150mm extension to remove the upper alternator mounting bolt.
- Use the same 14mm socket and ratchet to remove the lower mounting bolt.
- Rock the alternator gently to release it from the close-fitting mounting bracket.
- Lift the alternator upward and out of the engine compartment without striking the radiator or damaging nearby wiring.
- Do not pry against the alternator’s aluminum housing.
Step 6: Compare the Alternators
- Place the old and replacement alternators next to each other.
- Confirm that the mounting ears, electrical connector, B+ terminal, pulley grooves, and pulley offset match.
- Turn the replacement pulley by hand. It should rotate smoothly without scraping, roughness, or excessive looseness.
- If the replacement alternator did not include a pulley, pulley transfer requires an alternator-pulley tool and should be completed by a parts supplier or electrical rebuilding shop.
Step 7: Install the Replacement Alternator
- Lower the replacement alternator into its mounting bracket by hand.
- Start both mounting bolts by hand for several turns to prevent cross-threading.
- Use a 14mm socket, 150mm extension, and 3/8-inch-drive torque wrench to tighten the alternator mounting bolts to 29-41 Nm (22-30 ft-lbs).
- Make sure the alternator sits squarely against its bracket and does not trap any wiring.
Step 8: Reconnect the Alternator Wiring
- Place the B+ cable eyelet fully over the alternator output stud.
- Install the terminal nut with a 12mm socket and tighten it using the 3/8-inch-drive torque wrench to 10-15 Nm (7-11 ft-lbs).
- Do not overtighten the nut because the insulated terminal can break inside the alternator.
- Push the rubber cover completely over the B+ terminal.
- Push the small electrical connector into the alternator until its locking tab clicks.
Step 9: Reinstall the Serpentine Belt
- Route the belt around every pulley according to the original routing photograph or under-hood diagram.
- Make sure the belt’s ribs sit inside the grooves of each grooved pulley. The smooth back of the belt must contact only smooth pulleys.
- Use the 17mm serpentine-belt wrench to rotate the tensioner against spring pressure.
- Slide the belt over the alternator pulley, then slowly release the tensioner.
- Inspect every pulley by sight and touch. The belt must be centered with no rib hanging over an edge.
Step 10: Reconnect the Battery
- If removed, install the positive battery clamp first and use a 10mm socket and 3/8-inch-drive torque wrench to tighten it to 4-6 Nm (35-53 in-lbs).
- Install the negative battery clamp last and tighten it with the same 10mm socket to 4-6 Nm (35-53 in-lbs).
- Confirm that neither battery clamp can rotate by hand.
Step 11: Check the Charging System
- Set a digital multimeter to DC volts and place its probes directly on the battery posts.
- Before starting, a charged battery should usually measure approximately 12.4-12.7 volts.
- Start the engine and observe the belt from a safe distance. It should run smoothly without wandering, squealing, or shaking.
- With the engine running, voltage will commonly stabilize around 13.5-14.8 volts, although Hyundai’s computer-controlled charging strategy may vary voltage with battery condition and electrical load.
- Switch on the headlights and cabin blower, then verify that the battery warning light remains off.
✅ After Repair
- 🔍 Stop the engine and inspect the belt again to confirm that it remains centered on every pulley.
- 🔋 Confirm that the red battery warning light turns off after the engine starts.
- 🎧 Listen for belt squeal, grinding, rattling, or bearing noise.
- 🧰 Recheck the B+ terminal cover and both battery clamps.
- 🕐 Reset the clock and restore saved radio settings if necessary.
- 🚗 Drive for 10-15 minutes, then restart the engine to confirm normal cranking and charging operation.
- ⚠️ If the battery warning light remains on, inspect the belt and connections and perform a charging-system scan before replacing additional parts.
💰 DIY vs Shop Cost
Shop Cost: ₹22,000-₹45,000 (parts + labor)
DIY Cost: ₹15,000-₹35,000 (parts only)
You Save: ₹4,000-₹10,000 by doing it yourself!
Local labor rates and imported U.S.-spec alternator prices vary. This repair takes a shop approximately 1-1.5 hours.
🎯 Ready to get started?
HowToo makes it easy: same-day/2-day shipping on every part, plus all the tools and specialty tools you need! Check out the parts and tools sections below to add everything to your cart.