

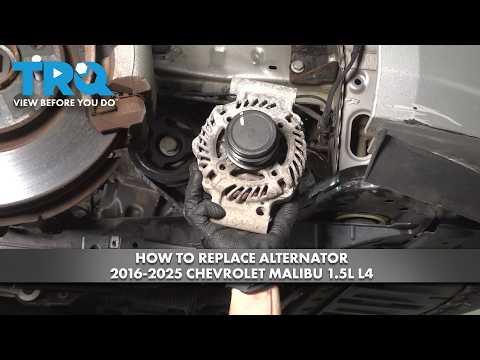




How to Replace the Alternator on a 2016-2020 Chevrolet Malibu 1.5L Turbo (Trim: LS | Engine: Inline 4 1.5L)
Step-by-step instructions with required tools, parts, torque specs, and safety tips for 2016, 2017, 2018, 2019, 2020
How to Replace the Alternator on a 2016-2020 Chevrolet Malibu 1.5L Turbo (Trim: LS | Engine: Inline 4 1.5L)
Step-by-step instructions with required tools, parts, torque specs, and safety tips for 2016, 2017, 2018, 2019, 2020


🔧 Malibu - Alternator Replacement
The alternator charges the battery and powers the electrical system while the engine runs. On your Malibu, replacement requires removing the air-intake duct, releasing the serpentine belt, disconnecting the alternator wiring, and removing the alternator through the lower engine area.
Difficulty Level: Intermediate | Estimated Time: 2-3 hours
Assumption: This procedure is for the stock 1.5L turbocharged engine.
⚠️ Safety & Precautions
- ⚠️ Disconnect the negative battery cable before touching the alternator wiring. The main alternator terminal is always connected to battery power.
- 🧤 Allow the engine and turbocharger area to cool completely before starting.
- 🚗 Support your Malibu with jack stands. Never work underneath a vehicle supported only by a floor jack.
- 🔋 Disconnect only the negative cable; alternator replacement does not normally require battery registration.
- 🛡️ Keep tools away from the positive battery terminal to prevent a short circuit.
🔧 Required Tools
You'll need the following tools for this repair:
- 7mm socket
- 10mm socket
- 13mm deep socket
- 15mm socket
- 15mm box-end wrench
- 3/8-inch drive ratchet
- 3/8-inch drive 6-inch extension
- 3/8-inch drive breaker bar
- 3/8-inch drive torque wrench rated 10-80 Nm
- Flat-blade screwdriver
- Trim-clip removal tool
- Serpentine-belt routing diagram or camera
- Digital multimeter rated CAT III 600V
- Floor jack rated 2-ton minimum
- Jack stands rated 2-ton minimum
- Wheel chocks
- Mechanic's gloves
- Safety glasses
🔩 Required Parts
HowToo sells all the parts you need for this repair:
- Alternator for 1.5L turbocharged engine - Qty: 1
- Serpentine belt - Qty: 1 if cracked, glazed, frayed, or contaminated
📋 Before You Begin
- 🅿️ Park your Malibu on level pavement, select Park, apply the parking brake, and switch the ignition off.
- 🛞 Place wheel chocks behind both rear wheels.
- 🔑 Keep the key fob away from the vehicle so the electrical system does not wake unexpectedly.
- 📷 Photograph the serpentine-belt routing before removing it. The serpentine belt is the single long belt that drives the engine accessories.
- 🧠 The radio and engine-control modules may need a short relearn period after battery power is restored. No infotainment service mode is required.
🔨 Step-by-Step Instructions
Follow these steps in order:
Step 1: Disconnect the Battery
- Open the hood and locate the battery at the left side of the engine compartment.
- Use a 10mm socket and 3/8-inch drive ratchet to loosen the negative battery-terminal clamp.
- Lift the negative cable off the battery post and position it where it cannot spring back.
- Wait at least two minutes before disconnecting alternator wiring.
- During installation, tighten the negative terminal to 6 Nm (53 in-lbs). Do not overtighten it.
Step 2: Remove the Air-Intake Duct
- Use a 7mm socket and ratchet to loosen the intake-duct clamps between the air-filter housing and turbocharger inlet.
- Release the breather-hose connection by pressing its locking tabs. Do not pull directly on the hose.
- Use a flat-blade screwdriver only where needed to gently release a stubborn retaining tab.
- Lift the intake duct out and place it somewhere clean.
- Cover open intake ports with clean lint-free material.
Step 3: Raise and Support the Vehicle
- Position a 2-ton floor jack under the approved front-center lifting point.
- Raise the front of your Malibu and place 2-ton jack stands beneath both reinforced front pinch-weld support points.
- Lower the vehicle gently onto the stands, then push lightly on the body to verify that it is stable.
- Use a trim-clip removal tool and the appropriate 7mm or 10mm socket to remove the lower splash-shield fasteners needed for alternator access.
- Keep the different fasteners arranged by location.
Step 4: Release the Serpentine Belt
- Compare the belt routing with your photograph or routing diagram.
- Place a 15mm box-end wrench or 15mm socket with a 3/8-inch drive breaker bar on the automatic belt tensioner. The tensioner is the spring-loaded pulley that keeps the belt tight.
- Rotate the tensioner slowly against spring pressure until the belt becomes loose.
- Slip the belt off the alternator pulley, then slowly return the tensioner to its resting position.
- Inspect the belt for cracks, missing ribs, shiny glazing, frayed edges, or oil contamination. Replace it if any damage is present.
- Do not remove the belt from every pulley unless you are replacing it.
Step 5: Disconnect the Alternator Wiring
- Locate the small electrical connector and the covered output terminal on the alternator.
- Press the connector lock and unplug the small connector by holding its plastic body, not its wires.
- Open the protective rubber cap over the large output terminal.
- Use a 13mm deep socket, 6-inch extension, and ratchet to remove the output-terminal nut.
- Lift the cable eyelet from the terminal and keep it insulated from surrounding metal.
- During installation, tighten the output-terminal nut to 15 Nm (11 ft-lbs).
Step 6: Remove the Alternator
- Support the alternator with one hand before removing its final mounting bolt.
- Use a 15mm socket, 6-inch extension, and ratchet to remove the alternator mounting bolts.
- Note each bolt's position and length so it returns to the same opening.
- Gently rock the alternator to release it from the mounting bracket. Do not pry against wiring, hoses, or aluminum sealing surfaces.
- Guide the alternator out through the lower access area. Rotate it as necessary, but do not force it past the radiator or air-conditioning lines.
Step 7: Compare and Install the New Alternator
- Place the old and new alternators side by side. Confirm that the mounting ears, pulley ribs, electrical connector, and output terminal match.
- Guide the replacement alternator into its bracket through the same lower access area.
- Start every mounting bolt by hand for several turns to prevent cross-threading.
- Use a 15mm socket and torque wrench to tighten the alternator mounting bolts to 50 Nm (37 ft-lbs).
- Do not use an impact wrench for final tightening.
Step 8: Reconnect the Alternator Wiring
- Place the large cable eyelet squarely over the output terminal.
- Use a 13mm deep socket and torque wrench to tighten the terminal nut to 15 Nm (11 ft-lbs).
- Close the rubber protective cap completely.
- Push the small electrical connector into place until its lock clicks.
- Gently tug the connector body to confirm it is secured.
Step 9: Reinstall the Serpentine Belt
- Route the belt around the pulleys according to your photograph or routing diagram, leaving the alternator pulley for last.
- Use a 15mm box-end wrench or 15mm socket and breaker bar to rotate the tensioner.
- Slip the belt over the alternator pulley and slowly release the tensioner.
- Inspect every pulley with a flashlight. Each belt rib must sit fully inside the matching pulley groove.
- A misplaced belt rib can destroy the new belt.
Step 10: Reassemble the Vehicle
- Reinstall the lower splash shield using the trim-clip removal tool by hand for clips and the appropriate 7mm or 10mm socket for screws.
- Use the 2-ton floor jack to raise the vehicle slightly, remove both jack stands, and lower your Malibu to the ground.
- Remove the clean coverings from the intake openings.
- Reinstall the air-intake duct and reconnect the breather hose until its lock clicks.
- Use a 7mm socket and ratchet to tighten the duct clamps until snug. Do not crush the plastic duct.
Step 11: Reconnect the Battery
- Place the negative cable fully onto the negative battery post.
- Use a 10mm socket and torque wrench to tighten the terminal to 6 Nm (53 in-lbs).
- Confirm the terminal cannot rotate by hand.
✅ After Repair
- 🔍 Look through the engine compartment and confirm that all tools and coverings have been removed.
- 🚗 Start the engine and watch the belt from a safe distance. It should run smoothly without wandering, squealing, or flapping.
- ⚡ Set a digital multimeter to DC volts and measure across the battery posts. Charging voltage commonly varies with electrical demand, but it should generally rise above resting battery voltage when charging is commanded.
- 💡 Switch on the headlights, rear defogger, and cabin blower. Verify that the battery warning light remains off.
- 🛑 Stop the engine immediately if the belt runs off-center, there is a grinding noise, or the battery warning light stays on.
- 🔧 If charging voltage remains low, test the battery, alternator control circuit, battery-current sensor, belt tensioner, cables, and related fuses before condemning the replacement alternator.
- 🕒 Recheck the belt position and electrical connections after a short test drive.
💰 DIY vs Shop Cost
Shop Cost: ₹28,000-₹50,000 (parts + labor)
DIY Cost: ₹20,000-₹38,000 (parts only)
You Save: ₹8,000-₹12,000 by doing it yourself!
Local labor and imported-part pricing vary. This repair takes a shop approximately 1.5-2.5 hours.
🎯 Ready to get started?
HowToo makes it easy: same-day/2-day shipping on every part, plus all the tools and specialty tools you need! Check out the parts and tools sections below to add everything to your cart.