

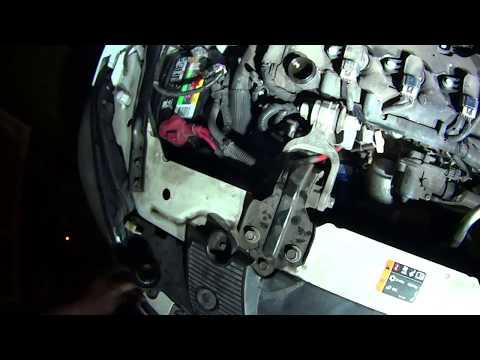




How to Replace the Alternator on a 2014-2020 Chevrolet Impala 3.6L V6 (Engine: V6 3.6L)
Step-by-step instructions with required tools, parts, torque specs, and safety tips for 2014, 2015, 2016, 2017, 2018, 2019, 2020
How to Replace the Alternator on a 2014-2020 Chevrolet Impala 3.6L V6 (Engine: V6 3.6L)
Step-by-step instructions with required tools, parts, torque specs, and safety tips for 2014, 2015, 2016, 2017, 2018, 2019, 2020


🔧 Impala - Alternator Replacement
The alternator sits at the passenger-side front of the engine and keeps the battery charged while your Impala is running. Replacement requires disconnecting the battery, removing the intake duct and drive belt, and transferring the electrical connections to the new alternator.
Difficulty Level: Intermediate | Estimated Time: 1.5-2.5 hours
Assumption: These instructions apply to the stock 3.6L V6 accessory-drive arrangement.
⚠️ Safety & Precautions
- ⚠️ Disconnect the negative battery cable before touching the alternator wiring. Its output terminal remains electrically live with the battery connected.
- 🧊 Let the engine cool completely because the alternator is close to hot engine and cooling-system components.
- 🔑 Keep the ignition switched off and the key away from the vehicle while working.
- 🛡️ Wear safety glasses and insulated work gloves.
- 🔌 Never test an alternator by disconnecting the battery while the engine is running. That can damage vehicle electronics.
- ⚡ Do not allow a metal tool to bridge the alternator output terminal and any grounded metal surface.
🔧 Required Tools
You'll need the following tools for this repair:
- 8mm socket
- 10mm socket
- 13mm socket
- 15mm socket
- 3/8-inch drive ratchet
- 3/8-inch drive 6-inch extension
- 3/8-inch drive serpentine-belt tool (specialty)
- 3/8-inch drive torque wrench rated 10-80 Nm
- Small flat-blade screwdriver
- Plastic trim removal tool
- Digital multimeter rated 20 volts DC minimum
- Insulated work gloves
- Safety glasses
🔩 Required Parts
HowToo sells all the parts you need for this repair:
- Alternator for 3.6L V6 - Qty: 1
- Serpentine drive belt - Qty: 1 if cracked, glazed, frayed, or contaminated
📋 Before You Begin
- 🅿️ Park your Impala on level ground, select Park, apply the parking brake, and switch off every electrical accessory.
- 🧊 Allow the engine to cool before reaching between the engine and radiator.
- 📷 Photograph the serpentine-belt routing before removal. A serpentine belt is the single long belt that drives several engine accessories.
- 🪟 Lower the driver’s window before disconnecting the battery so you cannot accidentally lock yourself out.
- 🔋 Open the trunk and remove the battery access cover on the passenger side. Disconnecting the battery may reset the clock, express-window memory, and some learned settings.
- 🔍 Compare the replacement alternator with the original before installation. The connector, mounting ears, pulley grooves, and output terminal must match.
🔨 Step-by-Step Instructions
Follow these steps in order:
Step 1: Disconnect the Battery
- Use a 10mm socket and 3/8-inch drive ratchet to loosen the negative battery-cable clamp in the trunk.
- Lift the negative clamp from the battery post and position it where it cannot spring back into contact.
- Wait at least two minutes before working on the alternator wiring.
Step 2: Remove the Engine Cover and Intake Duct
- Lift the decorative engine cover straight upward by hand to release its rubber retainers.
- Use an 8mm socket and 3/8-inch drive ratchet to loosen the intake-duct clamps.
- Use a small flat-blade screwdriver only if needed to release the duct’s retaining clip. Do not puncture the rubber duct.
- Disconnect any breather hose attached to the duct by pressing its locking tabs by hand.
- Remove the duct and place a clean covering over the exposed throttle-body opening.
- Never drop hardware into the intake opening.
Step 3: Release the Serpentine Belt
- Confirm the photographed belt routing before moving it.
- Fit the 15mm socket and 3/8-inch drive serpentine-belt tool onto the belt tensioner. The tensioner is the spring-loaded pulley that keeps the belt tight.
- Rotate the tensioner clockwise slowly to remove belt tension.
- Slide the belt off the alternator pulley with your free hand, then gently allow the tensioner to return to its stop.
- Leave the belt routed around the remaining pulleys if it will be reused.
- Inspect the belt for cracks, missing ribs, shiny glazing, fraying, or oil contamination. Replace it if any damage is present.
Step 4: Disconnect the Alternator Wiring
- Use a plastic trim removal tool to carefully release any wiring-harness retainers attached near the alternator.
- Use a small flat-blade screwdriver to lift the protective cap from the alternator output terminal.
- Use a 13mm socket, 3/8-inch drive extension, and 3/8-inch drive ratchet to remove the output-terminal nut.
- Lift the heavy charging cable from the terminal without twisting or bending it sharply.
- Press the lock on the small alternator control connector by hand and unplug it. Pull on the connector body, not its wires.
Step 5: Remove the Alternator
- Support the alternator with one hand because it is heavy.
- Use a 15mm socket, 3/8-inch drive extension, and 3/8-inch drive ratchet to remove the alternator mounting bolts.
- Keep track of each bolt’s original location and length.
- Rock the alternator gently by hand to release it from the mounting bracket. Do not pry against plastic housings, hoses, or the radiator.
- Lift the alternator from the engine compartment.
Step 6: Install the Replacement Alternator
- Compare both alternators side by side. Verify that the pulley diameter and grooves, electrical connector, output terminal, and mounting points match.
- Lower the replacement alternator into position by hand and align its mounting ears with the bracket.
- Start every mounting bolt by hand for several turns to prevent cross-threading.
- Use a 15mm socket and 3/8-inch drive torque wrench to tighten the alternator mounting bolts evenly to 50 Nm (37 ft-lbs).
- Start bolts by hand before using a ratchet.
Step 7: Reconnect the Alternator Wiring
- Push the small control connector into the alternator by hand until its lock clicks.
- Place the charging cable squarely over the output stud.
- Start the terminal nut by hand, then use a 13mm socket and 3/8-inch drive torque wrench to tighten it to 20 Nm (15 ft-lbs).
- Close the protective terminal cap by hand and reinstall the harness retainers with the plastic trim removal tool.
- Make sure the charging cable cannot touch the belt or any pulley.
Step 8: Reinstall the Serpentine Belt
- Route the belt around every pulley according to your photograph or the underhood routing label. Keep the alternator pulley for last.
- Use the 15mm socket and 3/8-inch drive serpentine-belt tool to rotate the tensioner clockwise.
- Slip the belt over the alternator pulley, then release the tensioner slowly.
- Inspect every pulley by sight and touch. Each belt rib must sit fully inside the matching pulley groove.
- A misaligned belt can come off immediately.
Step 9: Reinstall the Intake Duct and Engine Cover
- Remove the covering from the throttle-body opening.
- Install the intake duct fully over its connections and reconnect the breather hose by hand until it locks.
- Use the 8mm socket and 3/8-inch drive ratchet to tighten the duct clamps snugly. Do not crush the plastic duct.
- Align the engine cover with its rubber retainers and press it down firmly by hand.
Step 10: Reconnect the Battery
- Place the negative battery clamp fully onto the negative post.
- Use a 10mm socket and 3/8-inch drive torque wrench to tighten the negative battery terminal to 5 Nm (44 in-lbs).
- Reinstall the trunk battery access cover by hand.
✅ After Repair
- 🔍 Look through the engine compartment and verify that no tools remain near the belt.
- ▶️ Start the engine and observe the belt from a safe distance. It should run centrally and smoothly without fluttering or squealing.
- ⚠️ Switch the engine off immediately if the belt moves sideways, a charging warning appears, or you hear grinding.
- ⚡ Set the digital multimeter rated 20 volts DC minimum to DC volts. With the engine running, place the red probe on the positive jump terminal and the black probe on a clean engine ground.
- 📈 Charging voltage commonly varies with Chevrolet’s regulated charging system. Approximately 12.5-15.5 volts can be normal depending on battery condition and electrical demand.
- 💡 Turn on the headlights and blower motor, then confirm the charging warning remains off and the vehicle continues running normally.
- 🪟 Restore express-window operation if needed by closing each affected window completely and holding its switch upward for approximately two seconds.
- 🕒 Reset the clock and saved preferences if they were cleared.
- 🔧 Recheck the belt alignment after a short test drive. Do not touch the belt while the engine is running.
💰 DIY vs Shop Cost
Shop Cost: ₹45,000-₹85,000 including an imported alternator and labor
DIY Cost: ₹30,000-₹65,000 for the alternator and optional belt
You Save: ₹10,000-₹25,000 by doing it yourself!
Local labor and imported-part costs vary considerably. This repair takes a shop approximately 1.0-1.8 hours.
🎯 Ready to get started?
HowToo makes it easy: same-day/2-day shipping on every part, plus all the tools and specialty tools you need! Check out the parts and tools sections below to add everything to your cart.