

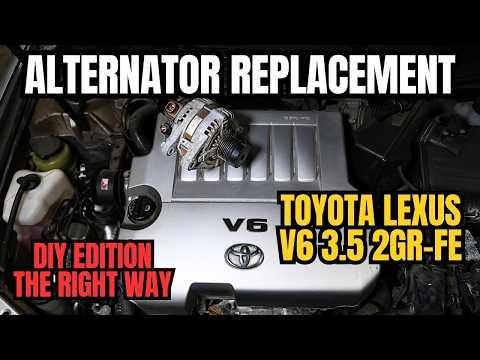





How to Replace the Alternator on a 2013-2018 Toyota Avalon 3.5L V6 (Engine: V6 3.5L)
Step-by-step instructions with required tools, parts, torque specs, and safety tips for 2013, 2014, 2015, 2017, 2018
How to Replace the Alternator on a 2013-2018 Toyota Avalon 3.5L V6 (Engine: V6 3.5L)
Step-by-step instructions with required tools, parts, torque specs, and safety tips for 2013, 2014, 2015, 2017, 2018


🔧 Avalon - Alternator Replacement
The alternator is mounted at the front of the 3.5L V6 and is removed from above. Access requires removing the air inlet duct, upper radiator hose, cooling-fan assembly, and drive belt before disconnecting and unbolting the alternator.
Difficulty Level: Advanced | Estimated Time: 3-5 hours
Assumption: This procedure applies to the stock U.S.-market 3.5L V6 configuration.
⚠️ Safety & Precautions
- ⚠️ Disconnect the negative battery cable before touching the alternator wiring. The main alternator terminal remains electrically live otherwise.
- ⚠️ Let the engine cool completely before opening the cooling system. Hot coolant can cause severe burns.
- ⚠️ Keep coolant away from children and animals. Collect it in a clean, covered drain pan.
- ⚠️ Never work near the electric cooling fans with the battery connected. They can start unexpectedly.
- ⚠️ Do not rotate the belt tensioner farther than needed. Sudden release can injure your hand.
- ⚠️ The alternator is heavy. Support it while removing the final mounting bolt.
🔧 Required Tools
You'll need the following tools for this repair:
- 10mm socket
- 12mm socket
- 14mm socket
- 3/8-inch drive ratchet
- 3/8-inch drive 6-inch extension
- 3/8-inch drive breaker bar
- Torque wrench rated 5-80 Nm
- Hose-clamp pliers
- Plastic trim-clip removal tool
- Small flat-blade screwdriver
- Plastic drain pan rated 10 liters minimum
- Clean funnel
- Digital multimeter
- Mechanic gloves
- Safety glasses
- Protective fender cover
🔩 Required Parts
HowToo sells all the parts you need for this repair:
- Alternator for 3.5L V6 - Qty: 1
- Serpentine drive belt - Qty: 1 recommended
- Toyota Super Long Life Coolant, premixed pink - Qty: 4 liters
- Upper radiator hose - Qty: 1 if swollen, cracked, or hardened
- Upper radiator-hose clamps - Qty: 2 if damaged or weak
📋 Before You Begin
- 📍 Park your Avalon on level ground, select Park, apply the parking brake, and switch off all electrical accessories.
- 🌡️ Allow the engine to become completely cold.
- 🪟 Lower the driver’s window before disconnecting the battery so you cannot accidentally lock yourself out.
- 🔑 Keep the smart key at least 15 feet from the vehicle.
- 🧠 Disconnecting the battery may reset the clock, radio presets, automatic-window initialization, and learned idle settings.
- 🧊 Use only Toyota-compatible premixed pink Super Long Life Coolant. Do not mix it with universal green coolant.
🔨 Step-by-Step Instructions
Follow these steps in order:
Step 1: Disconnect the battery
- Open the hood and place the protective fender cover over the painted bodywork.
- Use a 10mm socket and ratchet to loosen the negative battery-terminal clamp.
- Lift the negative clamp from the battery post and position it where it cannot spring back.
- Wait at least 90 seconds before working on electrical connectors.
Step 2: Remove the engine cover and air inlet duct
- Pull the decorative engine cover straight upward by hand to release its rubber grommets.
- Use the plastic trim-clip removal tool to release the clips securing the radiator-support cover, then lift the cover away.
- Use a 10mm socket and ratchet to remove the air-inlet fasteners.
- Release any duct clips with the small flat-blade screwdriver and remove the air-inlet duct.
- Photograph each connector before unplugging it.
Step 3: Drain enough engine coolant
- Position the 10-liter drain pan beneath the radiator drain valve.
- Slowly remove the radiator cap by hand only after confirming the engine is cold.
- Open the radiator drain valve by hand and drain approximately 3-4 liters of coolant.
- Close the drain valve by hand once the coolant level is below the upper radiator hose.
- Keep reusable coolant clean and covered.
Step 4: Remove the upper radiator hose
- Use hose-clamp pliers to compress each spring clamp and slide it away from the hose connection.
- Twist the upper radiator hose gently by hand to break its seal, then pull it from the radiator and engine connections.
- Do not pry against the plastic radiator neck; it can crack easily.
- Inspect the hose for swelling, cracking, oil contamination, or hardened rubber.
Step 5: Remove the cooling-fan assembly
- Disconnect both cooling-fan electrical connectors by pressing their locking tabs by hand. Use the small flat-blade screwdriver only if a lock is difficult to release.
- Release the wiring harness retainers from the fan shroud with the plastic trim-clip removal tool.
- Use a 10mm socket, extension, and ratchet to remove the upper fan-shroud bolts.
- Lift the complete fan-and-shroud assembly straight upward, disengaging its lower locating tabs.
- Move slowly so the shroud does not contact the radiator fins.
- Cover the radiator with clean cardboard.
Step 6: Record the drive-belt routing
- Photograph the serpentine-belt routing before removal.
- Confirm that the belt-routing label under the hood is readable.
- The serpentine belt is the single long belt that drives the alternator and other accessories.
Step 7: Remove the serpentine drive belt
- Fit a 14mm socket and 3/8-inch breaker bar onto the automatic belt tensioner.
- Rotate the tensioner clockwise slowly to remove belt tension.
- Slide the belt off the alternator pulley by hand, then slowly return the tensioner to its resting position.
- Remove the belt and inspect both sides for cracks, glazing, missing ribs, or coolant contamination.
- Never let the tensioner snap back.
Step 8: Disconnect the alternator wiring
- Press the lock and unplug the small alternator control connector by hand.
- Lift the rubber protective cap from the large output terminal.
- Use a 10mm socket and ratchet to remove the output-terminal nut.
- Lift the cable lug from the terminal and move it aside without sharply bending the cable.
- Release any harness clip from the alternator with the plastic trim-clip removal tool.
Step 9: Remove the old alternator
- Support the alternator with one hand because it is heavier than it appears.
- Use a 14mm socket, extension, and ratchet to loosen and remove the main alternator mounting bolt.
- Use a 12mm socket, extension, and ratchet to remove the remaining alternator mounting bolt.
- Rock the alternator gently by hand to release it from the mounting bracket.
- Lift the alternator upward through the space left by the cooling-fan assembly.
- Do not pry against coolant pipes, wiring, or the radiator.
Step 10: Compare the replacement alternator
- Place both alternators side by side and compare the mounting ears, pulley grooves, electrical connector, output stud, and housing shape.
- Rotate the replacement pulley by hand. It should turn smoothly without grinding or excessive looseness.
- Do not install the replacement if any connection or mounting point differs.
Step 11: Install the replacement alternator
- Lower the replacement alternator into position by hand and align its mounting ears with the bracket.
- Start both mounting bolts by hand for several turns to prevent cross-threading.
- Use the torque wrench with the 14mm socket to tighten the main mounting bolt to 58 Nm (43 ft-lbs).
- Use the torque wrench with the 12mm socket to tighten the smaller mounting bolt to 21 Nm (15 ft-lbs).
Step 12: Reconnect the alternator wiring
- Place the output-cable lug squarely over the alternator terminal.
- Install the terminal nut and tighten it with the torque wrench and 10mm socket to 9.8 Nm (87 in-lbs).
- Do not overtighten the nut; the insulated terminal can crack or rotate.
- Close the rubber terminal cap fully.
- Push the control connector into place by hand until its lock clicks.
- Reattach the wiring-harness retainers.
Step 13: Install the serpentine drive belt
- Route the belt around every pulley according to the routing photograph or under-hood label, leaving the alternator pulley until last.
- Use the 14mm socket and breaker bar to rotate the tensioner clockwise.
- Slip the belt over the alternator pulley by hand, then release the tensioner slowly.
- Inspect every pulley and confirm that each belt rib is seated inside a matching groove.
- Check the belt again from above and below before continuing.
Step 14: Reinstall the cooling-fan assembly
- Lower the fan-and-shroud assembly carefully between the engine and radiator.
- Engage both lower locating tabs before installing the upper bolts.
- Install the fan-shroud bolts by hand, then tighten them evenly with the 10mm socket and ratchet until snug.
- Reconnect both fan electrical connectors until their locks click.
- Secure the wiring harness in all original retainers.
Step 15: Reinstall the upper radiator hose
- Push the hose fully onto both fittings by hand until it reaches the original seating marks.
- Use hose-clamp pliers to return each spring clamp to its original position behind the raised bead.
- Confirm that the hose is not twisted and does not contact the belt or fan.
Step 16: Refill the cooling system
- Use the clean funnel to add Toyota-compatible premixed pink coolant slowly through the radiator filler neck.
- Fill the radiator to the neck, then fill the coolant reservoir to the FULL mark.
- Gently squeeze the upper radiator hose by hand several times to help release trapped air.
- Install the radiator cap securely by hand.
Step 17: Reinstall the covers and reconnect the battery
- Reinstall the air-inlet duct and tighten its fasteners snugly with the 10mm socket and ratchet.
- Reinstall the radiator-support cover and press its clips into place by hand.
- Align the engine-cover grommets with their mounting studs and press down by hand.
- Place the negative battery clamp fully over the battery post.
- Use the torque wrench and 10mm socket to tighten the clamp nut to 5.4 Nm (48 in-lbs).
✅ After Repair
- 🔍 Before starting, inspect the engine bay for tools and verify that both fan connectors are attached.
- 🚗 Start the engine and immediately watch the belt. Shut the engine off if the belt wanders, squeals continuously, or is not centered.
- ⚡ Set the digital multimeter to DC volts. With the engine running, measure across the battery posts; charging voltage will normally stabilize around 13.5-14.8 volts depending on battery condition and electrical demand.
- 💡 Switch on the headlights and blower motor, then confirm the charging warning light remains off.
- 🌡️ Allow the engine to reach operating temperature while watching for coolant leaks and abnormal temperature-gauge movement.
- 🧊 After the engine cools completely, recheck the radiator and reservoir levels and add compatible premixed coolant if necessary.
- 🪟 Reinitialize each automatic window if needed: close it fully, then hold the switch in the UP position for approximately one second.
- 🕒 Reset the clock and saved audio settings if they were erased.
💰 DIY vs Shop Cost
Shop Cost: ₹45,000-₹90,000 (parts + labor)
DIY Cost: ₹32,000-₹72,000 (parts only)
You Save: ₹6,000-₹18,000 by doing it yourself!
Labor around Sonīpat varies considerably for an imported U.S.-market Avalon. This repair takes a shop approximately 2.5-4 hours.
🎯 Ready to get started?
HowToo makes it easy: same-day/2-day shipping on every part, plus all the tools and specialty tools you need! Check out the parts and tools sections below to add everything to your cart.