

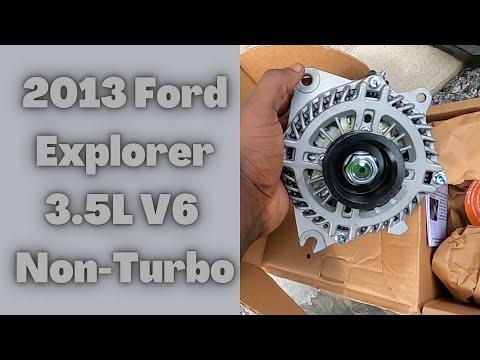




How to Replace the Alternator on a 2011-2015 Ford Explorer 3.5L V6 (Engine: V6 3.5L)
Step-by-step DIY instructions with required tools, parts, torque specs, and safety tips for 2011, 2012, 2013, 2014, 2015
How to Replace the Alternator on a 2011-2015 Ford Explorer 3.5L V6 (Engine: V6 3.5L)
Step-by-step DIY instructions with required tools, parts, torque specs, and safety tips for 2011, 2012, 2013, 2014, 2015


🔧 Explorer - Alternator Replacement
The alternator is mounted low on the passenger side of your Explorer. Replacement requires removing the right-front wheel and splash shield, releasing the drive-belt tension, and disconnecting the alternator wiring.
Difficulty Level: Intermediate | Estimated Time: 2-3 hours
⚠️ Safety & Precautions
- ⚠️ Disconnect the negative battery cable before touching the alternator wiring. Its main terminal is always live when the battery is connected.
- ⚠️ Let the engine cool completely before working near the exhaust and cooling system.
- ⚠️ Support your Explorer with a jack stand. Never work beneath a vehicle supported only by a floor jack.
- ⚠️ Do not loosen the tensioner pulley’s center bolt. Rotate the tensioner using its tool engagement point.
- ⚠️ Keep fingers clear of the belt and pulleys whenever the engine is running.
🔧 Required Tools
You'll need the following tools for this repair:
- 10mm socket
- 13mm socket
- 15mm shallow socket
- 15mm deep socket
- 19mm deep socket
- 8mm socket
- 3/8-inch-drive ratchet
- 1/2-inch-drive ratchet
- 3-inch socket extension
- 6-inch socket extension
- Serpentine-belt tool with 15mm adapter (specialty)
- Trim-clip removal tool
- Flat-tip screwdriver
- Torque wrench rated 5-25 Nm
- Torque wrench rated 20-150 Nm
- Floor jack rated 2-ton minimum
- Jack stand rated 2-ton minimum
- Wheel chocks
- Mechanic gloves
- Safety glasses
🔩 Required Parts
HowToo sells all the parts you need for this repair:
- Alternator for 3.5L naturally aspirated engine - Qty: 1
- Serpentine drive belt - Qty: 1 if cracked, glazed, frayed, or contaminated
- Splash-shield retainers - Qty: As needed
📋 Before You Begin
- 📋 Park your Explorer on firm, level ground. Shift to Park, apply the parking brake, and switch off all electrical accessories.
- 📋 Open the hood and allow the engine to cool.
- 📋 If the old alternator failed from oil or coolant contamination, find and repair that leak before installing the replacement.
- 📋 Save radio presets if desired. No battery registration or alternator programming is normally required for this replacement.
- 📋 A serpentine belt is the single long belt that drives several engine accessories. Photograph its routing before removal.
🔨 Step-by-Step Instructions
Follow these steps in order:
Step 1: Disconnect the Battery
- Use a 10mm socket and 3/8-inch-drive ratchet to loosen the negative battery-terminal clamp.
- Lift the negative cable from the battery post and position it where it cannot spring back into contact.
- Wait at least one minute before disconnecting alternator wiring.
Step 2: Loosen the Right-Front Wheel
- Place the wheel chocks firmly ahead of and behind the left-rear tire.
- Use a 19mm deep socket and 1/2-inch-drive ratchet to loosen each right-front lug nut about one-half turn. Do not remove them yet.
Step 3: Raise and Support the Vehicle
- Use the 2-ton floor jack at the specified right-front lifting point.
- Place the 2-ton jack stand beneath the reinforced support point and lower the vehicle onto it.
- Gently push the body to confirm it is stable before proceeding.
Step 4: Remove the Right-Front Wheel and Splash Shield
- Use the 19mm deep socket and 1/2-inch-drive ratchet to remove the lug nuts and wheel.
- Use an 8mm socket, 3/8-inch-drive ratchet, and trim-clip removal tool to remove the fasteners securing the front section of the right wheel-well splash shield.
- Use a flat-tip screwdriver only where needed to lift the center pins of plastic retainers.
- Move the shield aside to expose the drive belt and alternator area.
Step 5: Record the Drive-Belt Routing
- Inspect the under-hood belt-routing label and compare it with the belt’s current path.
- Take a clear photograph before removing the belt.
- Check the belt for cracks, missing ribs, frayed edges, shiny glazing, or fluid contamination.
Step 6: Release the Drive-Belt Tension
- Fit the serpentine-belt tool with 15mm adapter onto the belt-tensioner engagement point.
- Rotate the spring-loaded tensioner clockwise to remove tension from the belt.
- Slide the belt off the alternator pulley, then slowly return the tensioner to its resting position.
- Remove the belt only if it is being replaced. Otherwise, leave it routed around the remaining pulleys.
- Never let the tensioner snap back.
Step 7: Disconnect the Alternator Wiring
- Press the locking tab and unplug the small alternator electrical connector by hand. Use the flat-tip screwdriver gently if the locking tab is difficult to release.
- Lift the protective rubber cap from the main output terminal.
- Use a 13mm socket, 3-inch socket extension, and 3/8-inch-drive ratchet to remove the output-terminal nut.
- Lift the cable eyelet from the stud and move it aside without sharply bending the cable.
Step 8: Remove the Alternator
- Support the alternator with one hand. It is heavier than it appears.
- Use a 15mm shallow socket or 15mm deep socket, the required 3-inch or 6-inch socket extension, and a 3/8-inch-drive ratchet to remove the alternator mounting bolts.
- Note each bolt’s location and length during removal.
- Rock the alternator gently to free its mounting ears, then guide it out through the wheel-well opening.
- Do not pry against an aluminum coolant or air-conditioning component.
Step 9: Compare the Alternators
- Place the old and replacement alternators side by side.
- Confirm the pulley diameter and rib count, electrical connector, output stud, mounting ears, and clocking all match.
- Turn the replacement pulley by hand. It should rotate smoothly without grinding or excessive looseness.
Step 10: Install the Replacement Alternator
- Position the alternator in its bracket and install all mounting bolts by hand to prevent crossed threads.
- Use the appropriate 15mm socket, 3-inch or 6-inch socket extension, and torque wrench rated 20-150 Nm to tighten the mounting bolts evenly.
- Torque the alternator mounting bolts to 48 Nm (35 ft-lbs).
Step 11: Reconnect the Alternator Wiring
- Place the main output-cable eyelet squarely over the alternator stud.
- Install the terminal nut with a 13mm socket and tighten it using the torque wrench rated 5-25 Nm.
- Torque the output-terminal nut to 12 Nm (106 in-lbs).
- Reinstall the protective rubber cap so the energized terminal cannot contact metal.
- Push the small electrical connector into place until its lock clicks.
Step 12: Reinstall the Drive Belt
- Route the belt according to the under-hood diagram and your photograph. Ensure every rib sits fully inside every grooved pulley.
- Use the serpentine-belt tool with 15mm adapter to rotate the tensioner clockwise.
- Slip the belt over the alternator pulley and slowly release the tensioner.
- Inspect every pulley again. The belt must not hang over an edge or cross between ribs.
- Check the lowest pulley with a flashlight.
Step 13: Reinstall the Splash Shield and Wheel
- Position the splash shield and install its fasteners using the trim-clip removal tool, 8mm socket, and 3/8-inch-drive ratchet. Tighten the small screws only until snug.
- Install the wheel and start all lug nuts by hand.
- Use the 19mm deep socket and 1/2-inch-drive ratchet to snug the lug nuts in a star pattern.
- Raise the vehicle slightly with the 2-ton floor jack, remove the 2-ton jack stand, and lower the tire to the ground.
- Use the 19mm deep socket and torque wrench rated 20-150 Nm to tighten the lug nuts in a star pattern.
- Torque the wheel lug nuts to 135 Nm (100 ft-lbs).
Step 14: Reconnect the Battery
- Place the negative cable fully onto the battery post.
- Use a 10mm socket and torque wrench rated 5-25 Nm to tighten the clamp.
- Torque the negative battery-terminal clamp to 5 Nm (44 in-lbs).
- Do not overtighten the clamp or force it farther down the tapered post.
✅ After Repair
- ✅ Before starting the engine, inspect the belt from above and through the wheel-well opening to confirm correct routing.
- ✅ Start the engine and observe the belt from a safe distance. It should run centrally without jumping, squealing, or wandering.
- ✅ Confirm the battery warning light turns off. Shut down immediately if the light remains on, the belt runs incorrectly, or you smell burning rubber.
- ✅ Switch on the headlights and cabin blower. The lights should remain steady and no charging warning should appear.
- ✅ If available, check battery voltage with a suitable meter. Charging voltage commonly varies because Ford uses computer-controlled charging, so do not condemn the new alternator from one voltage reading alone.
- ✅ Reset the clock and radio presets if they were lost during battery disconnection.
- ✅ Recheck the wheel-lug torque after approximately 80-160 km.
💰 DIY vs Shop Cost
Shop Cost: $550-$900 (parts + labor)
DIY Cost: $250-$500 (parts only)
You Save: $300-$400 by doing it yourself!
Shop labor rates vary but typically run $100-$150/hour. This repair takes a shop approximately 1.5-2.5 hours.
🎯 Ready to get started?
HowToo makes it easy: same-day/2-day shipping on every part, plus all the tools and specialty tools you need! Check out the parts and tools sections below to add everything to your cart.