




How to Replace the A/C Compressor on a 2018-2020 Chevrolet Impala 3.6L (Engine: V6 3.6L)
Step-by-step instructions with tools, parts, torque specs, oil balancing, and R-134a safety for 2018, 2019
How to Replace the A/C Compressor on a 2018-2020 Chevrolet Impala 3.6L (Engine: V6 3.6L)
Step-by-step instructions with tools, parts, torque specs, oil balancing, and R-134a safety for 2018, 2019


🔧 Impala - A/C Compressor Replacement
Replacing the A/C compressor requires recovering the R-134a refrigerant, removing the drive belt and compressor, balancing the compressor oil, then evacuating and accurately recharging the system. Because refrigerant equipment and careful contamination control are required, this is an advanced repair even though the compressor is mechanically accessible from underneath your Impala.
Difficulty Level: Advanced | Estimated Time: 4-6 hours
Assumption: The A/C system is stock and still uses factory-specified R-134a refrigerant.
⚠️ Safety & Precautions
- ⚠️ Refrigerant must be recovered with certified equipment. Venting R-134a is unsafe and illegal in many locations.
- 🧤 Wear safety glasses and refrigerant-rated gloves. Escaping refrigerant can cause severe frostbite and eye injury.
- 🔥 Keep refrigerant away from flames and very hot surfaces because it can produce toxic gases.
- 🚫 Never loosen an A/C fitting until a recovery machine confirms that system pressure is zero.
- 🛢️ Keep every open line capped. Moisture and dirt can quickly damage the replacement compressor.
- 🏗️ Support your Impala with jack stands. Never work beneath a vehicle supported only by a floor jack.
- 🔌 Disconnecting the battery is recommended before unplugging and removing the compressor.
- ⚙️ If the old compressor seized or released metal debris, the condenser and expansion valve must also be replaced and the reusable lines flushed professionally.
🔧 Required Tools
You'll need the following tools for this repair:
- R-134a recovery, recycling and charging station (specialty)
- R-134a refrigerant identifier (specialty)
- Two-stage A/C vacuum pump (specialty)
- R-134a manifold gauge set (specialty)
- Electronic refrigerant scale accurate to 10 grams (specialty)
- A/C line cap and plug set (specialty)
- A/C flushing equipment (specialty)
- A/C oil measuring cup graduated in milliliters
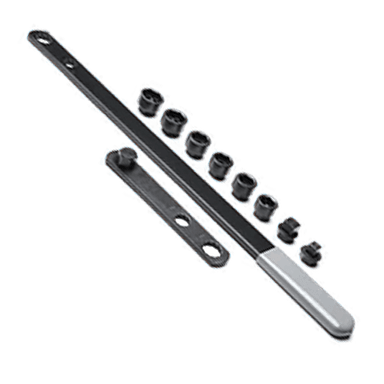
- Serpentine belt tool with 15mm socket
- 7mm socket
- 10mm socket
- 13mm socket
- 15mm socket
- 18mm socket
- 3/8-inch drive ratchet
- 3/8-inch drive extensions
- 1/2-inch drive breaker bar
- Torque wrench rated 5-60 Nm
- Torque wrench rated 40-200 Nm
- Plastic trim-clip removal tool
- Floor jack rated 2-ton minimum
- Jack stands rated 2-ton minimum
- Wheel chocks
- Digital vent thermometer
- Drain pan graduated in milliliters
- Nitrile gloves
- Refrigerant-rated gloves
- Safety glasses
🔩 Required Parts
HowToo sells all the parts you need for this repair:
- A/C compressor assembly for 3.6L engine - Qty: 1
- Compressor suction and discharge sealing washers - Qty: 2
- GM-specified PAG refrigerant oil - Qty: As measured during oil balancing
- R-134a refrigerant - Qty: Exact underhood-label charge
- Serpentine drive belt - Qty: 1 if cracked, glazed or refrigerant-soaked
- A/C condenser with receiver-desiccant - Qty: 1 if metal contamination is present
- A/C expansion valve - Qty: 1 if metal contamination is present
📋 Before You Begin
- 🚗 Park on level pavement, select Park, apply the parking brake and chock both rear wheels.
- 🏷️ Read the underhood A/C label before starting. Record the specified refrigerant type and exact charge weight; use that label rather than estimating.
- 🔍 Diagnose the system before ordering parts. A failed pressure sensor, relay, wiring circuit or low refrigerant charge can imitate compressor failure.
- ♻️ Have a qualified A/C technician recover the refrigerant if you do not own certified recovery equipment.
- 📏 Record the quantity of oil recovered by the recovery machine. This measurement is needed when calculating the final oil balance.
- 🔋 After refrigerant recovery, switch the ignition off, remove the key and wait two minutes before disconnecting the negative battery cable.
- 🧼 Clean around both compressor refrigerant connections before opening them.
🔨 Step-by-Step Instructions
Follow these steps in order:
Step 1: Recover the refrigerant
- Use the R-134a refrigerant identifier to verify that the system contains uncontaminated R-134a.
- Connect the R-134a recovery station to the high- and low-side service ports according to its instructions.
- Recover the complete charge until the machine finishes and both gauges remain at zero pressure.
- Use the graduated drain pan or machine readout to record the amount of oil removed during recovery.
- Remove the service hoses and reinstall the service-port caps by hand.
Step 2: Disconnect electrical power
- Open the hood and use a 10mm socket to loosen the negative battery-terminal clamp.
- Lift the clamp from the battery post and position it where it cannot spring back into contact.
Step 3: Raise and support the vehicle
- Use a 19mm or 3/4-inch equivalent wheel tool only if it correctly fits the installed lug nuts; use the 1/2-inch breaker bar to loosen the right-front lug nuts one turn before lifting.
- Use the 2-ton floor jack at the specified front lifting point, then place a 2-ton jack stand beneath the reinforced support point.
- Remove the right-front wheel using the correctly fitting wheel socket.
- Use the 7mm socket and plastic trim-clip tool to remove the right-front lower splash shield fasteners and clips.
- Arrange fasteners in removal order.
Step 4: Remove the serpentine belt
- Photograph or note the factory belt-routing diagram before releasing the belt.
- Use the serpentine belt tool with 15mm socket to rotate the automatic tensioner and release belt tension.
- Slide the belt off the A/C compressor pulley, then slowly return the tensioner to its stop.
- Inspect the belt for cracks, glazing, missing ribs or refrigerant contamination.
Step 5: Disconnect the compressor lines
- Place the drain pan beneath the compressor to catch refrigerant oil.
- Clean the line manifold and compressor using a clean lint-free cloth.
- Use the appropriate 13mm or 15mm socket, as fitted to the compressor manifold fastener, to remove the suction/discharge line retaining bolt.
- Pull the manifold straight away without twisting or bending the aluminum lines.
- Immediately install plugs from the A/C line cap and plug set in the open lines and compressor ports.
- Discard the old sealing washers. Never reuse them.
Step 6: Disconnect and remove the compressor
- Release the connector lock by hand and unplug the compressor electrical connector without pulling on its wires.
- Support the compressor with one hand or a suitable support.
- Use the 13mm or 15mm socket and extensions, as fitted, to remove the compressor mounting bolts from below.
- Lower the compressor carefully through the lower opening without striking the radiator, lines or wiring.
- Keep all removed oil in the graduated drain pan for measurement.
Step 7: Inspect for internal failure
- Use safety glasses and drain oil from the old compressor into the graduated measuring cup while slowly rotating its pulley hub by hand.
- Inspect the oil for silver flakes, dark sludge or gritty particles.
- If metal is present, do not install only a compressor. Replace the condenser with receiver-desiccant and expansion valve, then use A/C flushing equipment on only the reusable lines approved for flushing.
- Do not flush the compressor, condenser, expansion valve or evaporator.
Step 8: Balance the compressor oil
- Check the replacement compressor documentation to determine whether it is shipped dry or prefilled with oil.
- Use the graduated measuring cup to measure oil removed from the old compressor and include the amount captured by the recovery machine.
- Use only the PAG oil specification printed on the compressor documentation or underhood label.
- Adjust the replacement compressor so the system receives the same amount removed unless components were flushed or replaced; in that case, use the GM component-oil allocation supplied with the replacement parts.
- Rotate the new compressor hub by hand approximately 10 turns to distribute oil internally.
- Do not guess the oil quantity. Too much or too little oil can damage the compressor and reduce cooling.
Step 9: Install the replacement compressor
- Position the compressor against its mounting bracket by hand and start every mounting bolt several turns to prevent cross-threading.
- Use the appropriate socket and torque wrench to tighten the compressor mounting bolts evenly to 25 Nm (18 ft-lbs).
- Reconnect the electrical connector by hand until its lock clicks.
Step 10: Reconnect the refrigerant lines
- Remove the temporary plugs only when ready to make the connection.
- Install new sealing washers in their correct positions and lightly wet them with the specified clean PAG oil.
- Align the line manifold squarely with the compressor ports. Do not use the bolt to pull a misaligned manifold into place.
- Install the retaining bolt using the appropriate socket and tighten it with the low-range torque wrench to 22 Nm (16 ft-lbs).
Step 11: Reinstall the drive belt
- Route the belt around every pulley according to the underhood diagram, leaving the easiest pulley until last.
- Use the serpentine belt tool with 15mm socket to rotate the tensioner, slip the belt into position and slowly release the tensioner.
- Use a flashlight to verify that every belt rib is centered in every grooved pulley.
- One misplaced rib can destroy the belt.
Step 12: Reassemble the wheel area
- Use the 7mm socket and plastic trim-clip tool to reinstall the splash shield and all retained clips.
- Install the right-front wheel and tighten the lug nuts lightly in a star pattern with the correctly fitting wheel socket.
- Use the floor jack to remove the jack stand and lower your Impala.
- Use the high-range torque wrench and wheel socket to tighten the lug nuts in a star pattern to 140 Nm (100 ft-lbs).
Step 13: Reconnect the battery
- Place the negative battery clamp fully onto the post.
- Use the 10mm socket to tighten the clamp securely without overtightening it.
- Turn the ignition on and confirm that normal electrical functions return.
Step 14: Evacuate and leak-test the system
- Connect the R-134a manifold gauge set and two-stage vacuum pump to the service ports.
- Evacuate the system for at least 45 minutes, longer in humid conditions.
- Close both manifold valves, stop the pump and verify that the vacuum holds for at least 10 minutes.
- If vacuum is lost, locate and repair the leak before charging. Vacuum retention alone does not replace a pressurized leak test.
Step 15: Recharge by exact weight
- Place the approved R-134a supply on the electronic refrigerant scale and zero the scale.
- Use the R-134a charging station or manifold gauge set to charge exactly the weight printed on your Impala’s underhood label.
- Do not charge by pressure alone and do not add stop-leak products.
- Close the valves, disconnect the couplers and reinstall both service-port caps by hand.
✅ After Repair
- 🌡️ Start the engine, set the blower to medium-high, select maximum cooling and open the center vents.
- 🔍 Inspect the compressor, line manifold and service ports for refrigerant or oil leakage.
- 👂 Listen for belt squeal, grinding, rattling or repeated rapid compressor cycling.
- ❄️ Use the digital vent thermometer to verify that center-vent temperature falls steadily.
- 📊 Confirm high- and low-side pressures are appropriate for the outdoor temperature and humidity using the R-134a manifold gauge set.
- 🧪 Perform an electronic or approved UV leak inspection after the system has operated.
- 🚨 Stop the engine immediately if the belt runs off-center, the compressor makes heavy mechanical noise or pressure rises abnormally.
- 🕒 Recheck cooling performance and visible connections after a short road test.
💰 DIY vs Shop Cost
Shop Cost: ₹55,000-₹110,000 (parts + labor, depending on imported-part availability)
DIY Cost: ₹30,000-₹65,000 (parts only; recovery and recharge service extra)
You Save: ₹20,000-₹45,000 by doing it yourself!
Labor rates in Sonīpat vary widely. This repair takes a shop approximately 3-5 hours, plus evacuation and charging time.
🎯 Ready to get started?
HowToo makes it easy: same-day/2-day shipping on every part, plus all the tools and specialty tools you need! Check out the parts and tools sections below to add everything to your cart.