

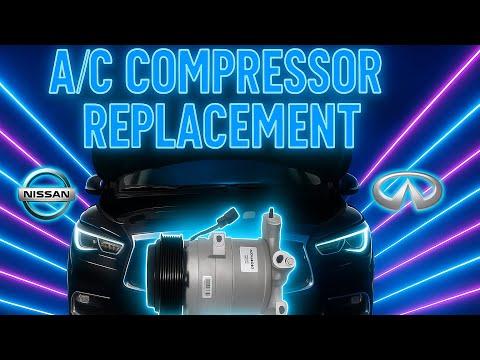





How to Replace the A/C Compressor on a 2015-2021 Nissan Murano 3.5L V6 (Trim: Platinum | Engine: V6 3.5L)
Step-by-step instructions with tools, parts, torque specs, charging, and safety tips for 2015, 2016, 2017, 2018, 2019, 2020, 2021
How to Replace the A/C Compressor on a 2015-2021 Nissan Murano 3.5L V6 (Trim: Platinum | Engine: V6 3.5L)
Step-by-step instructions with tools, parts, torque specs, charging, and safety tips for 2015, 2016, 2017, 2018, 2019, 2020, 2021


🔧 Murano - A/C Compressor Replacement
Replacing the A/C compressor requires recovering the refrigerant, removing the drive belt and refrigerant lines, installing the new compressor with fresh O-rings, evacuating the system, and charging it by weight. Because refrigerant equipment and precise oil control are required, this is an advanced repair and is not recommended as a first A/C project.
Difficulty Level: Advanced | Estimated Time: 4-6 hours
Assumption: Use only the refrigerant type and charge weight printed on your Murano’s under-hood A/C label.
⚠️ Safety & Precautions
- ⚠️ Refrigerant can cause severe frostbite and eye injury. Never loosen an A/C fitting until a certified recovery machine shows the system is empty.
- ⚠️ Venting refrigerant is unsafe and may violate local environmental regulations. Have a qualified A/C shop recover it if you do not have approved equipment.
- ⚠️ Never mix R-134a and R-1234yf equipment, refrigerant, fittings, or oils.
- ⚠️ Disconnect the negative battery cable before reaching near the compressor or drive belt.
- ⚠️ Support your Murano with jack stands. Never work beneath a vehicle supported only by a jack.
- ⚠️ PAG oil absorbs moisture rapidly. Keep the compressor and refrigerant lines capped whenever they are disconnected.
- ⚠️ If the old compressor failed internally or discharged metal debris, do not simply install another compressor. The condenser, desiccant element, and expansion valve may also require replacement.
🔧 Required Tools
You'll need the following tools for this repair:
- R-134a or R-1234yf refrigerant recovery/recharge station matching the under-hood label (specialty)
- Electronic refrigerant scale accurate to 10 grams (specialty)
- Electronic refrigerant leak detector matching the under-hood label (specialty)
- Dry nitrogen regulator and hose set rated for 150 psi (specialty)
- A/C oil measuring cylinder graduated in 5mL increments (specialty)
- A/C line sealing caps and plugs (specialty)
- 3/8-inch-drive breaker bar
- 3/8-inch-drive torque wrench rated 5-80 Nm
- 1/2-inch-drive torque wrench rated 40-150 Nm
- 10mm socket
- 12mm socket
- 14mm socket
- 21mm impact socket
- 6-inch socket extension
- Plastic trim-clip removal tool
- Small nylon O-ring pick
- Floor jack rated 2-ton minimum
- Jack stands rated 2-ton minimum
- Wheel chocks
- Drain pan with 2-quart capacity
- Digital multimeter rated CAT III
- Nitrile gloves
- Safety glasses with side shields
🔩 Required Parts
HowToo sells all the parts you need for this repair:
- A/C compressor matched to the 3.5L V6 - Qty: 1
- Compressor suction-line O-ring - Qty: 1
- Compressor discharge-line O-ring - Qty: 1
- PAG refrigerant oil matching the under-hood label and compressor instructions - Qty: 1 container
- Refrigerant matching the under-hood A/C label - Qty: Charge weight shown on label
- Condenser desiccant element - Qty: 1 recommended whenever the system has been left open
- A/C condenser - Qty: 1 if compressor debris is present
- A/C expansion valve - Qty: 1 if compressor debris is present
- Serpentine drive belt - Qty: 1 if cracked, glazed, oil-soaked, or worn
📋 Before You Begin
- 📋 Park your Murano on level ground, select Park, apply the parking brake, and allow the engine to cool completely.
- 📋 Record the refrigerant type and exact charge weight from the under-hood A/C label. The label overrides all catalog estimates.
- 📋 Confirm that the replacement compressor is compatible with the refrigerant and oil shown on that label.
- 📋 Have the refrigerant professionally recovered before opening the system.
- 📋 Do not rotate the new compressor dry. Follow its included oil instructions before installation.
- 📋 If the old compressor seized or produced metal debris, stop and plan for contamination repair rather than compressor-only replacement.
🔨 Step-by-Step Instructions
Follow these steps in order:
Step 1: Recover the refrigerant
- Connect the correctly matched refrigerant recovery/recharge station to the high- and low-pressure service ports.
- Use the recovery station to recover the complete refrigerant charge according to the machine instructions.
- Confirm both gauges remain at 0 psi before disconnecting any refrigerant line.
- Never use pressure alone to identify refrigerant.
Step 2: Disconnect the battery
- Open the hood and use a 10mm socket to loosen the negative battery-terminal nut.
- Remove and isolate the negative cable so it cannot spring back onto the terminal.
- Wait at least three minutes before working near electrical connectors.
- During reassembly, tighten the terminal nut to 5.4 Nm (48 in-lbs).
Step 3: Raise and support the vehicle
- Place wheel chocks behind both rear tires.
- Use a 21mm impact socket to loosen the right-front wheel nuts one turn while the tire is on the ground.
- Use the 2-ton floor jack at the front lifting point, then lower your Murano securely onto 2-ton jack stands.
- Use the 21mm impact socket to remove the wheel.
- During installation, use the 1/2-inch-drive torque wrench and 21mm socket to tighten the wheel nuts in a star pattern to 113 Nm (83 ft-lbs).
Step 4: Remove the right splash shields
- Use the plastic trim-clip removal tool to release the right-front fender-liner and lower splash-shield clips.
- Use a 10mm socket to remove the shield bolts.
- Move the shields aside to expose the drive belt and compressor area.
- Keep each clip with its original panel because the clip lengths can differ.
Step 5: Remove the drive belt
- Photograph the belt routing before removal.
- Fit the 3/8-inch-drive breaker bar into the belt tensioner and rotate the tensioner slowly to release belt tension.
- Slide the belt off the compressor pulley, then slowly release the tensioner.
- Inspect the belt for cracking, shiny glazing, missing ribs, or oil contamination.
- Keep fingers away from the loaded tensioner.
Step 6: Check for compressor failure debris
- Place the 2-quart drain pan beneath the compressor connections.
- Use a 12mm socket and 6-inch extension to remove the refrigerant-line retaining bolts.
- Carefully separate the suction and discharge lines without bending them.
- Immediately seal each line with A/C line sealing caps and plugs.
- Inspect the oil at the openings. Gray oil, glitter, metal particles, or black residue indicates internal failure.
- If debris is present, replace the condenser and expansion valve and clean approved reusable lines before proceeding.
Step 7: Disconnect and remove the compressor
- Press the lock and unplug the compressor electrical connector by hand. Do not pull on the wires.
- Use a digital multimeter only if connector damage or a wiring fault is suspected; do not apply battery voltage directly to the compressor control circuit.
- Support the compressor by hand while using a 14mm socket and 6-inch extension to remove its mounting bolts.
- Lower the compressor through the wheel-well or lower opening without damaging nearby hoses.
- Keep the compressor upright so its remaining oil can be measured accurately.
Step 8: Measure and prepare the replacement compressor
- Drain the old compressor into the graduated A/C oil measuring cylinder while slowly rotating its shaft by hand.
- Check the new compressor instructions for its shipping-oil amount and required PAG oil type.
- Adjust the new compressor’s oil quantity according to the Nissan-compatible compressor instructions and the measured amount removed.
- Do not add the system’s entire oil capacity to a compressor-only replacement unless the whole system has been flushed and emptied.
- Turn the new compressor shaft by hand approximately ten complete revolutions to distribute the oil.
- Too much oil reduces cooling and can damage components.
Step 9: Install the replacement compressor
- Position the compressor against its mounting bracket by hand.
- Start every mounting bolt by hand to prevent cross-threading.
- Use the 3/8-inch-drive torque wrench, 14mm socket, and 6-inch extension to tighten the compressor mounting bolts evenly to 25 Nm (18 ft-lbs).
- Reconnect the compressor electrical connector by hand until its lock clicks.
Step 10: Install new refrigerant-line O-rings
- Use the small nylon O-ring pick to remove the old O-rings without scratching the aluminum sealing surfaces.
- Lightly coat the new O-rings with the exact PAG oil specified for the system.
- Install the O-rings by hand without twisting them.
- Seat both refrigerant lines squarely against the compressor.
- Use the 3/8-inch-drive torque wrench and 12mm socket to tighten the line retaining bolts to 4.5 Nm (40 in-lbs).
- Do not overtighten these bolts; the O-rings create the seal.
Step 11: Reinstall the drive belt
- Route the belt around all pulleys according to the photograph, leaving the compressor pulley until last.
- Use the 3/8-inch-drive breaker bar to rotate the tensioner and slide the belt over the compressor pulley.
- Slowly release the tensioner and visually verify that every rib is seated in every grooved pulley.
- Replace the belt if it shows any damage or contamination.
Step 12: Pressure-test the sealed system
- Connect the dry nitrogen regulator and hose set to the A/C service equipment.
- Pressurize the system with dry nitrogen only, following the equipment manufacturer’s test-pressure limit.
- Use the electronic refrigerant leak detector to inspect both compressor fittings and all disturbed connections.
- Release the nitrogen through approved service equipment after the test.
- Never use oxygen, shop air, or compressed air for A/C pressure testing.
Step 13: Evacuate and recharge the system
- Connect the correctly matched refrigerant recovery/recharge station to both service ports.
- Run the vacuum cycle for at least 30 minutes, then perform the machine’s vacuum-hold leak test.
- If vacuum decays, locate and repair the leak before charging.
- Use the electronic refrigerant scale and recharge station to install exactly the refrigerant weight shown on the under-hood label.
- Do not charge by pressure or by can count.
Step 14: Reassemble the splash shields and wheel
- Use a 10mm socket to reinstall the lower splash-shield bolts snugly without stripping the plastic retainers.
- Use the plastic trim-clip removal tool by hand to reinstall all fender-liner and splash-shield clips.
- Install the wheel and start all wheel nuts by hand.
- Use the floor jack to remove the jack stands and lower your Murano.
- Use the 1/2-inch-drive torque wrench and 21mm socket to tighten the wheel nuts in a star pattern to 113 Nm (83 ft-lbs).
Step 15: Reconnect the battery
- Place the negative battery cable fully onto the terminal.
- Use the 3/8-inch-drive torque wrench and 10mm socket to tighten the terminal nut to 5.4 Nm (48 in-lbs).
- Reset the clock and automatic-window function if those settings were lost.
✅ After Repair
- ✅ Start the engine with the A/C switched off and watch the belt for correct tracking.
- ✅ Turn the A/C on, select maximum cooling and recirculation, and set the blower to medium-high.
- ✅ Verify that cool air comes from the vents and that no abnormal grinding, rattling, or belt noise is present.
- ✅ Use the electronic refrigerant leak detector around both compressor fittings and service-port caps.
- ✅ Confirm that the radiator cooling fans operate when commanded by the A/C system.
- ✅ Recheck the wheel-nut torque after approximately 50-100 km of driving.
- ✅ If the compressor does not operate, diagnose pressure-sensor data, power supply, ground, and HVAC control commands rather than adding refrigerant.
💰 DIY vs Shop Cost
Shop Cost: ₹55,000-₹1,10,000 (parts + labor)
DIY Cost: ₹35,000-₹75,000 (parts only, excluding recovery and recharge equipment)
You Save: ₹15,000-₹35,000 if you already have access to approved A/C equipment.
Local labor and imported-part pricing vary significantly. A professional shop typically needs approximately 4-6 hours, including recovery, evacuation, and charging.
🎯 Ready to get started?
HowToo makes it easy: same-day/2-day shipping on every part, plus all the tools and specialty tools you need! Check out the parts and tools sections below to add everything to your cart.