








How to Replace the A/C Compressor on a 2015-2020 Chevrolet Tahoe (Trim: LT | Engine: V8 5.3L | Body: Sport Utility)
Step-by-step instructions with tools, parts, torque specs, refrigerant safety, and recharge tips for 2015, 2016, 2017, 2018, 2019, 2020
How to Replace the A/C Compressor on a 2015-2020 Chevrolet Tahoe (Trim: LT | Engine: V8 5.3L | Body: Sport Utility)
Step-by-step instructions with tools, parts, torque specs, refrigerant safety, and recharge tips for 2015, 2016, 2017, 2018, 2019, 2020


🔧 Tahoe - A/C Compressor Replacement
Replacing the A/C compressor requires recovering the refrigerant, removing the dedicated stretch-fit belt, transferring the correct amount of refrigerant oil, and evacuating and recharging the system. Refrigerant recovery and charging must be performed with equipment compatible with the refrigerant printed on your Tahoe’s underhood A/C label.
Difficulty Level: Advanced | Estimated Time: 4-6 hours
Assumption: This procedure covers the factory front-and-rear A/C system normally installed on the LT.
⚠️ Safety & Precautions
- ⚠️ Do not loosen an A/C fitting until a qualified shop has completely recovered the refrigerant. Venting refrigerant is dangerous and unlawful.
- ⚠️ Read the underhood A/C label before selecting equipment. Never mix R-1234yf and R-134a equipment, oil, or refrigerant.
- ⚠️ R-1234yf is mildly flammable. Keep sparks, cigarettes, and open flames away from the vehicle.
- ⚠️ Wear safety glasses and refrigerant-resistant gloves. Escaping liquid refrigerant can cause severe frostbite.
- ⚠️ Disconnect the negative battery cable after refrigerant recovery and before unplugging the compressor.
- ⚠️ Support the Tahoe with jack stands. Never work beneath a vehicle supported only by a floor jack.
- ⚠️ Cap every open refrigerant line immediately. Moisture or dirt can damage the new compressor.
- ⚠️ If the old compressor seized or released metal debris, stop and replace the condenser and expansion devices, then flush approved reusable lines. Installing only a compressor will cause another failure.
🔧 Required Tools
You'll need the following tools for this repair:
- Metric socket set (7mm-15mm)
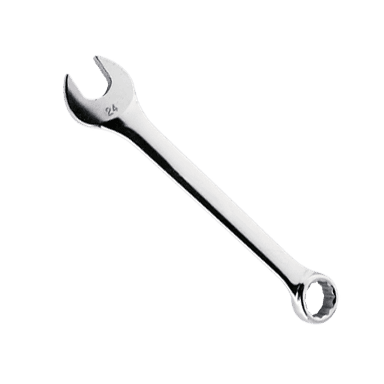
- Metric combination wrench set (10mm-15mm)
- 3/8-inch drive ratchet
- 3/8-inch drive extension set (3-inch and 6-inch)
- 3/8-inch drive torque wrench (10-80 Nm)
- 15mm serpentine-belt tool
- A/C stretch-belt removal and installation tool (specialty)
- Trim-clip removal tool
- Floor jack (rated 3-ton minimum)
- Jack stands (rated 3-ton minimum)
- Wheel chocks
- Refrigerant recovery and recharge machine matching underhood label (specialty)
- A/C vacuum pump matching underhood label (specialty)
- Digital refrigerant scale (0.1-ounce resolution)
- Graduated oil measuring cup (1-ounce increments)
- A/C line caps and plugs (specialty)
- Electronic refrigerant leak detector matching underhood label (specialty)
- Safety glasses
- Refrigerant-resistant gloves
🔩 Required Parts
HowToo sells all the parts you need for this repair:
- A/C compressor with clutch and control valve - Qty: 1
- A/C compressor sealing-washer kit - Qty: 1
- A/C compressor stretch-fit belt - Qty: 1
- Refrigerant type specified on underhood A/C label - Qty: Factory label capacity
- Refrigerant oil type specified on underhood A/C label - Qty: As required by oil-balance procedure
- A/C line caps and plugs - Qty: 1 set
- A/C condenser - Qty: 1 if metal debris or black oil is present
- Front expansion valve - Qty: 1 if metal debris is present
- Rear expansion valve - Qty: 1 if metal debris is present
📋 Before You Begin
- 📋 Park your Tahoe on level pavement, apply the parking brake, switch off the climate control, and chock the rear wheels.
- 📋 Photograph the underhood A/C label. It identifies the approved refrigerant, oil specification, and exact charge by weight.
- 📋 Have a certified A/C shop recover the refrigerant if you do not own an approved recovery machine. Do not use a vacuum pump to remove refrigerant.
- 📋 Ask the shop to record how much refrigerant and oil were recovered. This helps identify leaks and establish the correct oil balance.
- 📋 Obtain a new stretch-fit belt. This elastic belt has no tensioner and should not be reused after removal.
- 📋 Confirm whether the original compressor failed internally. Metal flakes, gray sludge, or black oil require contamination repairs before installing the replacement.
🔨 Step-by-Step Instructions
Follow these steps in order:
Step 1: Recover the Refrigerant
- Use the refrigerant recovery and recharge machine specified for the refrigerant shown on the underhood label.
- Connect the machine to the high- and low-side service ports and perform its complete recovery cycle.
- Verify both gauges remain at 0 psi before disconnecting a refrigerant line.
- A shop can perform recovery before your DIY work.
Step 2: Disconnect Electrical Power
- Open the hood and switch the ignition completely off.
- Use a 10mm wrench to loosen the negative battery-cable terminal.
- Remove the negative cable and isolate it so it cannot touch the battery post.
- Wait at least two minutes before unplugging electrical components.
Step 3: Raise and Support the Tahoe
- Place the floor jack beneath the front crossmember and raise the front of your Tahoe.
- Position the 3-ton jack stands beneath the approved frame support points, then lower the vehicle onto them.
- Use the floor jack to apply light backup support without lifting the Tahoe away from the stands.
- Wear safety glasses before working underneath.
Step 4: Remove the Lower Shield
- Use the correct socket from the 7mm-15mm metric socket set to remove the lower splash-shield screws.
- Use the trim-clip removal tool to release any plastic retainers without breaking them.
- Lower the shield and arrange its fasteners in removal order.
Step 5: Remove the Drive Belts
- Photograph the main serpentine-belt routing before removal.
- Use the 15mm serpentine-belt tool to rotate the automatic tensioner and slip the main belt away from the crankshaft pulley as needed for access.
- Use the A/C stretch-belt removal and installation tool on the crankshaft pulley while turning the crankshaft by hand in its normal direction.
- Walk the A/C belt off the pulley. Do not pry against the pulley or compressor housing.
- Discard the removed A/C stretch-fit belt.
Step 6: Disconnect the Compressor Electrical Connector
- Use your fingers to release the connector lock, then unplug the compressor electrical connector.
- Use the trim-clip removal tool to release the harness retainer from its bracket.
- Inspect the connector for melted plastic, corrosion, or oil contamination.
Step 7: Disconnect the Refrigerant Lines
- Confirm the recovery machine shows no remaining system pressure.
- Use a 13mm socket and 3/8-inch ratchet to remove the refrigerant-line retaining bolt from the compressor manifold block.
- Pull the line block straight away without bending the aluminum pipes.
- Use A/C line caps and plugs to seal the compressor ports and open lines immediately.
- Remove and discard the old sealing washers. Never reuse them.
Step 8: Remove the Old Compressor
- Support the compressor by hand before removing its final fastener.
- Use a 13mm socket, extensions, and 3/8-inch ratchet to remove the compressor mounting bolts.
- Lower the compressor carefully through the available lower opening.
- Do not allow residual oil to spill until it can be measured.
Step 9: Inspect the Old Compressor and Oil
- Use the graduated oil measuring cup to drain the old compressor while rotating its hub by hand several turns.
- Record the amount and inspect the oil under bright light.
- Stop the repair if the oil contains metal particles, thick gray material, or black contamination.
- If contamination is present, replace the condenser and both expansion valves and clean only those lines approved for flushing.
- Debris left inside will destroy the new compressor.
Step 10: Balance the Compressor Oil
- Use the graduated oil measuring cup to determine how much shipping oil is inside the replacement compressor.
- Use only the refrigerant oil specification printed on your Tahoe’s underhood label or supplied with the matched compressor.
- If the replacement compressor contains shipping oil, adjust it according to the compressor manufacturer’s instructions and the measured amount removed from the old unit.
- Do not add the entire system oil capacity to a compressor-only repair. Excess oil reduces cooling and can damage the compressor.
- Rotate the new compressor hub by hand approximately ten turns to distribute the oil.
Step 11: Install the New Compressor
- Lift the replacement compressor into its mounting position by hand.
- Start every mounting bolt by hand to prevent cross-threading.
- Use the 13mm socket and torque wrench to tighten the compressor mounting bolts evenly to 50 Nm (37 ft-lbs).
- Route the electrical harness exactly as it was originally positioned.
Step 12: Connect the Refrigerant Lines
- Install new sealing washers in their correct positions and lightly wet them with the approved refrigerant oil.
- Keep oil away from the bolt threads and sealing faces.
- Seat the manifold block squarely against the compressor without forcing the aluminum lines.
- Start the retaining bolt by hand, then use the 13mm socket and torque wrench to tighten it to 22 Nm (16 ft-lbs).
- Remove the protective plugs only immediately before making the connection.
Step 13: Reconnect the Compressor Harness
- Push the electrical connector onto the compressor until its lock clicks.
- Secure the harness retainer using your fingers and verify the wiring cannot contact either belt.
Step 14: Install the New Stretch-Fit Belt
- Place the new A/C stretch-fit belt around the compressor pulley and partially onto the crankshaft pulley.
- Use the A/C stretch-belt installation tool while rotating the crankshaft by hand in its normal direction.
- Confirm every belt rib sits fully inside its pulley groove.
- Use the 15mm serpentine-belt tool to reinstall the main belt according to your routing photograph.
- Inspect the main belt for cracks or oil contamination before reuse.
Step 15: Reinstall the Lower Shield
- Raise the lower shield into position by hand.
- Use the trim-clip removal tool by hand to reinstall reusable plastic retainers.
- Use the appropriate socket from the 7mm-15mm metric socket set to reinstall the shield screws snugly without stripping the plastic retainers.
Step 16: Lower the Vehicle and Reconnect the Battery
- Use the floor jack to raise your Tahoe slightly and remove both jack stands.
- Lower the vehicle fully and remove the wheel chocks.
- Reconnect the negative battery cable and use the 10mm wrench to tighten the terminal securely.
Step 17: Evacuate and Recharge the System
- Use the compatible recovery and recharge machine and vacuum pump to evacuate the system for at least 45 minutes.
- Close the valves and verify the system holds vacuum for at least 10 minutes. A loss of vacuum indicates a leak that must be repaired.
- Use the digital refrigerant scale to charge exactly the refrigerant weight printed on the underhood A/C label.
- Do not charge by pressure alone. Your Tahoe’s front-and-rear system requires an exact charge by weight.
✅ After Repair
- ✅ Use the electronic refrigerant leak detector around the compressor line connection, service ports, and compressor case.
- ✅ Start the engine with the climate system off and watch both belts for one minute. Stop immediately if a belt walks sideways or makes noise.
- ✅ Select maximum cooling, recirculation, and high blower speed. Confirm the compressor operates without grinding, knocking, or belt squeal.
- ✅ Check cooling from both the front and rear vents.
- ✅ Verify the recovered and recharged quantities are recorded on the repair invoice or service label.
- ✅ Recheck the compressor area for refrigerant oil after a short road test. An oily fitting usually indicates a leak.
- ✅ Reset the clock and saved audio settings if they were lost during battery disconnection.
💰 DIY vs Shop Cost
Shop Cost: ₹75,000-₹145,000 (parts, refrigerant, and labor)
DIY Cost: ₹35,000-₹75,000 (parts plus professional recovery and recharge)
You Save: ₹40,000-₹70,000 by doing the mechanical work yourself!
Independent workshop labor in the Sonīpat/Delhi NCR area varies considerably. This repair typically requires approximately 4-6 labor hours plus refrigerant service.
🎯 Ready to get started?
HowToo makes it easy: same-day/2-day shipping on every part, plus all the tools and specialty tools you need! Check out the parts and tools sections below to add everything to your cart.