

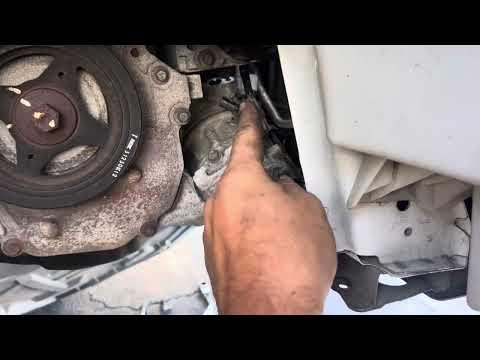





How to Replace the A/C Compressor on a 2013-2019 Nissan Sentra (Trim: S | Engine: Inline 4 1.8L)
Step-by-step instructions with tools, parts, torque specs, refrigerant safety, and recharge tips for 2013, 2014, 2015, 2016
How to Replace the A/C Compressor on a 2013-2019 Nissan Sentra (Trim: S | Engine: Inline 4 1.8L)
Step-by-step instructions with tools, parts, torque specs, refrigerant safety, and recharge tips for 2013, 2014, 2015, 2016


🔧 Sentra - A/C Compressor Replacement
Replacing the A/C compressor requires recovering the R-134a refrigerant, removing the drive belt and refrigerant lines, balancing the compressor oil, then evacuating and accurately recharging the system. Because specialized refrigerant equipment is required, this is an advanced repair; a practical DIY option is to have an A/C shop recover and recharge the system while you perform the mechanical replacement.
Difficulty Level: Advanced | Estimated Time: 4-6 hours
Assumption: The replacement compressor matches the original unit, and the under-hood refrigerant label remains readable.
⚠️ Safety & Precautions
- ⚠️ Never loosen an A/C fitting until a certified shop or recovery machine has completely recovered the refrigerant.
- 🧤 Liquid refrigerant can cause severe frostbite. Wear gloves and safety glasses.
- 🚫 Never vent R-134a into the atmosphere or use compressed air to pressure-test the system.
- 🔥 Keep refrigerant away from flames and very hot surfaces because toxic gases can form.
- 🔌 Disconnect the negative battery cable before unplugging or removing the compressor.
- 🛢️ Use only the oil type printed on the compressor or under-hood A/C label. Do not mix PAG oil types.
- 📏 Recharge by refrigerant weight, not by gauge pressure alone. Use the exact amount printed on your Sentra’s under-hood label.
- 🚗 Support your Sentra with jack stands. Never work beneath a vehicle supported only by a floor jack.
🔧 Required Tools
You'll need the following tools for this repair:
- R-134a refrigerant recovery/recycling/recharging station (specialty)
- R-134a manifold gauge set (specialty)
- A/C vacuum pump rated for R-134a systems (specialty)
- Electronic refrigerant scale accurate to 10 grams (specialty)
- Electronic R-134a leak detector (specialty)
- A/C oil measuring cylinder graduated in milliliters (specialty)
- 10mm socket
- 12mm socket
- 14mm socket
- 3/8-inch drive ratchet
- 3/8-inch drive 150mm extension
- 3/8-inch drive torque wrench rated 5-60 Nm
- 14mm serpentine-belt wrench
- Plastic trim-clip removal tool
- Plastic O-ring pick
- Clean rubber line caps sized for A/C fittings
- Floor jack rated 2-ton minimum
- Jack stands rated 2-ton minimum
- Wheel chocks
- Safety glasses
- Refrigerant-resistant gloves
🔩 Required Parts
HowToo sells all the parts you need for this repair:
- A/C compressor with clutch - Qty: 1
- Compressor suction-line O-ring - Qty: 1
- Compressor discharge-line O-ring - Qty: 1
- Nissan-approved R-134a A/C compressor oil - Qty: As required by oil balancing
- R-134a refrigerant - Qty: Exact under-hood label specification
- Accessory drive belt - Qty: 1 if cracked, glazed, contaminated, or worn
- A/C receiver-drier or desiccant element - Qty: 1 if the system remained open or contains debris
- A/C condenser - Qty: 1 if metal debris or black contaminated oil is present
📋 Before You Begin
- 🅿️ Park your Sentra on level ground, shift into first gear, apply the parking brake, and chock both rear wheels.
- 🏷️ Read and photograph the under-hood A/C label. Record the refrigerant type and exact charge weight before beginning.
- ❄️ Have the refrigerant fully recovered with an R-134a recovery station. A manifold gauge set connects to the high- and low-pressure service ports so system pressure can be safely monitored.
- 🔍 Diagnose the original failure first. A compressor that failed internally may spread metal debris through the condenser and hoses.
- 🔌 After recovery is complete, switch the ignition off, remove the key, wait at least one minute, and disconnect the negative battery cable with a 10mm socket.
- 🧼 Keep every open fitting clean and capped. Moisture entering the system damages the desiccant and can create corrosive acids.
🔨 Step-by-Step Instructions
Follow these steps in order:
Step 1: Recover the refrigerant
- Use the R-134a recovery/recycling/recharging station according to its instructions to recover the complete refrigerant charge.
- Use the R-134a manifold gauge set to verify both gauges remain at zero pressure before opening any fitting.
- If pressure returns, stop and recover the system again. Never loosen a pressurized line.
Step 2: Raise and secure the vehicle
- Use the floor jack at the front-center jacking point, then place the jack stands beneath the approved front side support points.
- Lower your Sentra onto the jack stands and gently verify that it is stable.
- Use the plastic trim-clip removal tool to remove the lower engine splash-shield clips, then lower the shield.
Step 3: Remove the accessory drive belt
- Use the 14mm serpentine-belt wrench on the automatic belt tensioner and rotate the tensioner far enough to release belt tension.
- Slide the belt off the A/C compressor pulley, then slowly release the tensioner.
- Inspect the belt for cracking, glazing, missing ribs, or oil contamination. Replace it if damaged.
- Photograph the belt routing before removal.
Step 4: Disconnect the compressor wiring
- Press the locking tab by hand and unplug the compressor clutch electrical connector.
- Release the wiring harness from its compressor retaining clip by hand and move it away from the work area.
- Do not pull on the wires themselves.
Step 5: Disconnect the refrigerant lines
- Wear refrigerant-resistant gloves and safety glasses.
- Use the 10mm socket and 3/8-inch drive ratchet to remove the suction- and discharge-line retaining bolts from the compressor.
- Carefully pull each line straight away from its port. Do not twist or sharply bend the aluminum lines.
- Immediately install clean rubber line caps over the open lines and compressor ports.
- Use the plastic O-ring pick to remove the old O-rings without scratching the aluminum sealing surfaces.
Step 6: Remove the old compressor
- Support the compressor with one hand or from below before removing the final mounting bolt.
- Use the 12mm socket, 150mm extension, and 3/8-inch drive ratchet to remove the compressor mounting bolts.
- Lower the compressor carefully through the available lower opening. Do not strike the radiator, condenser, or refrigerant lines.
- Keep the old compressor upright so its oil can be measured.
Step 7: Inspect for internal contamination
- Use the A/C oil measuring cylinder to drain and measure the oil from the old compressor. Rotate its shaft by hand several turns while draining.
- Inspect the oil in good light. Clear oil without particles generally indicates a mechanical replacement can continue.
- If the oil is black, gritty, or contains shiny metal, stop the repair. The condenser, receiver-drier or desiccant, and contaminated components require service before installing the new compressor.
- Do not attempt to flush a modern parallel-flow condenser containing compressor debris.
Step 8: Balance the compressor oil
- Use the A/C oil measuring cylinder to check the amount of shipping oil in the replacement compressor.
- Follow the replacement compressor’s oil-balancing instructions. Unless those instructions state otherwise, adjust the new compressor to contain the same measured amount drained from the old compressor.
- Use only Nissan-approved oil of the exact type specified on the compressor or A/C label.
- Rotate the new compressor shaft by hand approximately ten turns to distribute its oil before installation.
- Do not add the system’s entire oil capacity to a compressor unless the complete A/C system has been emptied and serviced.
Step 9: Install the replacement compressor
- Position the new compressor against its mounting bracket without allowing it to hang from the lines or wiring.
- Start every mounting bolt by hand to prevent crossed threads.
- Use the 12mm socket and 3/8-inch drive torque wrench to tighten the compressor mounting bolts evenly to 25 Nm (18 ft-lbs).
Step 10: Install new line seals
- Use the plastic O-ring pick to place new O-rings on the suction and discharge fittings.
- Lightly coat each O-ring with the same Nissan-approved compressor oil using a gloved fingertip.
- Push each line squarely into its compressor port. Do not force or pinch the O-rings.
- Start the retaining bolts by hand, then use the 10mm socket and 3/8-inch drive torque wrench to tighten them to 4.9 Nm (43 in-lbs).
- Do not overtighten the line bolts; the aluminum fittings can distort.
Step 11: Reconnect the wiring and belt
- Connect the compressor clutch plug by hand until its lock clicks, then secure the harness in its original clip.
- Route the accessory drive belt around every pulley according to the routing label or your reference photograph.
- Use the 14mm serpentine-belt wrench to rotate the tensioner, slide the belt over the final pulley, and slowly release the tensioner.
- Check by sight and touch that every belt rib is centered in its pulley groove.
Step 12: Reassemble and reconnect the battery
- Use the plastic trim-clip removal tool to reinstall the lower splash shield and its clips.
- Use the floor jack to raise your Sentra slightly, remove the jack stands, and lower the vehicle.
- Use the 10mm socket and 3/8-inch drive torque wrench to reconnect the negative battery terminal to 5.4 Nm (48 in-lbs).
Step 13: Evacuate and leak-test the system
- Use the R-134a manifold gauge set and A/C vacuum pump to evacuate the system for at least 30 minutes.
- Close both manifold valves and switch off the vacuum pump. Confirm that the vacuum holds for at least 10 minutes.
- If vacuum is lost, use the electronic R-134a leak detector after introducing refrigerant with the recovery/recharging station. Repair the leak before charging fully.
- A vacuum test alone cannot prove that the system is leak-free under operating pressure.
Step 14: Recharge by exact weight
- Use the R-134a recovery/recycling/recharging station or electronic refrigerant scale to install the exact refrigerant weight printed on the under-hood label.
- Do not estimate the charge or add refrigerant until the low-side gauge “looks right.” Your Sentra requires a weight-based charge.
- Keep the refrigerant cylinder upright unless the charging-equipment instructions specifically provide controlled liquid charging.
✅ After Repair
- 🔄 Start the engine with the A/C initially switched off. Watch the belt and listen for rubbing, knocking, or pulley noise.
- ❄️ Set the blower to high, select the coldest temperature, choose recirculation, and switch the A/C on.
- 👀 Confirm the compressor clutch engages and disengages without belt slippage or excessive noise.
- 🔍 Use the electronic R-134a leak detector around both compressor fittings and the service ports.
- 🌡️ Verify cool center-vent air and stable high- and low-side pressures appropriate for the outdoor temperature.
- 🛑 Shut the engine off immediately if the compressor rattles, the belt walks off-center, or system pressure becomes abnormal.
- 🪟 Reset the automatic window function if needed: fully lower the window, then fully raise it and hold the switch upward for several seconds.
💰 DIY vs Shop Cost
Shop Cost: ₹45,000-₹85,000 (parts + labor)
DIY Cost: ₹22,000-₹48,000 (parts plus professional recovery/recharge)
You Save: ₹20,000-₹37,000 by doing the mechanical work yourself!
Labor around Sonīpat and the Delhi NCR region varies widely. This repair typically takes a shop approximately 3-5 hours, excluding additional contamination repairs.
🎯 Ready to get started?
HowToo makes it easy: same-day/2-day shipping on every part, plus all the tools and specialty tools you need! Check out the parts and tools sections below to add everything to your cart.