

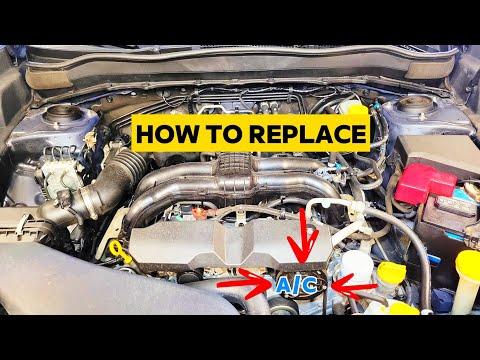





How to Replace the A/C Compressor on a 2010-2014 Subaru Outback 3.6L (Trim: 3.6R Limited | Engine: Flat 6 3.6L)
Step-by-step instructions with tools, parts, torque specs, refrigerant safety, and recharge tips for 2010, 2011, 2012, 2013
How to Replace the A/C Compressor on a 2010-2014 Subaru Outback 3.6L (Trim: 3.6R Limited | Engine: Flat 6 3.6L)
Step-by-step instructions with tools, parts, torque specs, refrigerant safety, and recharge tips for 2010, 2011, 2012, 2013


🔧 Outback - A/C Compressor Replacement
Replacing the A/C compressor requires recovering the refrigerant, removing the drive belt and refrigerant lines, then evacuating and accurately recharging the system. Your Outback uses an R-134a system, and refrigerant recovery must be performed with approved A/C equipment—releasing it into the air is unsafe and illegal in many locations.
Difficulty Level: Advanced | Estimated Time: 4-6 hours
Assumption: These instructions apply to the stock factory R-134a system.
⚠️ Safety & Precautions
- 🧊 Never disconnect an A/C line until a recovery machine confirms system pressure is zero.
- 🥽 Wear safety glasses and refrigerant-rated gloves. Escaping refrigerant can cause instant frostbite or blindness.
- 🚫 Do not vent R-134a refrigerant. Have a certified A/C shop recover it before disassembly.
- 🔥 Work only with the engine completely cool.
- 🔋 Disconnect the negative battery cable before unplugging or removing the compressor.
- 🛢️ Keep every open refrigerant connection capped. Moisture damages the compressor and desiccant.
- ⚠️ If the old compressor failed internally and released metal debris, the condenser and expansion valve may require replacement. This becomes a professional-level contamination repair.
- 🚗 Support your Outback with jack stands. Never work beneath a vehicle supported only by a floor jack.
🔧 Required Tools
You'll need the following tools for this repair:
- R-134a recovery, recycling and charging machine (specialty)
- R-134a manifold gauge set (specialty)
- Vacuum pump rated for automotive A/C systems (specialty)
- Electronic refrigerant scale accurate to 10 grams (specialty)
- A/C line cap and plug set (specialty)
- Refrigerant oil measuring cylinder graduated in millilitres (specialty)
- 14mm six-point socket
- 12mm six-point socket
- 10mm six-point socket
- 3/8-inch drive ratchet
- 3/8-inch drive breaker bar
- 3/8-inch drive 150mm extension
- Torque wrench covering 5-50 Nm
- Plastic trim-clip removal tool
- Small nylon O-ring pick
- Serpentine-belt routing diagram or camera
- Floor jack rated 2-ton minimum
- Jack stands rated 2-ton minimum
- Wheel chocks
- Refrigerant-rated gloves
- Nitrile gloves
- Safety glasses
🔩 Required Parts
HowToo sells all the parts you need for this repair:
- A/C compressor with clutch for 3.6L engine - Qty: 1
- Compressor suction-line O-ring - Qty: 1
- Compressor discharge-line O-ring - Qty: 1
- R-134a refrigerant - Qty: Use the exact under-hood label charge
- Subaru-specification DH-PR compressor oil - Qty: As measured and required
- Receiver-drier desiccant element - Qty: 1 if compressor failed internally or system remained open
- Serpentine drive belt - Qty: 1 if cracked, glazed or refrigerant-soaked
The factory refrigerant specification is generally about 0.45 kg ± 0.05 kg of R-134a, but the under-hood A/C label is authoritative. Do not substitute a different PAG oil merely by viscosity; use the oil specification printed on the replacement compressor or approved for the factory compressor.
📋 Before You Begin
- 🚗 Park your Outback on level ground. Select Park, apply the parking brake and place wheel chocks behind the rear wheels.
- 🧊 Have an A/C shop recover the refrigerant. Confirm both manifold gauges read zero before opening a connection.
- 📷 Photograph the serpentine-belt routing before removing the belt.
- 🔋 Record any preferred radio settings, switch the ignition off and keep the key away from the vehicle.
- 🛢️ Read the replacement compressor instructions. Some compressors arrive dry, while others contain a full system oil charge that must be adjusted.
- 🧰 Arrange caps and plugs before opening the refrigerant lines. A desiccant absorbs moisture from the refrigerant; exposure to humid air quickly reduces its effectiveness.
🔨 Step-by-Step Instructions
Follow these steps in order:
Step 1: Recover the Refrigerant
- Connect the R-134a recovery machine to the high- and low-pressure service ports according to the machine instructions.
- Recover the complete refrigerant charge with the R-134a recovery machine.
- Use the R-134a manifold gauge set to verify both sides remain at zero pressure for at least two minutes.
- Do not proceed if pressure returns. Additional refrigerant may remain trapped in the system.
Step 2: Disconnect the Battery
- Open the hood and use a 10mm socket and 3/8-inch drive ratchet to loosen the negative battery-terminal clamp.
- Remove the clamp and position it where it cannot spring back onto the battery post.
- Wait at least one minute before unplugging the compressor connector.
Step 3: Raise and Support the Front
- Use the floor jack at the front center lifting point to raise your Outback.
- Place both jack stands beneath the reinforced front support points, then lower the vehicle gently onto them.
- Push lightly on the body to confirm it is stable before reaching underneath.
Step 4: Remove the Lower Engine Cover
- Use a plastic trim-clip removal tool to release the plastic retainers.
- Use a 12mm socket, extension and ratchet to remove any bolted retainers fitted to the lower cover.
- Support the cover with one hand while removing the final fastener, then lower it out of the way.
Step 5: Remove the Serpentine Belt
- Compare the belt path with your photograph or routing diagram.
- Fit a 14mm socket and breaker bar to the automatic belt-tensioner pulley bolt.
- Rotate the tensioner clockwise to remove belt tension. Slide the belt off an accessible pulley, then slowly release the tensioner.
- Remove the belt and inspect it for cracks, shiny glazing, frayed edges or oil contamination.
- Never let the tensioner snap back.
Step 6: Disconnect the Compressor Electrical Connector
- Locate the compressor at the lower front of the engine.
- Press the locking tab and disconnect the compressor electrical plug by hand.
- Do not pull on the wiring. Inspect the plug for melted plastic, corrosion or damaged terminals.
Step 7: Disconnect the Refrigerant Lines
- Clean dirt from around both compressor line connections with a clean lint-free cloth.
- Use a 12mm socket, extension and ratchet to remove the suction- and discharge-line retaining bolts.
- Gently lift the line blocks straight away from the compressor. Do not bend or twist the aluminium lines.
- Immediately seal every opening with the A/C line cap and plug set.
- Use the small nylon O-ring pick to remove the old O-rings without scratching the aluminium sealing surfaces.
Step 8: Remove the Compressor
- Support the compressor with one hand. It is heavier than it appears.
- Use a 14mm socket, extension and ratchet to remove the compressor mounting bolts.
- Note the location and length of each bolt so it returns to the same hole.
- Lower the compressor carefully through the bottom opening without striking the radiator, refrigerant lines or wiring.
Step 9: Check the Old Compressor for Internal Failure
- Use the refrigerant oil measuring cylinder to drain oil from the old compressor while slowly rotating its hub by hand.
- Record the amount removed. Examine the oil for metallic glitter, black sludge or burnt odor.
- If metal is present, do not install the new compressor and simply recharge. The contaminated condenser and expansion valve must be addressed, and cleanable lines must be flushed with professional equipment.
- The compressor, receiver-drier and expansion valve must never be flushed internally.
Step 10: Set the New Compressor Oil Quantity
- Use the refrigerant oil measuring cylinder to determine how much oil was shipped inside the new compressor.
- Follow the new compressor manufacturer’s oil-balancing instructions. For a clean system with no major refrigerant loss, the replacement compressor should normally contain approximately the same amount drained from the old unit.
- Use only Subaru-approved DH-PR compressor oil unless the replacement compressor specifically requires another compatible oil.
- Rotate the new compressor hub by hand approximately ten turns to distribute the oil before installation.
- Do not add a full system oil quantity unless the entire system was flushed or replaced. Excess oil reduces cooling and can damage the compressor.
Step 11: Install the New Compressor
- Lift the new compressor into position and start every mounting bolt by hand to avoid cross-threading.
- Use a 14mm socket and torque wrench to tighten the compressor mounting bolts evenly to 36 Nm (27 ft-lbs).
- Connect the compressor electrical plug by hand until its lock clicks.
Step 12: Install New Line O-Rings
- Confirm all compressor ports and line fittings are clean and undamaged.
- Lightly wet the new O-rings with the specified DH-PR compressor oil using a gloved fingertip.
- Install each O-ring in its proper groove by hand. Never reuse the old O-rings.
- Remove the caps, align each line block squarely and start its bolt by hand.
- Use a 12mm socket and torque wrench to tighten each compressor line bolt to 7.5 Nm (66 in-lbs).
- Do not overtighten these small bolts; the aluminium fittings can distort.
Step 13: Reinstall the Serpentine Belt
- Route the belt around every pulley according to your routing photograph, leaving one easy-to-reach smooth pulley until last.
- Use a 14mm socket and breaker bar to rotate the automatic tensioner clockwise.
- Slide the belt onto the final pulley, then release the tensioner slowly.
- Check visually and by touch that every belt rib sits fully inside its matching pulley grooves.
- Use the 14mm socket and breaker bar to rotate the engine slightly only if needed to verify belt seating; do not use the starter.
Step 14: Reinstall the Lower Engine Cover
- Raise the lower cover into position by hand.
- Install its plastic retainers with the trim-clip removal tool.
- Use a 12mm socket and ratchet to install the bolted retainers snugly. Do not crush the plastic cover.
Step 15: Lower the Vehicle and Reconnect the Battery
- Use the floor jack to lift your Outback slightly, remove both jack stands and lower it to the ground.
- Install the negative battery-terminal clamp.
- Use a 10mm socket and torque wrench to tighten the terminal nut to 6 Nm (53 in-lbs).
Step 16: Evacuate and Leak-Test the System
- Connect the R-134a manifold gauge set and vacuum pump to the service ports.
- Run the vacuum pump for at least 45 minutes. This removes air and boils moisture from the system.
- Close both manifold valves and stop the pump. Confirm the system holds vacuum for at least 20 minutes.
- If vacuum drops, find and repair the leak before adding refrigerant.
Step 17: Recharge by Weight
- Place the R-134a container on the electronic refrigerant scale and zero the scale.
- Use the R-134a recovery and charging machine to add the exact refrigerant weight printed on your Outback’s under-hood label.
- Do not charge by pressure alone. Ambient temperature changes pressure, so pressure is not an accurate measure of refrigerant quantity.
- Keep hands, hoses and clothing clear of the belt and cooling fans whenever the engine is running.
✅ After Repair
- 🌬️ Start the engine and set the blower to maximum, temperature to full cold, A/C on and recirculation on.
- 👀 Observe the belt and compressor from a safe distance. Stop the engine immediately if the belt wanders, squeals or vibrates.
- 🧊 Confirm cool air reaches the center vents and compressor operation is smooth without grinding or knocking.
- 🔍 Use the R-134a manifold gauge set and an approved leak detector to check both compressor connections and service ports.
- 💧 Verify that condensation drains beneath the passenger side after several minutes of operation.
- 🔋 Allow the engine to idle while the electronic throttle relearns. Initial idle speed may fluctuate briefly after battery reconnection.
- 🪟 Reset automatic windows if needed: lower each affected window completely, raise it completely and hold the switch up for approximately one second.
- ⚠️ If cooling is weak, pressures are abnormal or the compressor cycles rapidly, switch the A/C off and diagnose the system rather than adding extra refrigerant.
💰 DIY vs Shop Cost
Shop Cost: ₹45,000-₹90,000 including compressor, labor, recovery and recharge
DIY Cost: ₹30,000-₹70,000 including parts and professional refrigerant service
You Save: ₹10,000-₹25,000 by doing most of it yourself!
Labor around Sonīpat varies by workshop. This repair typically takes a professional approximately 3-5 hours, plus evacuation and recharge time. Buying professional recovery equipment solely for one repair is usually not economical.
🎯 Ready to get started?
HowToo makes it easy: same-day/2-day shipping on every part, plus all the tools and specialty tools you need! Check out the parts and tools sections below to add everything to your cart.